People try to achieve natural and soft skin. They want to look at their skin glowing, smooth, and soft in their portrait. Skin is the most significant fact to consider here. To make a perfect picture, there are many ways that you can follow. But we are going to show how you can easily make skin smooth in Photoshop. Follow our tutorial and make your portrait look amazing.
This tutorial is about making skin smooth in portrait. We will cover this part, but will not include how to remove blemishes or other imperfections.
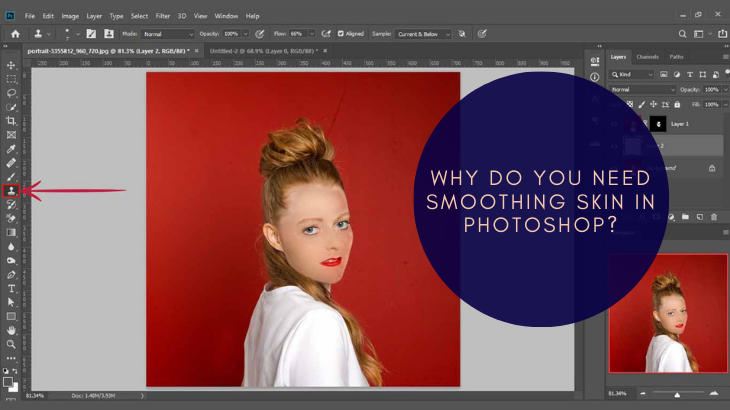
Why do you need smoothing skin in Photoshop?
We want flawless photographs. The enchanting and stunning photo brings out the personality in your photo. A little effort creates the image that you want to see. You have to pay a little attention if you want to do the tasks for post-processing in the right way. Though it is a bit tricky, you can handle it easily.
There are a lot of ways of smoothing skin in Photoshop. But we will show you the best way for skin smoothing technique. Photoshop is a necessary tool in some areas. If you have done everything in your portrait properly, you do not need much processing. We are not saying that we are the best. It is just a basic and straight forward approach. We hope that you get this the best way for smoothing skin in Photoshop.
Smoothing Skin in Photoshop with easy steps
In this tutorial, you will know how to smooth your skin in a portrait. Retouchers use different advanced retouching tools to smooth skin. It takes hours to smooth skin in Photoshop. We will start with smoothing the skin in a portrait giving a silky look. You can use any image from anywhere. So take a picture and do it according to some steps.
We are going to work on this image in this tutorial. As it is a skin smoothing tutorial, we have to focus on the face.
If your task is to make your skin smooth and natural in the portrait, you can use the spot healing brush.
Make sure that you have Adobe Photoshop on your computer.
Step:1

Open up your image in Photoshop. You can use any edition that you want. It will be fine for you regardless of which one you are using. Start with zooming in the target area. The main cause of zooming is to
When you have zoomed in your target area, duplicate the layer and add a 20pixel Gaussian blur from the filters menu. Immediately you will find the whole picture softer. Reduce the clarity of the layer to 50% in the Layers palette.
Step 2:

In the next level, you have to add a layer mask. Layer mask hides or reveals the layers below. Hold down the ALT or OPTION key. Click the Add Layer Mask icon. You will find the Add Layer Mask at the bottom of the Layers palette. Your image will go back to the pre-blur appearance. There will be a black box next to the layer thumbnail.
Step 3:

Now we are going to work with the Brush tool. Select the Brush tool first. You can adjust the size of the brush. Use the bracket keys to adjust. Press the Shift key. You can now adjust the hardness or softness of the brush. For a more natural look, you will need a brush that has a softer edge. Hard brush edges stand out. Now you can do the facial edits.
Step 4:

Use the white brush. Work with transparency from 50 to 70%. Work at the higher end on female portraits. Work at the lower end on male pictures. If you choose the wrong clarity somehow, switch the brush color directly to black. Now get back to what you were doing. You can replace the part that you have removed. Now readjust your clarity. Switch back the brush color into white. Now continue your editing.
Step 5:

Take a look at what you have done so far. When you have added the blur, when you have created the black layer mask, it has covered the blur only. This area is noticing.
Step 6:

Do not brush over the lips and eyes in the portrait. Facial features must be sharp in a good picture. You have to edit your photos accurately. If you have smoothened the forehead, cheeks, you have to edit neck and shoulder. Try to be inconsistent as much as possible to edit your photos. These steps will leave you with a natural looking portrait.
The last tip is that skin has texture. So if you over-smooth your skin, it will not draw the attention of the person.
If you were looking to create smooth skin in Photoshop, you could use some other methods. There are some other skin-perfecting Photoshop plugins within your budget.
Touch up layer technique
Touch up layer is a simple technique to remove blemishes to make it spotless. You can sue touch up layer to remove makeup also. You can remove strands of hair. You can use touch up layer to retouch makeup. Use this technique for getting a clean line.
Touch up layer does not work well for retouching patches of skin or hot spots. But this technique does not work well for multiple blemishes. You can limit touch up layers that are
Step 1:

To apply a touch up layer, start with the background layer. Add an empty layer on the top.
Step 2:

Touch up is normally done switching between the Clone stamp and Healing brush. You can use the Spot healing brush to work well. If you use the Healing brush, ensue that you check the Sample all layers. When you use the Clone stamp make sure that you set the Current and below for tool option. You can start with a small brush at 50%to 75 % hardness. Softer brushes tend to result in an artificial softness.
Step3:

If you start with your Healing brush, select the new empty layer and zoom in. Set the brush size larger than your blemish. Focus on how your skin texture flow and changes the skin tone. You can get the best result if your sample is similar to the retouching area.
Step 4:

You can remove blemish with just one click. Do not sweep or paint. Click away the blemishes and move around the face. Move around different areas of the face in the portrait.
Step 5:

You can remove wrinkles using touch up layer sometimes. You can use this technique when you want to lighten few wrinkles using Clone stamp tool. Use this technique to obtain natural looking skin. This technique helps to get a more natural look than you expect.
Step 6:

This technique is a bit interesting. Select your eraser with this technique. Erase the correction off the touch up layer and do it again. Use your low clarity when the touch up is a bit heavy. You can also reduce the clarity, You have to use layer mask to blend in the touch up.
This technique is essential to achieve beautiful skin as well as needed for some photographers. But you have to do more things to achieve beautiful and smooth skin. We want to advice you to start with touch up layer. Then any kind of retouching that you need will be easier and effective.
High pass filter is great for smoothing skin
High pass filter is used to sharpen images in Photoshop. If you know the High pass filter before, you can use it to smooth skin in a portrait. Most of the steps are same for using the High pass filter to smooth skin in portrait.
The high pass filter looks for the edges and highlights them. There can be a change in brightness or color. The edges go around the person’s hair, eyes, mouth and skin texture. Skin texture has the low amount of detail.
You have to decide first where you are going to use your phone. You have to think about how your client wants them. You have to give priority to make your photo quality unique and interesting. Focus on where your final image is going to be used and how it is going to be used. You cannot retouch your photos the way you retouch your images for Instagram.
Keep on practicing. Practice can make your smoothing technique easier.
Wrap up your tutorial
Now you have got the perfect image. It is all about our skin smoothing tutorial. I hope that this tutorial was enough to help you to gain a set of skills to smoothing skin in Photoshop. Follow all of these steps to get a face with smooth skin. Doing it, in the same way, several times, you will be able to smooth skin faster than before.