
In Adobe Illustrator, a compound path refers to a combination of two or more overlapping objects that creates a single path with holes where the objects intersect.
These holes allow you to see through the compound path to the content beneath it. Compound paths behave similarly to grouped objects, but their components cannot be edited independently—you can only manipulate the overall shape of the compound path itself
To make a clipping mask with a compound path in Illustrator, follow these steps:
- Draw your desired shapes over the image you want to mask.
- Select all the shapes you’ve drawn.
- Right-click and choose “Make Compound Path” to combine them into one object.
- With the compound path selected, click on the image to select it as well.
- Go to Object > Clipping Mask > Make or right-click and choose “Make Clipping Mask.”
This technique allows you to control which parts of the image are visible within the shapes you’ve drawn, providing precision and flexibility in your design process.
For comprehensive guidance on creating a clipping mask with a compound path in Illustrator, including additional methods in Photoshop and InDesign, as well as practical applications and advantages, continue reading the detailed instructions below.
How to Make Compound Path in illustrator
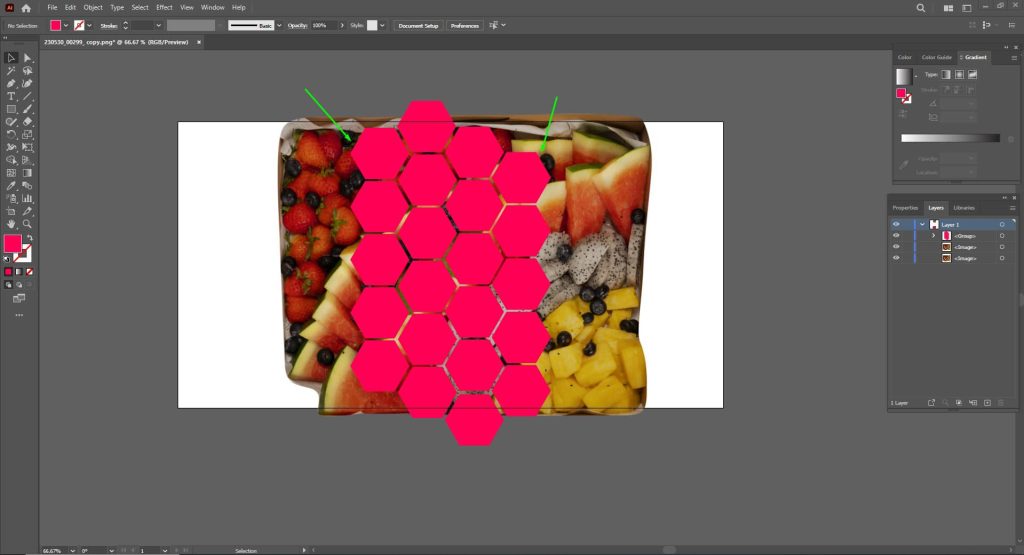
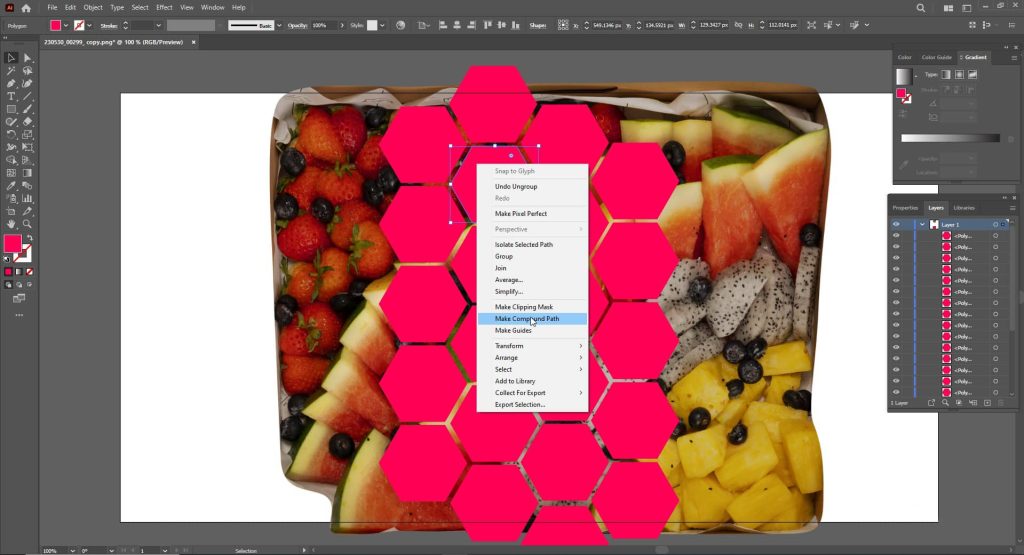
Step 1: Draw Shapes & Position Them on Images
Draw the shapes you want to use to cover parts of the image. For example, if you want to mask the image with a couple of hexagons—draw hexagons and watch them form in their full shape.
Anyway.
Next, position them over the image where you want them. You need to place the images properly and embed them, so you don’t lose them later.
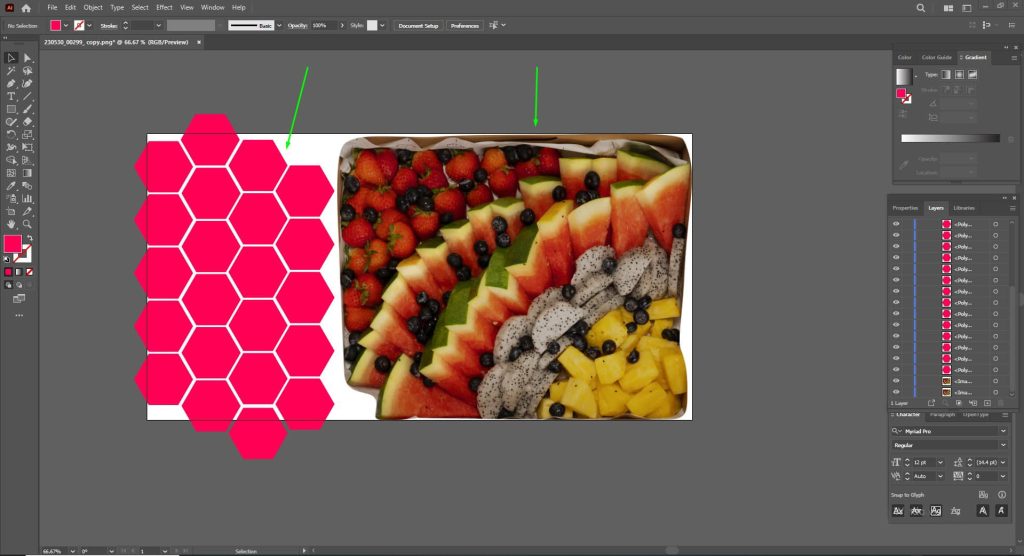
Step 2: Select the Shapes
Once you’ve drawn the shapes, select them all.
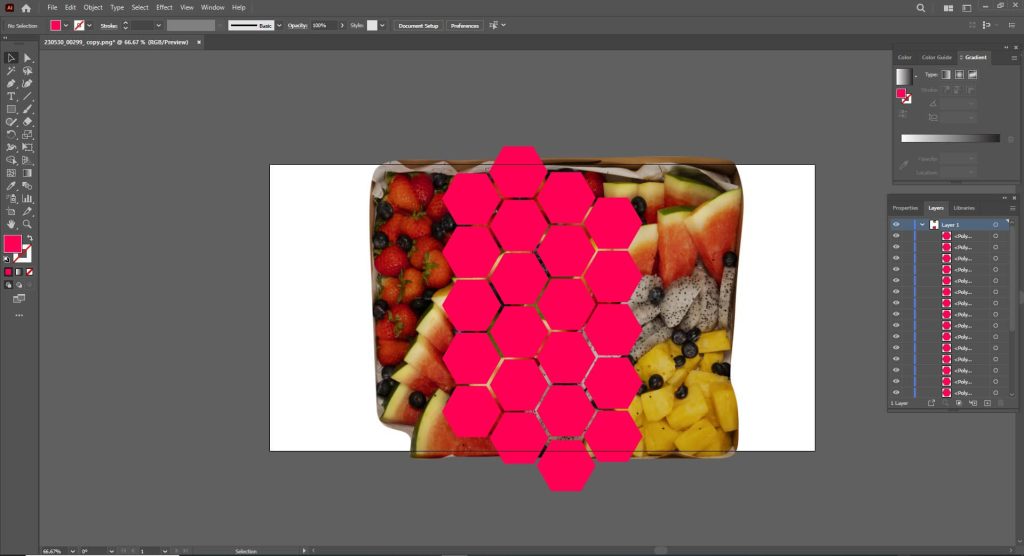
Step 3: Make All the Shapes in One Object
Right-click on the selected shapes and choose “Make Compound Path” from the menu that pops up. This combines all the shapes into one.
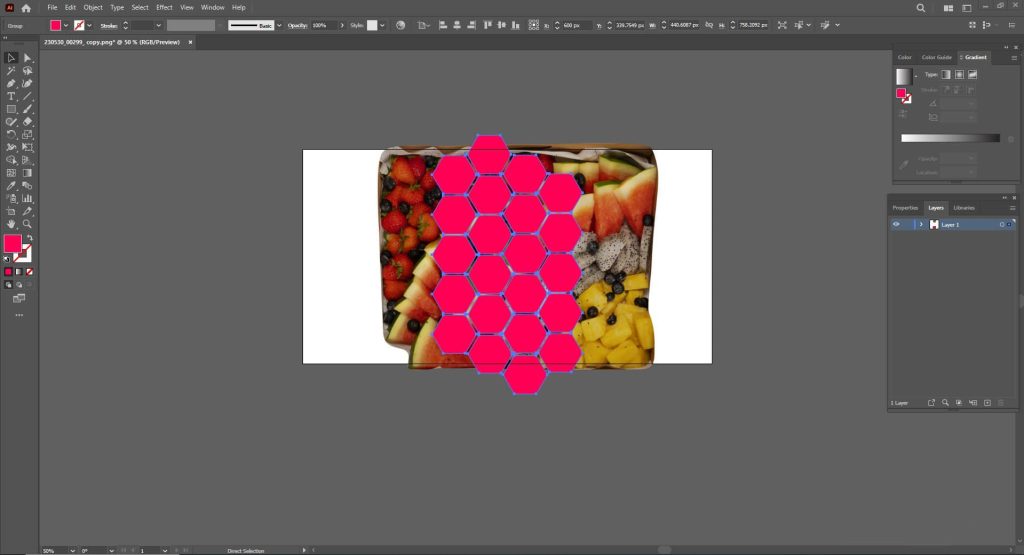
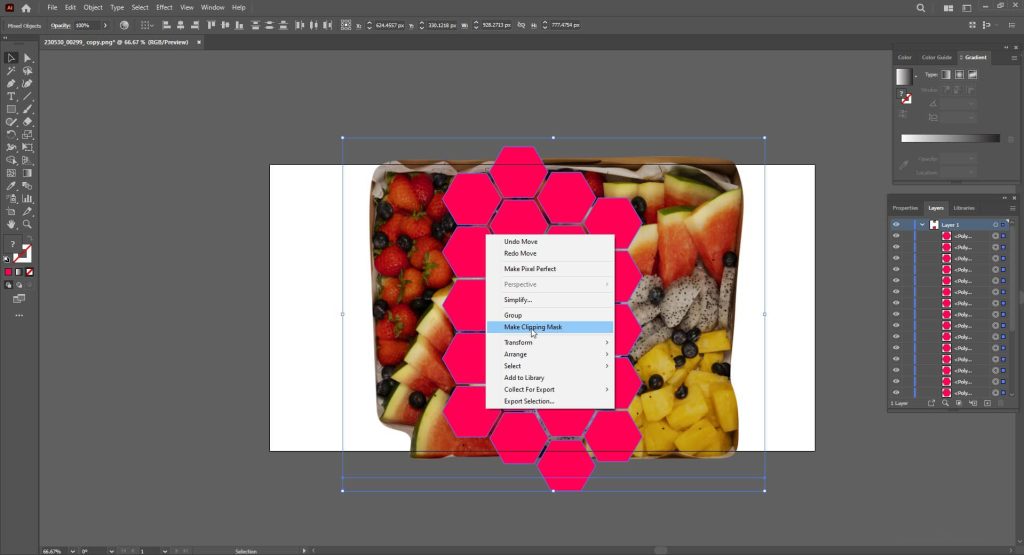
Step 4: Select the Image and Shapes Together
With the compound path still selected, click on the image as well to select it.
How to Make Clipping Mask With a Compound Path
Go to the Object menu at the top, then choose Clipping Mask, and click Make from the options. Alternatively, you can right-click and choose Make Clipping Mask from there.
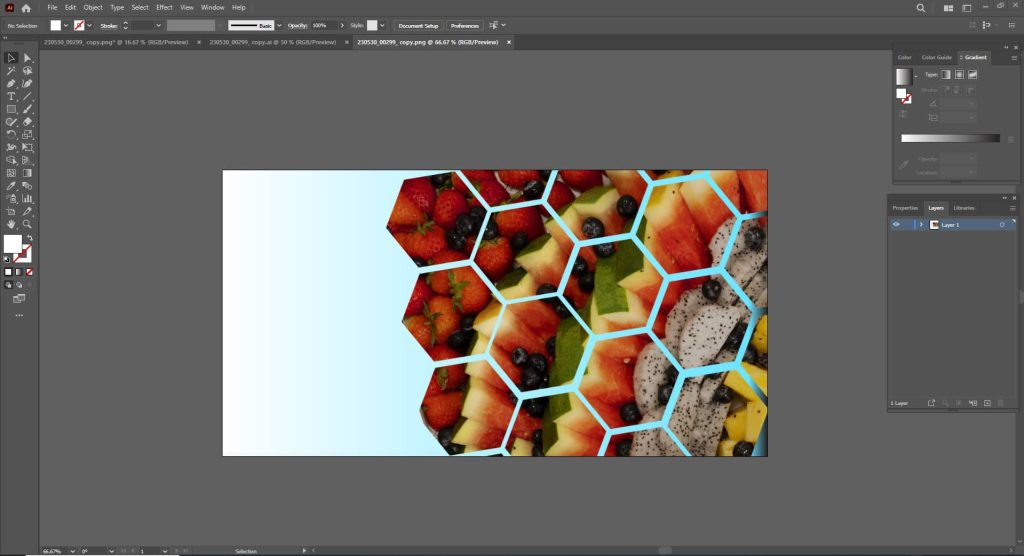
The Final Result
After applying the clipping mask, the image will be visible only within the boundaries of the shapes you created. All those shapes will act as one mask, showing the image underneath them.
Do you want to know this editing technique for Photoshop and InDesign? Well, creating a clipping mask with a compound path in Adobe Illustrator, Photoshop, and InDesign involves slightly different processes due to the nature of the software. So, check the following sections.
How to Make a Clipping Mask With a Compound Path in Adobe Photoshop
Open Photoshop: Start Photoshop and open your project.
Draw Shapes: Use the Shape tools to draw the shapes you want. Make sure they overlap where you want the clipping mask.
Make Smart Object (Optional): Right-click on the shapes, select “Convert to Smart Object” to keep them editable.
Select Layers: Choose the layers containing the shapes for your mask.
Create Compound Path: Right-click on the selected layers, choose “Convert to Smart Object” if you haven’t already, then right-click again and select “Create Clipping Mask.”
Adjust: Move or edit your clipped content as needed.
How to Make a Clipping Mask With a Compound Path in Adobe InDesign
Open InDesign: Open InDesign and your document.
Draw Shapes: Use the Shape tools to draw the shapes you need, ensuring they overlay where you want the mask.
Make Compound Path: Select all the shapes, go to Object > Paths > Make Compound Path.
Place Content: Import or create the content you want to clip.
Layer Arrangement: Make sure your content layer is above the compound path layer.
Create Clipping Mask: Select both layers, go to Object > Clipping Path > Options, choose “Inset Frame” or “Alpha” and click “OK.”
Adjust: Move or edit your clipped content as needed.
5 Reasons Why Designers Use Clipping Masks with Compound Paths
Clipping masks and compound paths are powerful tools for Adobe Illustrator, Photoshop, or InDesign. Here are some benefits of using clipping masks with compound paths:
- Controlling Visibility
Clipping masks allow you to precisely control which parts of an image or object are visible, effectively cropping or shaping it to fit specific areas.
This is particularly useful when you want to highlight certain details or create intricate designs where only specific portions need to be shown.
- Non-Destructive Editing
By using clipping masks with compound paths, you can make edits to the content inside the mask without permanently altering the original objects.
This means you can experiment freely with different effects, adjustments, or compositions without worrying about damaging your underlying elements.
- Creating Complex Shapes & Designs
Compound paths allow you to combine multiple shapes or paths into one, creating more intricate and customizable designs.
When combined with clipping masks, you can use these complex shapes to control visibility, revealing or concealing different parts of your design as desired.
- Enhancing Workflow Efficiency
Clipping masks and compound paths help streamline your workflow by providing a structured and organized approach to working with complex designs.
They allow you to manage multiple layers and elements more effectively, making it easier to keep track of your work and make adjustments as needed.
This can significantly speed up the design process, especially when dealing with large or intricate projects.
- Versatility Across Projects
One of the greatest advantages of clipping masks with compound paths is their versatility.
They can be applied to a wide range of design elements, including images, text, shapes, and patterns.
Whether you’re creating digital illustrations, designing print layouts, or working on web graphics, clipping masks, and compound paths offer a flexible and adaptable solution for achieving your desired effects.
5 Practical Uses of Clipping Mask With a Compound Path
With Clipping Masks and Compound Paths—designers make images that fit into custom shapes, add textures to text, create intricate patterns for backgrounds, make detailed illustrations, and even show how designs look on real products.
Let’s see how you can use it in real projects.
- Custom Image Shapes
Imagine you’re designing a poster for a music festival, and you want to include photos of the performing artists.
By using clipping masks, you can crop each photo into a unique shape – perhaps a guitar silhouette for the rock band, a microphone shape for the vocalist, and so on – adding visual interest and tying the design together thematically.
- Textured Typography
Let’s say you’re designing a book cover and want to add some visual flair to the title text.
By applying a clipping mask with a compound path, you can overlay the text with a textured pattern or gradient—giving it a more dynamic appearance while maintaining readability.
- Patterned Backgrounds
Suppose you’re creating a packaging design for a line of artisanal chocolates and want to incorporate a decorative pattern into the background.
Using a clipping mask with a compound path, you can seamlessly fill the background shape with a repeating pattern – perhaps inspired by intricate lacework or geometric motifs – adding a touch of elegance and sophistication to the packaging.
- Illustrative Artwork
If you’re an illustrator working on a digital painting, you might use clipping masks and compound paths to add depth and texture to your artwork.
For example, you could create separate layers for the background, foreground elements, and character details, applying clipping masks to control the visibility and blending of each layer for a more polished and cohesive final result.
- Product Mockups and Prototypes
Let’s say you’re a product designer tasked with creating mockups for a new line of smartphone cases.
By using clipping masks with compound paths, you can overlay your design concepts onto photographs of the actual phone models, allowing you to visualize how the designs will look in real-world settings and making it easier to communicate your ideas to clients or stakeholders.
Final Notes
Clipping masks with compound paths offer a wide range of benefits for designers, from precise control over visibility and non-destructive editing to enhanced workflow efficiency and versatility across different types of projects. By utilizing these tools effectively, you as a designer can show the full potential of your work with precision.
