
If you are learning graphic design and photo editing, knowing how to create a clipping path in Photoshop accurately is critical! This technique is super useful for things like removing backgrounds or isolating objects for design.
Basically, a clipping path is a way to outline and separate specific parts of an image from the background.
We will walk through each step with easy-to-follow instructions and shortcuts to make the process faster. Also. we will also cover common problems you might run into and how to fix them. Plus, we’ll share some tips to save you time and explore real-life examples of how clipping paths are used in different industries.
Let’s start with the steps first.
Pen Tool: Essential for drawing a path.
Paths Panel: For saving paths name the paths.
Make Selection: Preparing the path as a selection.
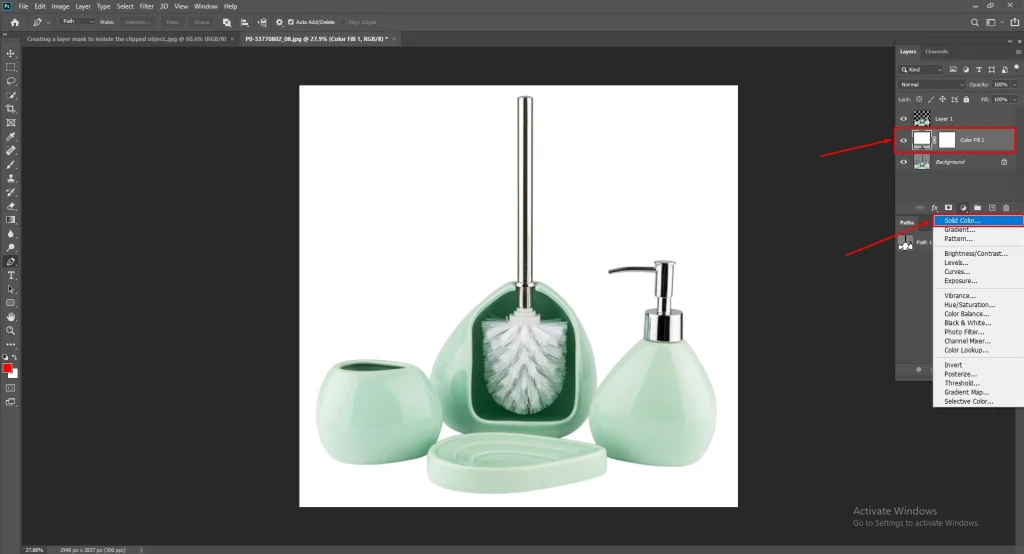
Create Clipping Mask: Create a new layer or use an existing one.
There are various Photoshop techniques for clipping paths. The following steps are of a professional technique. However, you will find more options and tricks later on in the discussion.

Shortcut:
First, you need to open the image in Photoshop. Be informed that you can open an image in different ways.
Considering that after opening Photoshop you can use the shortcuts to load an image.
Ctrl + O (Windows) or Command + O (Mac) > Select Image Click on Open
One more way you can open an image:
Open Photoshop > File> Open > Double-click on the images.
Shortcut:
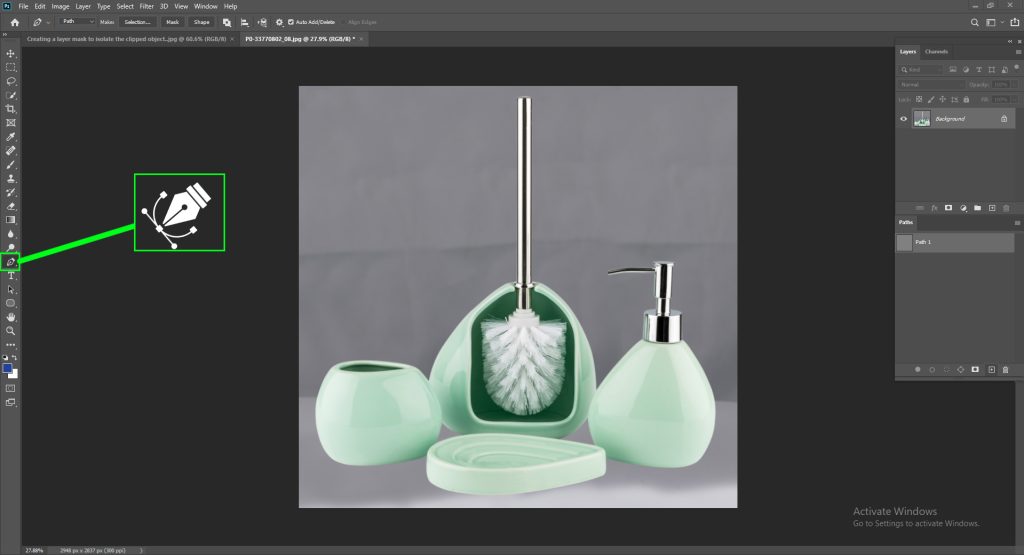
Time to use the pen tool in Photoshop – your ultimate tool for perfect clipping path. With the software interface open, press “P” to select the Pen Tool.
Or, you can go to the left-hand side toolbar of the screen, and select the Pen Tool from there.
Click on the edge of the object you want to clip or cut out.
This creates anchor points.
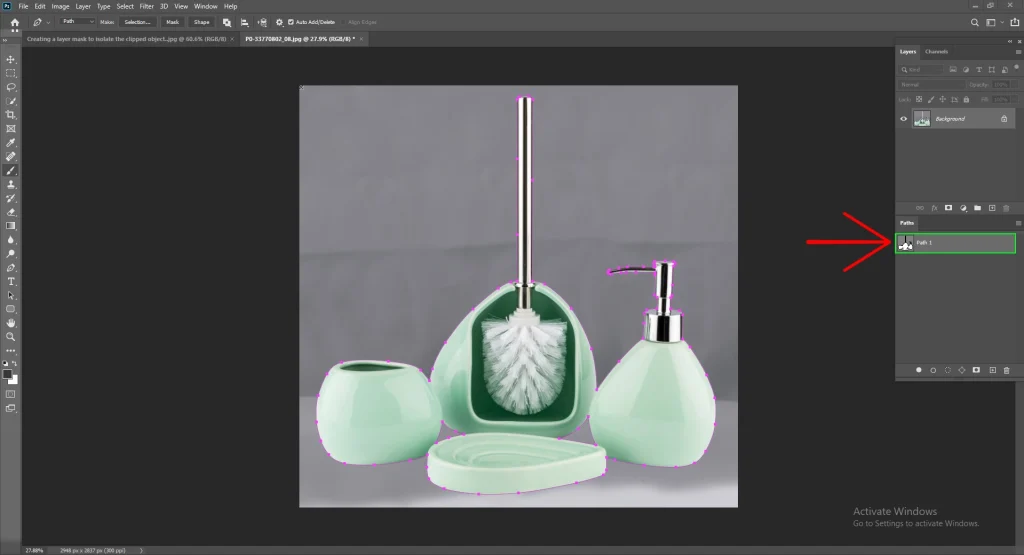
Keep on drawing the clipping path line along the border of the object.
Adjust the curve of the path using the straight line on the anchor point.
Once you are done drawing the path on the edge completely, close the path by connecting the last and first points together.
Shortcut:
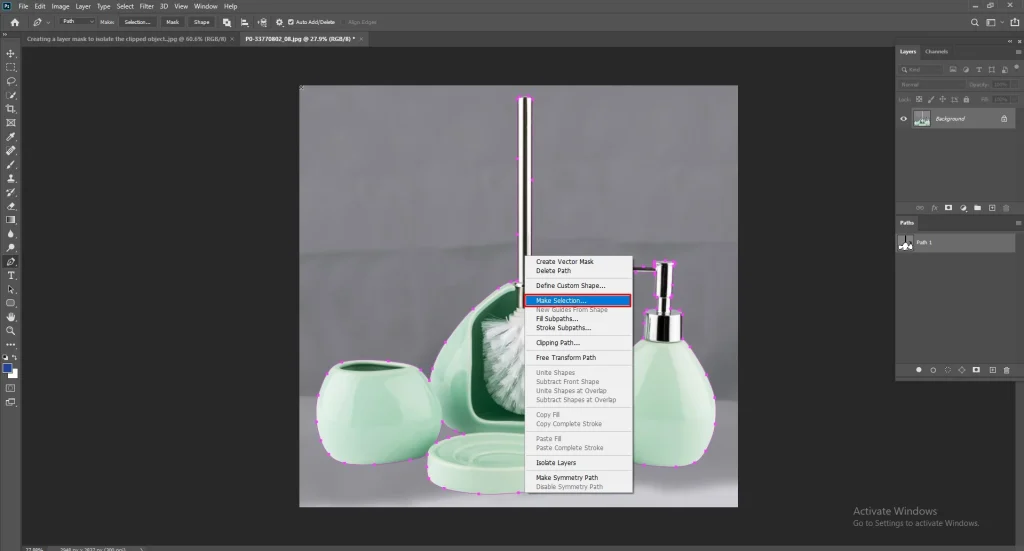
To take out the object from the image use the shortcuts to select the object.
Another way you can do it – right-click on the path to get a drop-down menu and click on “Make Selection” from the list.
Shortcut:
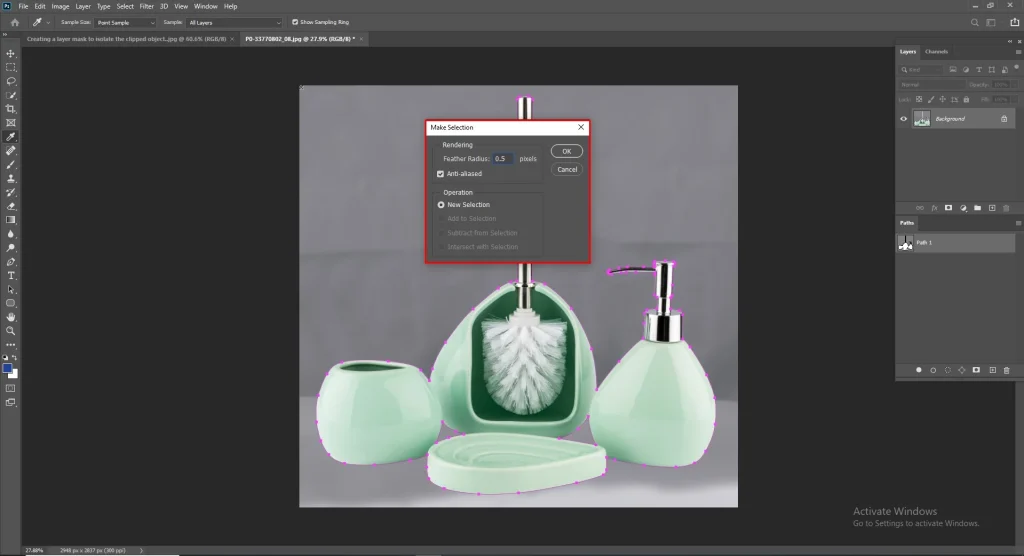
This option varies from version to version of Photoshop.
So, it’s better you know the manual action: Select > Modify > Feather
Next, click “OK”.
Shortcuts:
Use these shortcuts above to create a layer mask. Also, you can do it manually:
Go to the bottom of the Layers panel.
Keep the selection active and click on the “Layer Mask” button.
This will create a layer mask and separate the image as selected.
Shortcut:
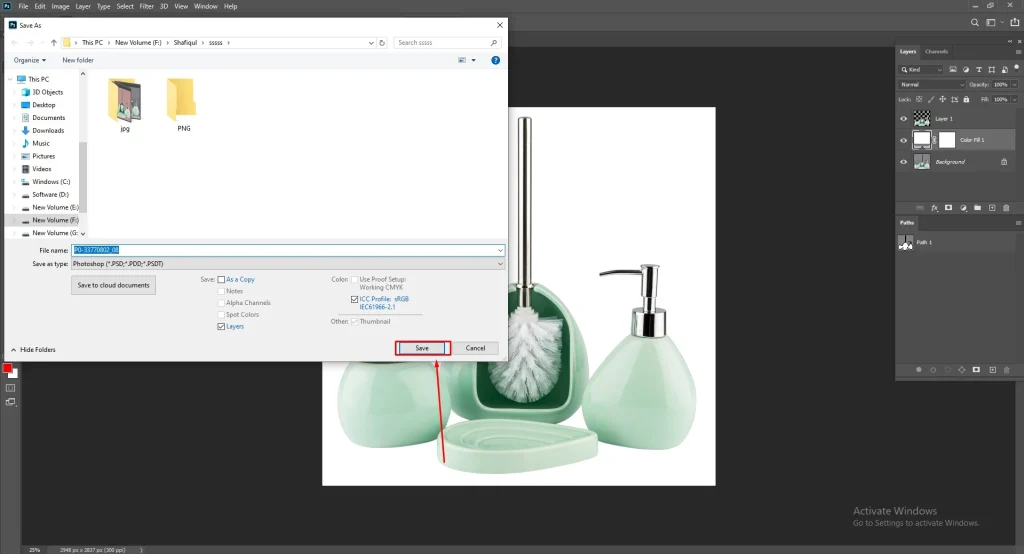
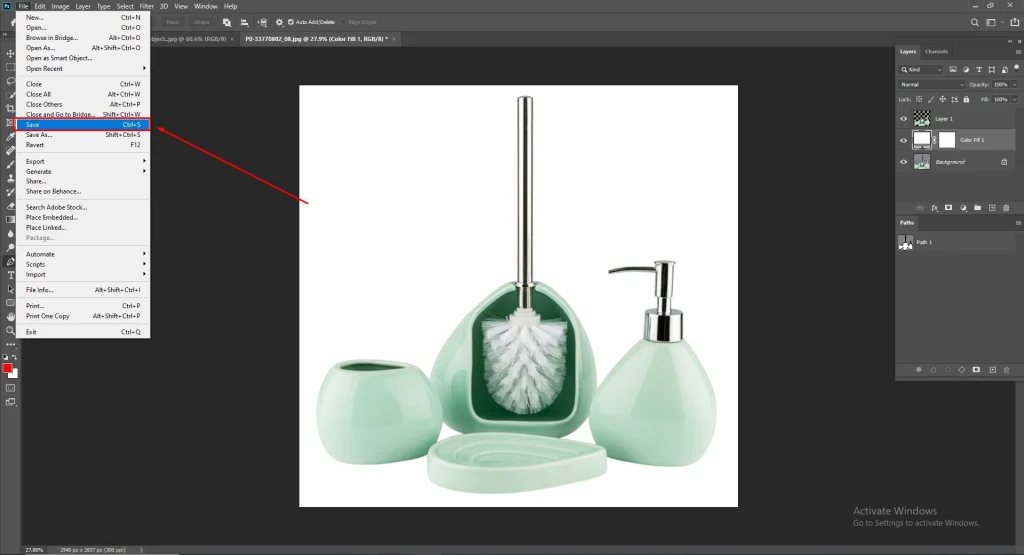
The process gets completed by saving your work. To do that- you can use the shortcut and save it quickly.
Besides, in Photoshop there is a direction option, go to file and choose save path: File > Save
Now you know the steps and shortcuts to make the clipping path to separate elements in a photo. Here are a few more suggestions so you confirm making a flawless path every single time!
This is a powerful tool for creating accurate and clean clipping paths. Using this allows you to create a smooth path around an object. Besides, when you have a detailed selection to make pen tool is the tool to help you.
If you zoom in and draw the path, the clarity of the details will be noticeable! Additionally, zooming in while creating a path ensures you are precisely following the curves and edges of the object.
The next thing that you need to keep in mind while drawing the clipping line is using the anchor points correctly. Because the particular points deliver you a natural-looking path. So, you must be mindful while placing the point on the shape of an object.
Not to mention – practice makes a man perfect, you need to try it again and again to draw precise paths. Also, we advise that we practice with video tutorials.
Here is our tutorial that you can watch to learn it better. Also, in the upcoming sections, learn about the COMMON ERRORS and SOLUTIONS to them along with PRACTICAL USE CASES and AUTOMATIC CLIPPING PATH creation options.
It’s a dominant and versatile editing tool in Photoshop. Moreover, the clipping path technique is widely used for numerous purposes. Explore some practical applications below:
In e-commerce, businesses use clipping paths to remove backgrounds from product images. This is to make products look better and more consistent. As a result, they can attract more buyers.
Graphics designers use clipping paths to combine different visuals into one design seamlessly, by isolating specific elements like icons or logos.
Photographers use clipping paths to enhance subject isolation, allowing for detailed editing for purposes like – portrait retouching or changing backgrounds.
In print media, clipping paths ensure images fit perfectly:
Certainly! When you’re working with images in Photoshop and you’re trying to cut out or isolate parts of the picture, you might run into some common problems. Nevertheless, with a bit of practice and experimentation, you can usually solve them.
Take a look at the following breakdown of errors and solutions:
Error 1: Rough or Jagged Edges
If the edges of what you’ve cut out look rough or jagged, try using a smoother selection tool.
Error 2: Leftover Background
Sometimes, after cutting something out, you might still see bits of the old background around the edges. You can fix this by refining your selection more carefully.
Error 3: Uneven Lines
If the lines you’ve cut along aren’t smooth, try adjusting them with special tools.
Error 4: Color Issues
Sometimes, the colors around the edges of what you’ve cut might look strange. To fix this, try adjusting the edges to blend better.
Error 5: Loss of Quality
If the thing you’ve cut out looks blurry or low-quality, try working with a higher-quality image.
Error 6: Results Aren’t Consistent
If things look different in different parts of the image, try using different methods or tools.
Error 7: Slow Performance
If Photoshop is running slowly while you’re cutting things out, try simplifying your process or working with smaller images.
Error 8: Background Isn’t Transparent
If you’re trying to remove a background and it’s not turning transparent, make sure you’re saving your file in the right format and using the right tools.
| Shortcuts | Uses |
| Ctrl + O (Windows), Command + O (Mac) | Quickly open an image in Photoshop |
| P | Activate the Pen Tool swiftly |
| Ctrl + Enter (Windows), Command + Return (Mac) | Make the selection of the object in the image efficiently |
| Shift + F6 for Photoshop CC | Achieve a smooth edge for the selection, or alternatively, Select > Modify > Feather manually |
| Ctrl + Alt + G (Windows), Command + Option + G (Mac) | Create a layer mask to select the mask quickly |
| Ctrl + S | Save the clipping path in Photoshop promptly |
| Shift | Toggles between the Selection view and Image view |
| Command + Enter (MacOS) | Creates a selection from an active path |
| Right-click the path & select “Stroke Path” | Apply a stroke path for focusing on an object |
| Holding down Option (MacOS) or Alt (Windows) and clicking between two layers in the Layers panel | Create a clipping mask |
| A | Selects the Direct Selection tool to adjust points created with the Pen tool |
| H | Select the Hand tool for panning the image |
| Shortcut (MacOS): CTRL + = (COMMAND + =) | Zooms in on the image |
| Shortcut (MacOS): CTRL + – (COMMAND -) | Zooms out on the image |
You can balance automation with manual refinement as needed for your projects. So, here are a few more quick techniques to
Use this tool for simpler shapes or backgrounds with clear contrast. It can quickly select areas based on color or tone.
Steps:
This tool is handy for selecting objects with well-defined edges. Simply drag over the object, and Photoshop will attempt to select it automatically.
This tool is handy for selecting objects with well-defined edges. Simply drag over the object, and Photoshop will attempt to select it automatically.
Steps:
This feature uses artificial intelligence to identify and select the main subject in an image. While not always perfect, it can save time by providing a starting point for further editing.
Steps:
