
To curve a photograph in Photoshop, follow these steps:
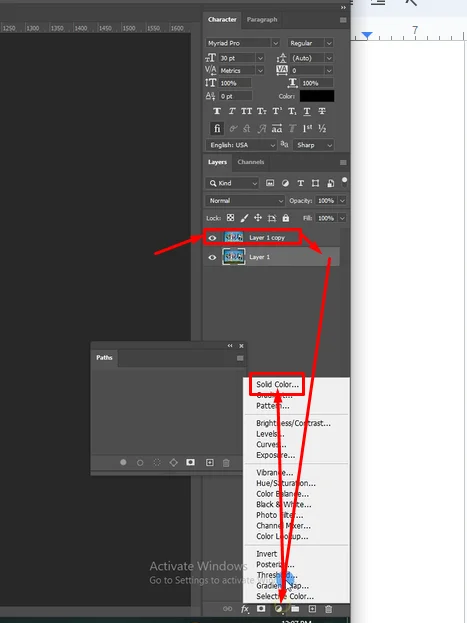
- Set the image in “Layer 1” and create a “Layer 1 Copy”.
- Select “Layer 1” and go to “Create New Layer”.
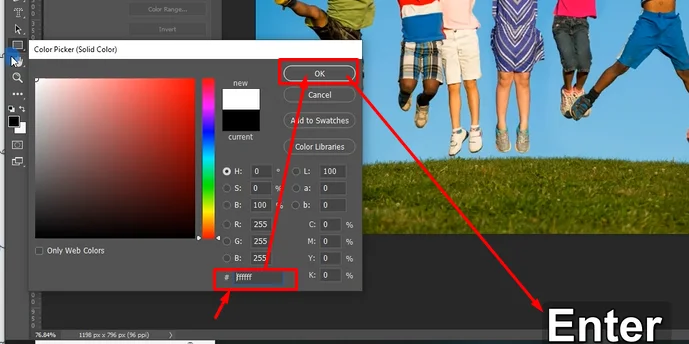
- Pick “Solid Color” and Put #ffffff in “Color Picker”. Next, press “OK” and “Enter”.
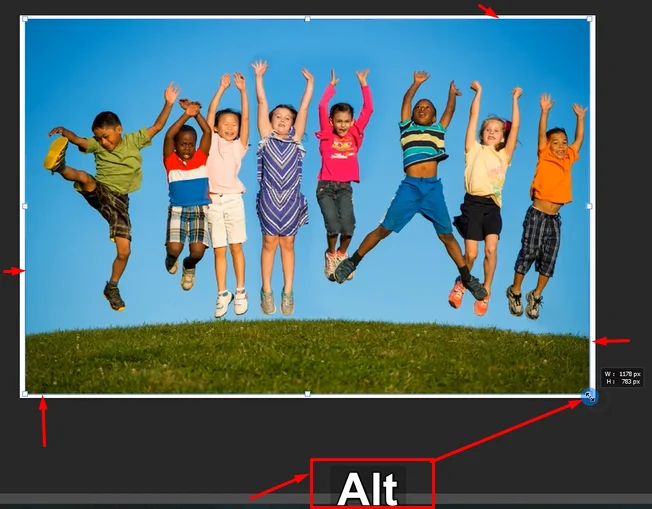
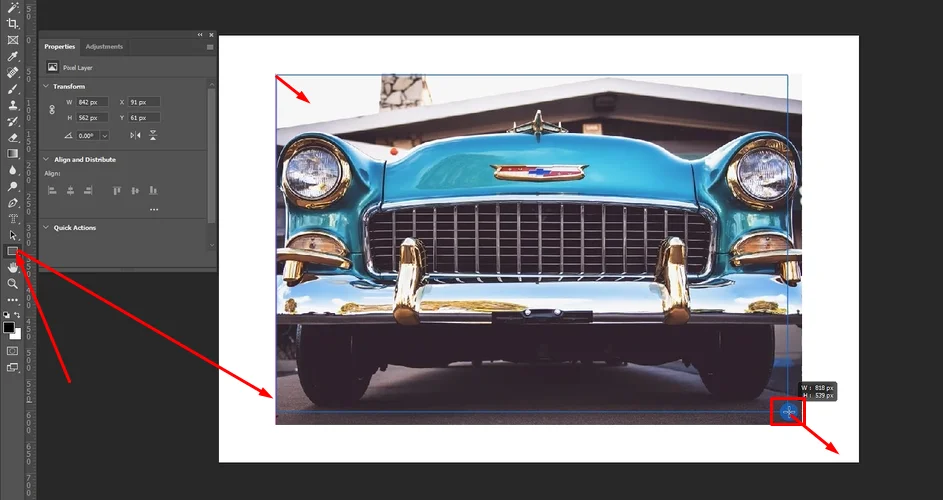
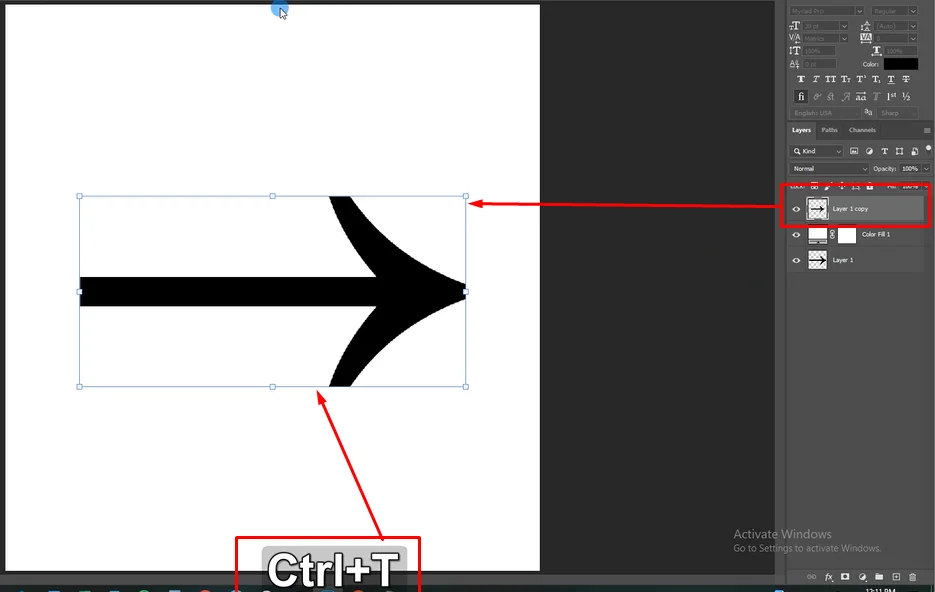
- Select “Layer 1 Copy” and press “Control / Command + T”.
- Next, pressing “Alter” make the picture smaller.
- Click on ” Switch Between Free Transform and Warp Modes”
- Drag the edges of the image to curve it.
Learn how to curve an image in Photoshop with detailed instructions in the next section.
In this article, you will also find:
- Curving the edges of an image
- Curving shapes like arrows
- Adding curved text around objects
- Different methods to curve images in Photoshop Elements
6 Steps to Curve an Image in Photoshop
For a visual demonstration of the steps, watch the embedded video.
Step 1:
Set the image in “Layer 1”. Make a “Layer 1 Copy”. Next, select “Layer 1”. Click on “Create a New Layer” and select “Solid Color”.
Step 2:
Pick the color code “#ffffff”. Click click “OK’ and “Enter”.
Step 3:
Select “Layer Copy 1” and press “Control/ Command + T” to select the layer like this:

Step 4:
Presing “Alter” resize the image and set it in the center perfectly.
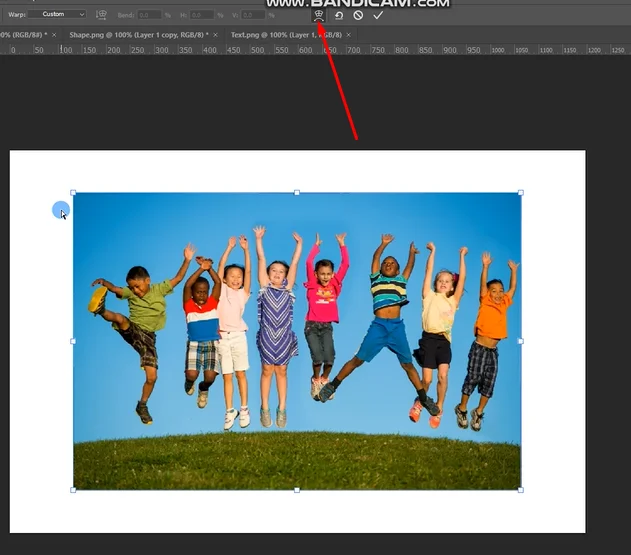
Step 5:
Keep the image selected by pressing “Command / Control + T” once. Then, click on the “Switch Between Free Transform and Warp Modes” icon as indicated below:
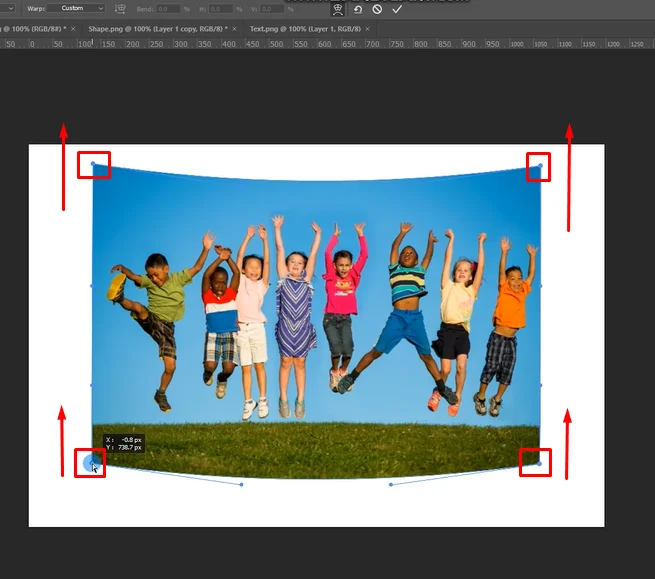
Step 6:
Drag the corners of the image upward to make it curved.
Author’s Note: With over 10 years of experience in Photoshop, I’ve successfully curved numerous images using these techniques.
What about curving the corners of an image in Photoshop? The following section will help.
If You Want to Curve the Edges of an Image in Photoshop
Step 1:
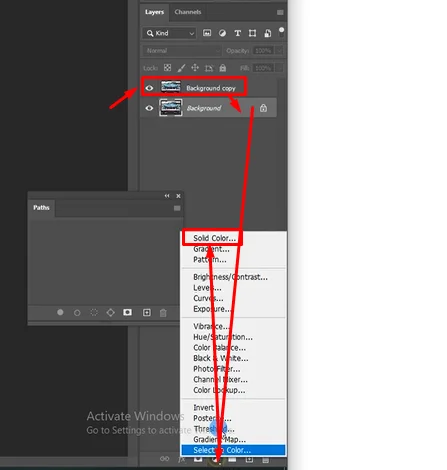
Make a “Background Copy”. Select the “Background” layer. Next, click on the “Create a New Layer” icon and select “Solid Color”.
Step 2:
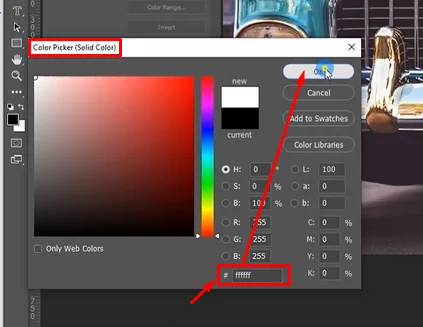
Put color code “#ffffff” in the “Color Picker” window and click “OK”.
Step 3:
Select “Background Copy” and press “Control / Command + T” to select the layer.
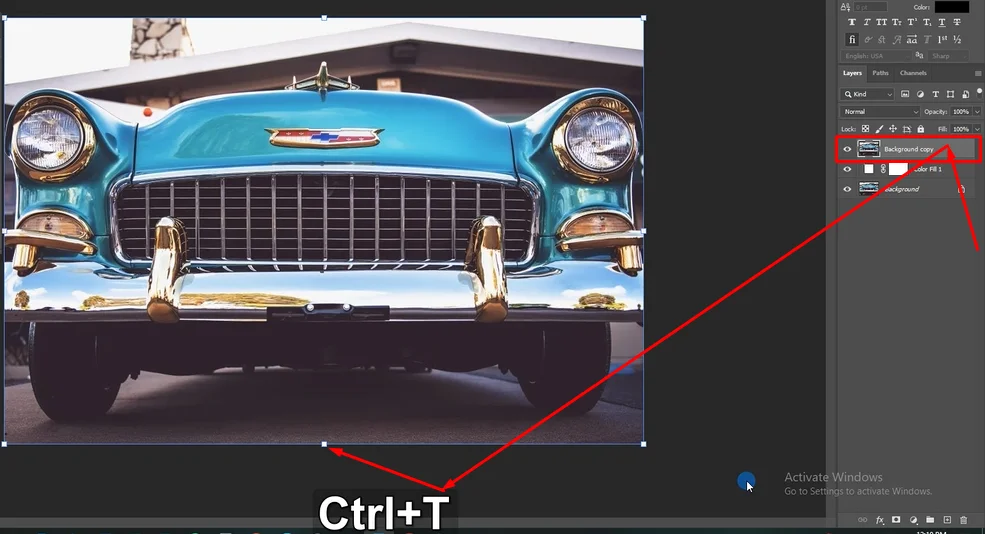
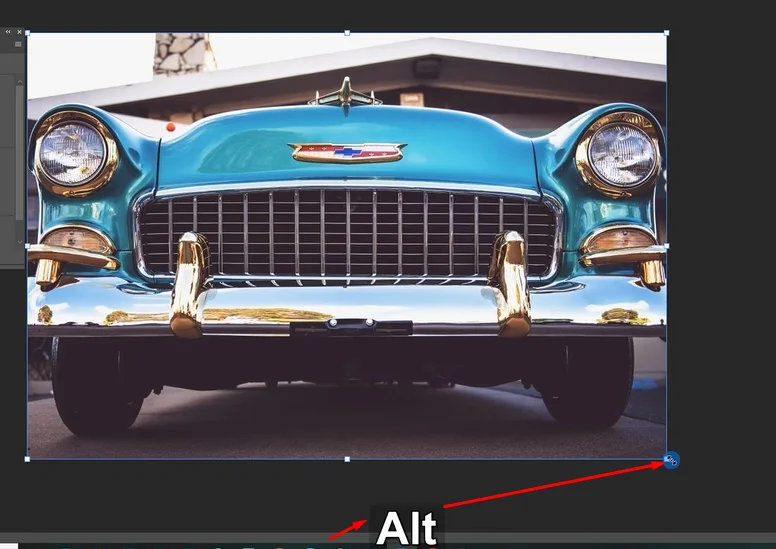
Step 4:
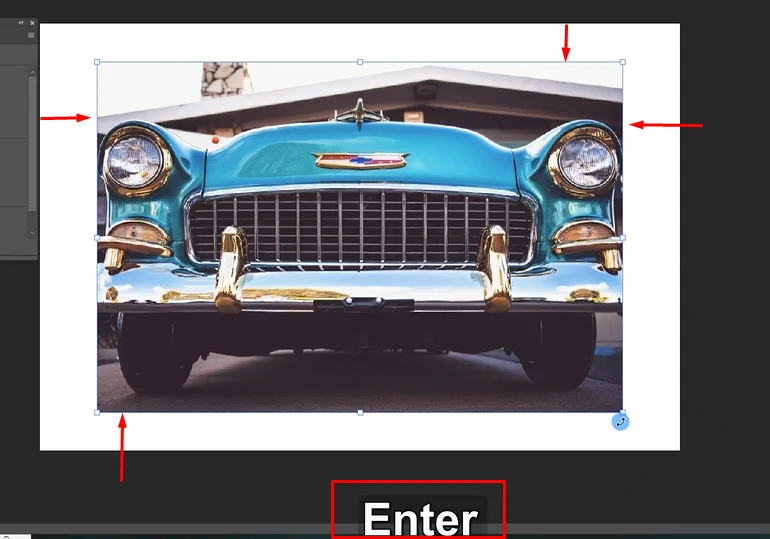
Next, press “Alter” only and move your cursor to fix the image on the white background.
Next, hit “Enter”.
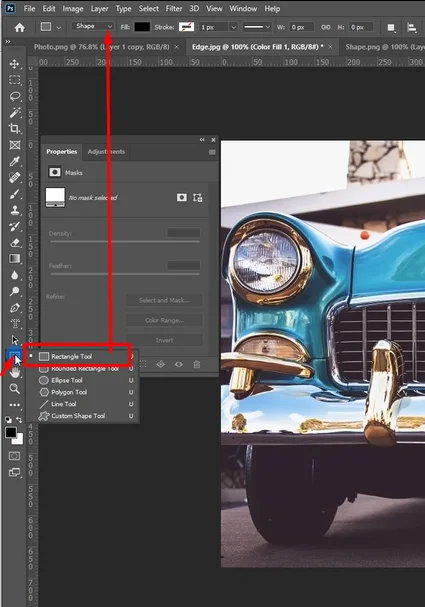
Step 5:
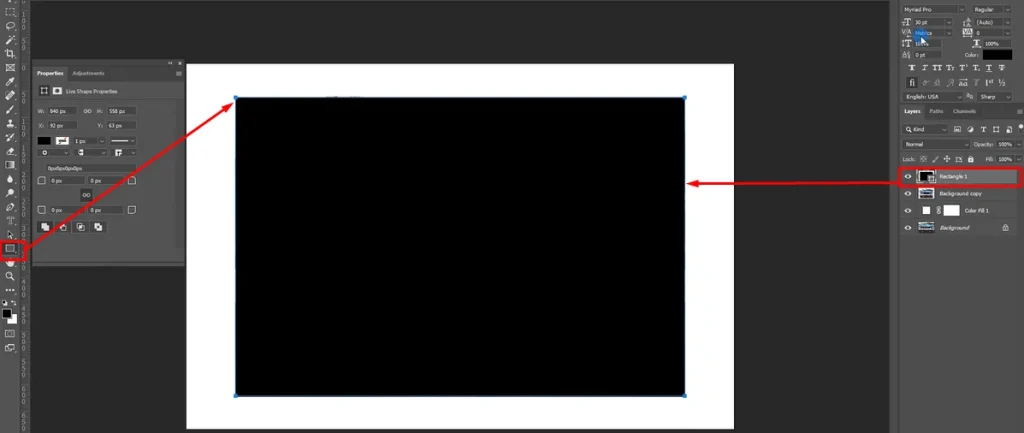
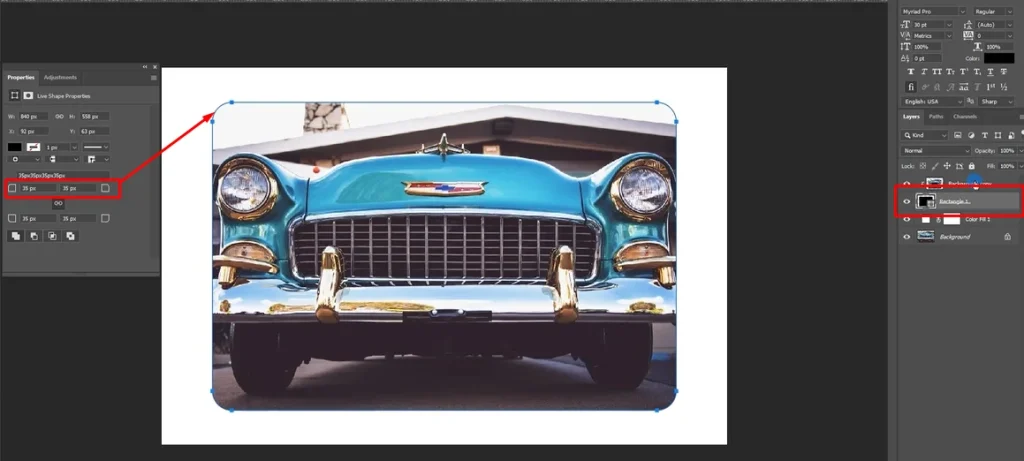
Make sure “Background Copy” is selected. Go to the “Rectangle” tool. Draw a rectangle proportionate to the current size of your main image.
Once you create a rectangle a new layer will appear like this:
Step 6:
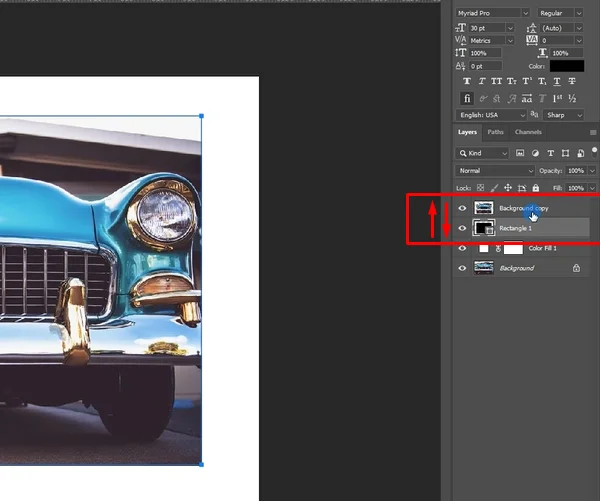
Swap the position of “Background Copy” and “Rectangle 1”.
Step 7:
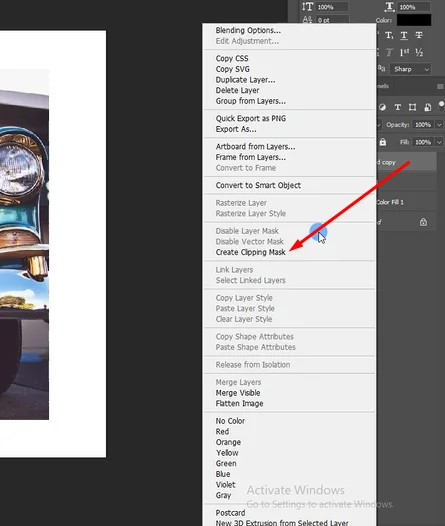
Select “Background Copy”.
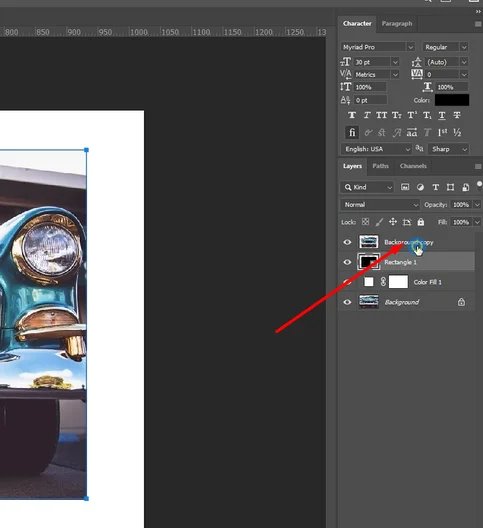
Right-click on the layer and select “Create Clipping Mask”.
Step 8:
Select the “Ractagle” layer and change the around the edges using the “Properties” window.
People often try to curve an arrow in Photoshop or it can be any straight line shape. Let’s how you can do that.
Easiest Way to Curve Shape in Photoshop
Step 1:
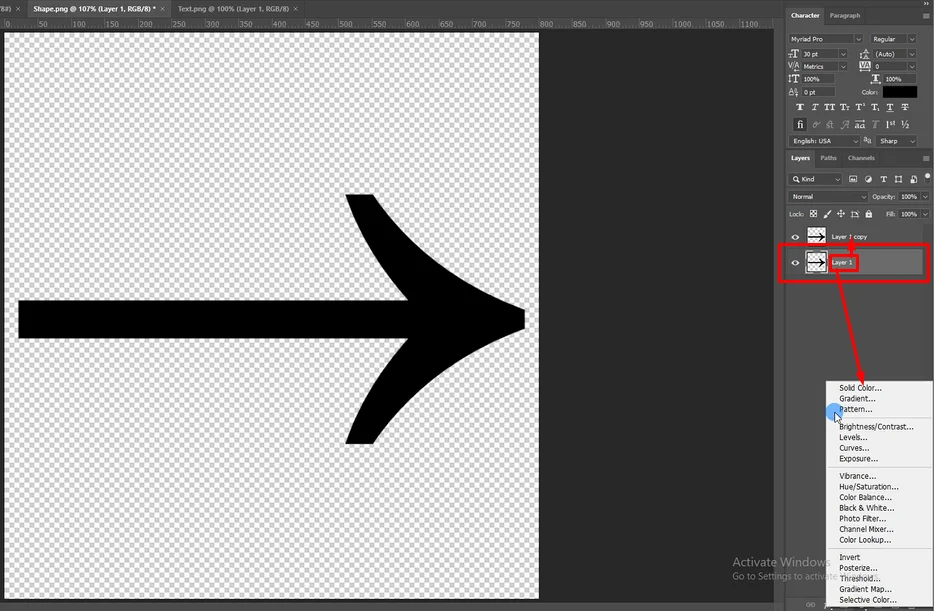
Create a “Layer 1 Copy”. Select “Layer 1” and click on “Create a New Layer”. Pick “Solid Color” from the list.
Step 2:
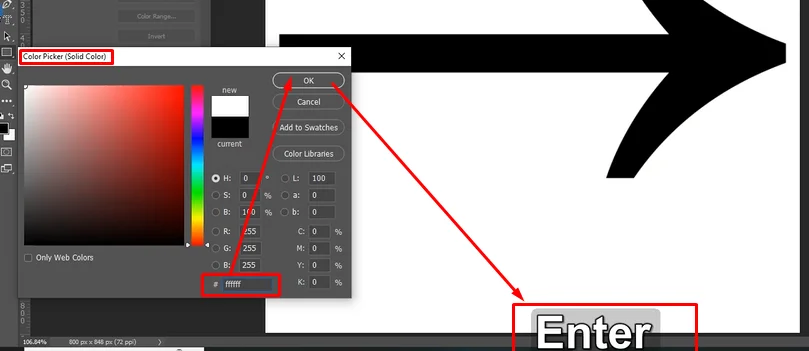
Pick the color code “#ffffff”. Then press “OK” and “Enter”.
Step 3:
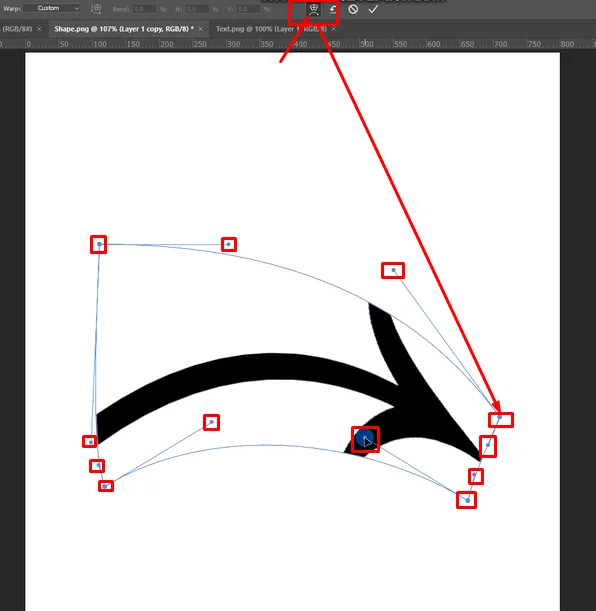
Select “Layer 1 Copy” and press “Control / Command + T” to select the shape.
Step 4:
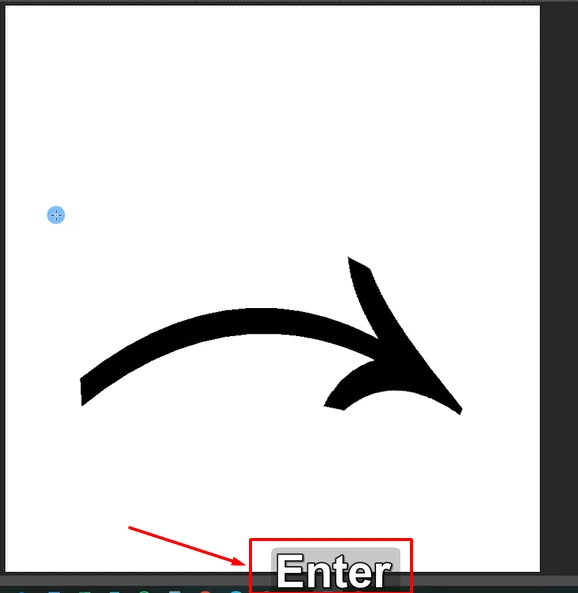
Click on the “Switch Between Free Transform and Warp Modes”. Move the dotes to bend the shape like this:
Finally, press “Enter”.
Curved texts are also a popular Photoshop Edits. Want to see how that works?
Curving Text around an Image or Object in Photoshop
We will show you adding text to a shape. You can add text the same way to any object the same way.
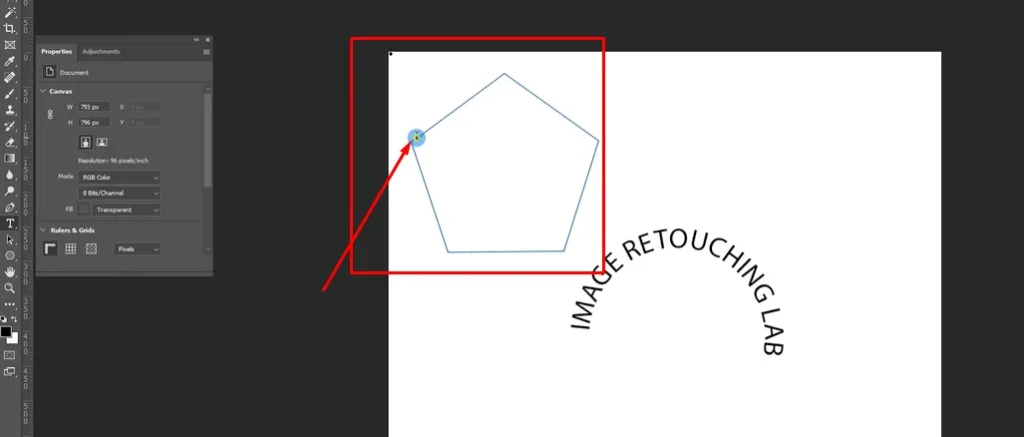
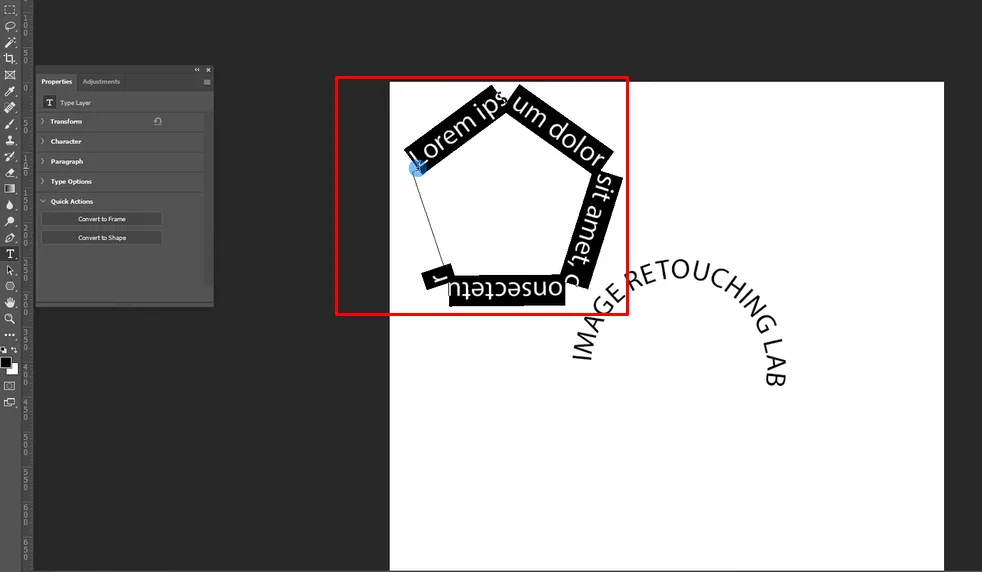
Step 1:
Set an image in “Layer 1”. Then create the shape you need from the “Horizontal Type Tool”.
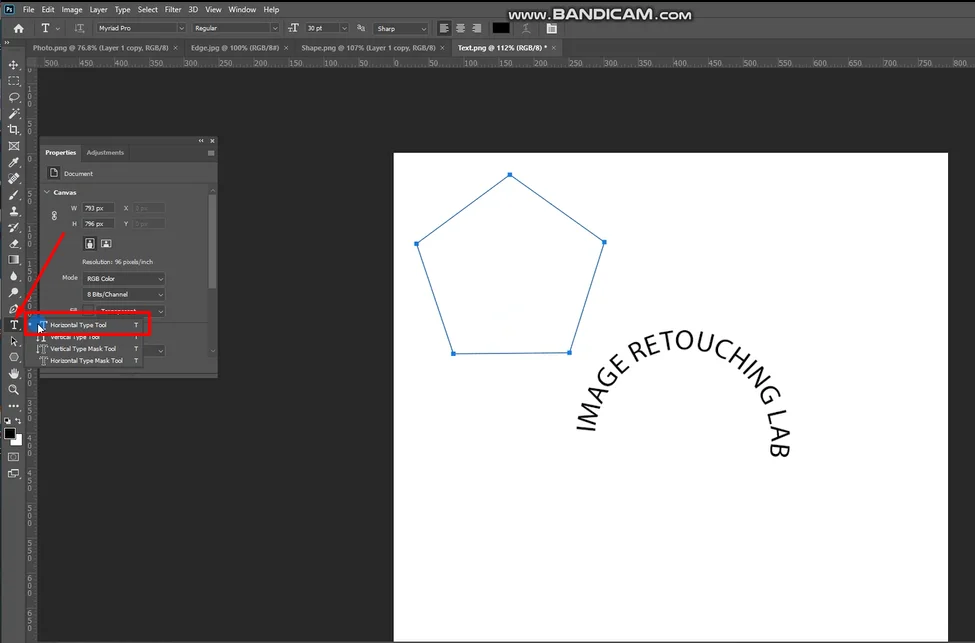
Step 2:
Now, place the cursor anywhere on the outline.
Finally, you will see the text appearing around the shape.
Need to create a curve in Photoshop Elements?
While Photoshop Elements doesn’t have a Warp option, there are still ways to create curves using the tools and techniques available.
Find instructions and video for that in the following section.
5 Ways to Curve an Image in Photoshop Elements
Creating curves in Photoshop Elements without the dedicated “Warp” option requires a bit of creativity and manual manipulation. So, here is the first method that involves the “Liquify” tool.
Method 1: Using the Liqufy Tool
Step 1: Line everything element up in the “Layer 1” as you like.
Step 2: Keep “Layer 1” selected
Step 3: Go to “Filter” and take the pointer to “Distrort” to select“Liquify”.
Step 4: Adjust the “Liquify Circle” to curve objects.
The video below will help you understand the technique.
Note that, there are 4 more ways you can do the edit. Experiment with these methods as well to find what works best for you.
Method 2: Transform Tools
The Free Transform tool (Ctrl+T) lets you manually distort images. By dragging the corners or edges, you can create basic curves.
It’s easy to use but might not be great for complex shapes.
Method 3: Layer Masks and Brush Tool
This method involves using layer masks and the Brush tool. You create a shape, apply a layer mask, and then use the brush to paint in curves.
It’s precise but requires some skill with masks and brushes.
Method 4: Pen Tool
Photoshop Elements has a Pen tool that can create paths for curves. Once you’ve made your path, you can apply transformations to it.
This method is precise but takes some practice to master.
Method 5: Third-party Plugins
You can also consider using third-party plugins that offer warp or distortion features.
They can make curve creation easier, but they might cost extra and could have compatibility issues.
Final Notes on Curving Images In Photoshop
We have walked you through everything from rounding edges to bending arrows and curving text. And don’t worry if you’re using Photoshop Elements – we’ve got tips for that too!
Our goal is to help you unlock your creativity and give you the skills to bring your designs to life. So, jump right in, and practice with our step-by-step tutorials.
Got questions or feedback? Drop us a comment! We’re all ears and eager to hear how our blog has helped you and what else you’d like to learn.
