
Straighten a crooked image in Photoshop quickly via these steps:
- Open the Image in the Background
- Control / Command + J to Create a New Layer (Layer 1)
- Select Background Layer
- Click on Create New Fill or Adjustment Layer
- Select Solid Color
- Put the #ffffff Color Code in the Color Picker and Click OK.
- Select Layer 1
- Control / Command + T + Alter to straighten a crooked image in Photoshop
In this blog, you will see a variety of image straightening examples with proper steps and instructions, as follows—
- Fixing a tilted photo
- Making the lines aligned
- Even line adjustment to the horizon
- Modifying an image perspective
- Placing the object at a right angle
Go through all the sections and learn how to straighten an image in Photoshop based on your needs.
How to Straighten Different Types of Images in Photoshop
Straightening an image in Photoshop can be of a variety of examples or edits. So, based on the issue you have with an image, you do the editing.
Let’s start with a very basic and common image straightening case.
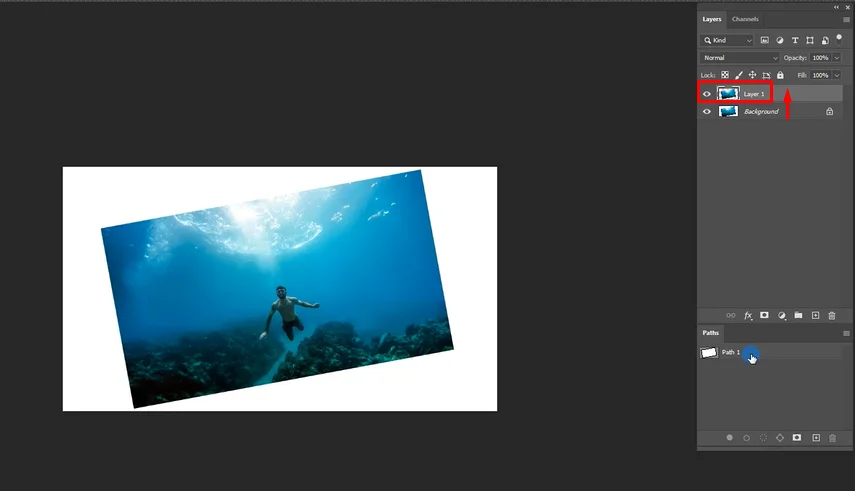
1. Straighten a Warped Image
You might get a warped image somehow, maybe it’s a scanned copy, such as:

So, how do you straighten a crooked image? Here you go—
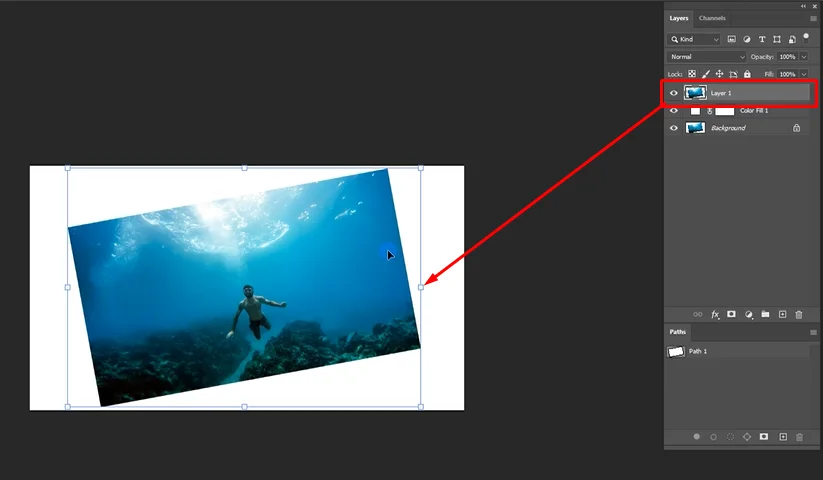
Step 1: Create a new layer by pressing “Control / Command +J”. You will see “Layer 1” sitting above the Background right away.
Step 2: Select the “Background” layer. Then, click on “Create New a Fill” and select “Solid Color”.
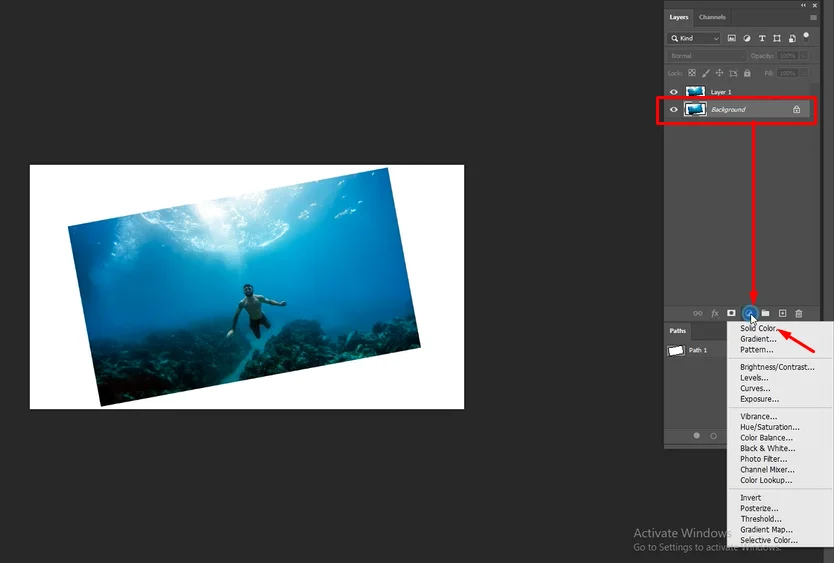
Right after that, there will be “Color Fill 1”.
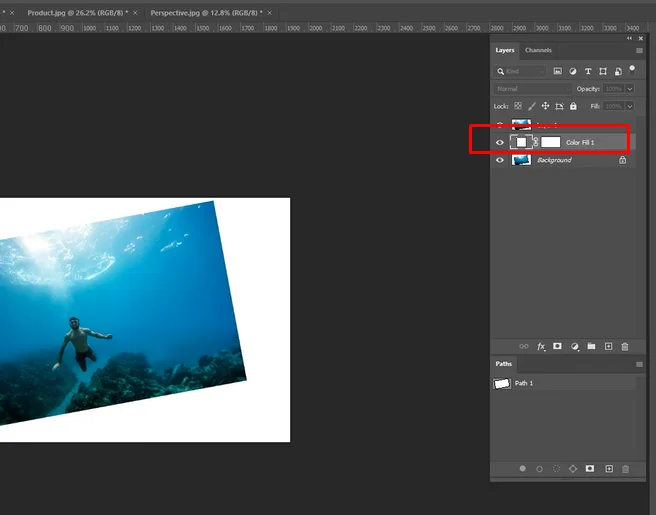
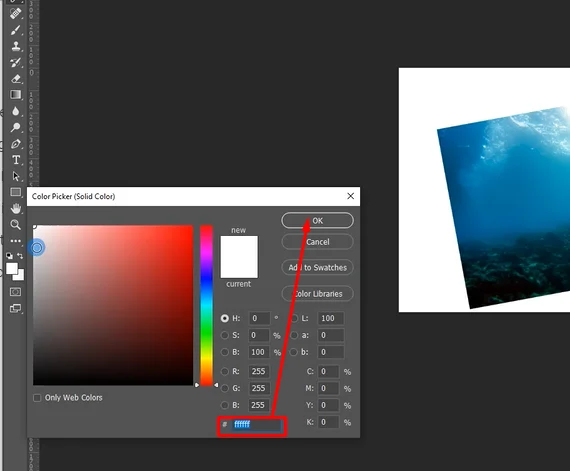
Step 3: Also, a “Color Picker” window will open up with that. Pick the color code “#ffffff” and click “OK”.
Step 4: Select “Layer 1” and Press “Control / Command + T” to select the image only.
Step 5: Reposition the image on the white background using your mouse and hit “Enter”.
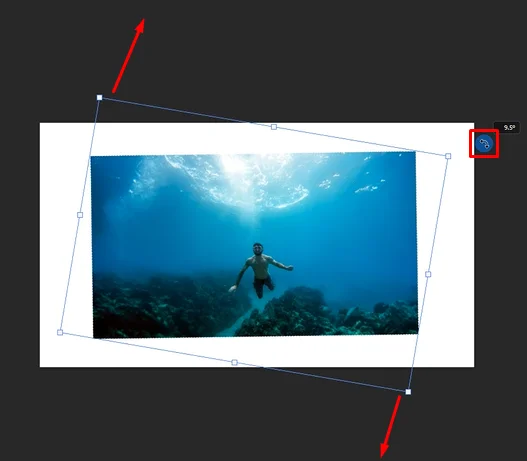
Additionally, you can use “Control / Command + T + Alter” to further adjust the photo evenly in the background.
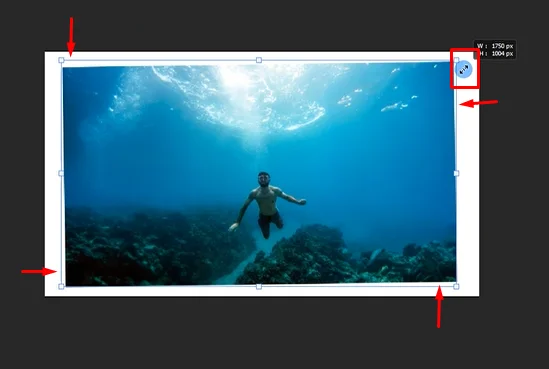
So, that’s how you straighten a crooked image in Photoshop. Find 4 more image straightening cases below and learn how to do those with our precise instructions.
2. Want to Straighten Lines in Photoshop?
Well, it can be any sort of uneven line in your photo. For editing different types of line editing cases in Photoshop, you will also need different solutions.
Here is an example of straightening lines:

Here are the steps to fix an uneven line like this:
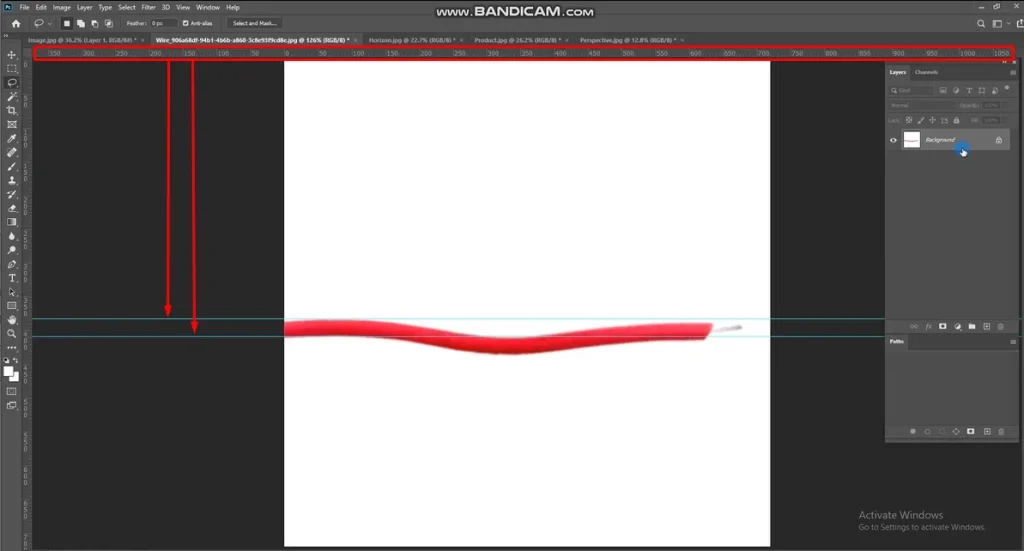
Step 1: Open the image in the “Background” layer and drag down two rulers. Just like this:
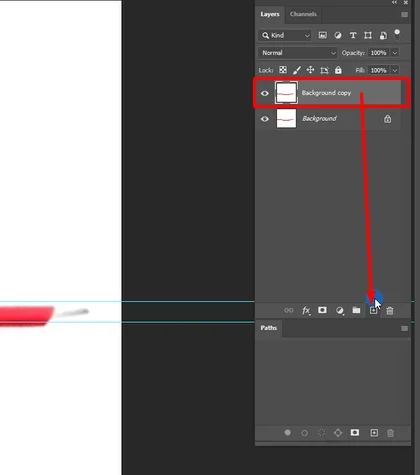
Step 2: Make a “Background Copy”.
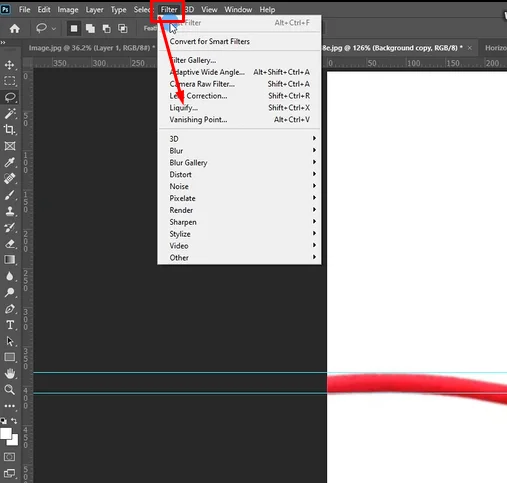
Step 3: Go to “Filter” and click on “Liquify”.
Step 4: You will be on a new window. Keep “Show Guide” checked and start putting the wire in an even line.
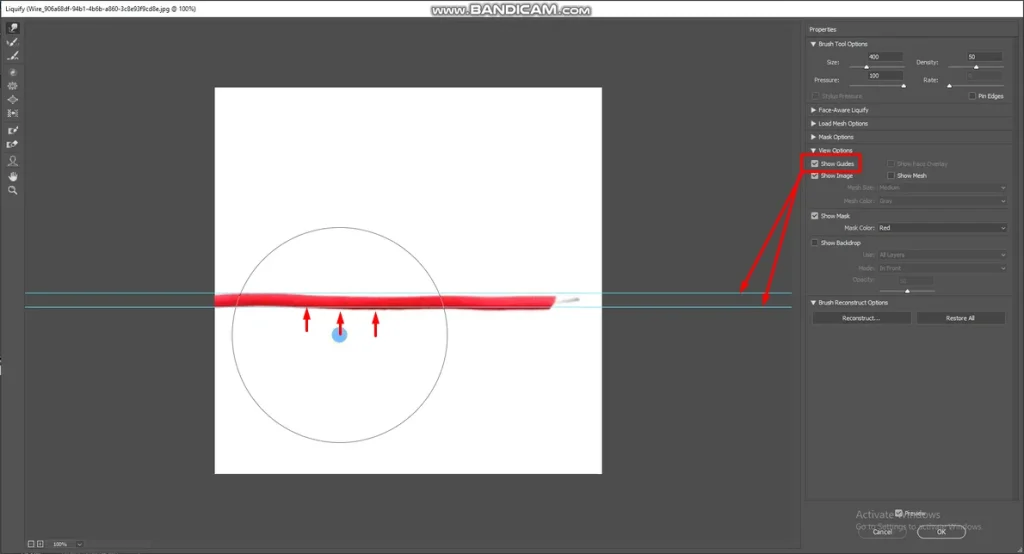
Finally, “Merge Layers” and “Save” your file. Note that, using “Liquify” you can straighten edges in Photoshop.
However, you have learned how to straighten lines in Photoshop. Let’s look at another image straightening example.
3. Learn Straightening Horizon in Photoshop
You might straighten out a horizon to make the photo look more level. For instance, you might have an image like this:

To even out the horizon follow these steps below:
Step 1: Make a “Background Copy”.
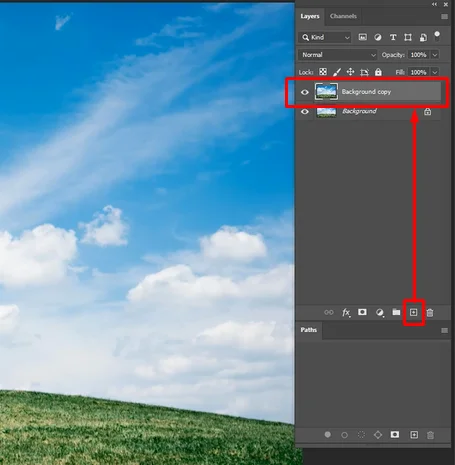
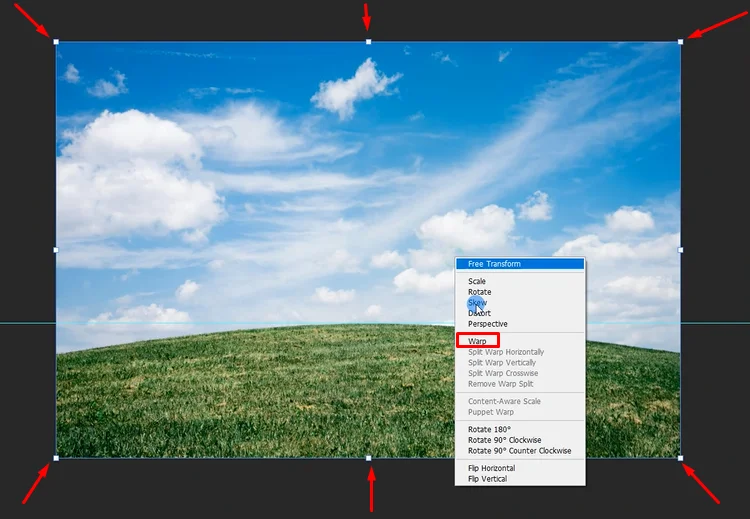
Step 2: Press Control / Command + T to select the “Background Copy”. Keep the cursor on the photo and right to find “Wrap”.
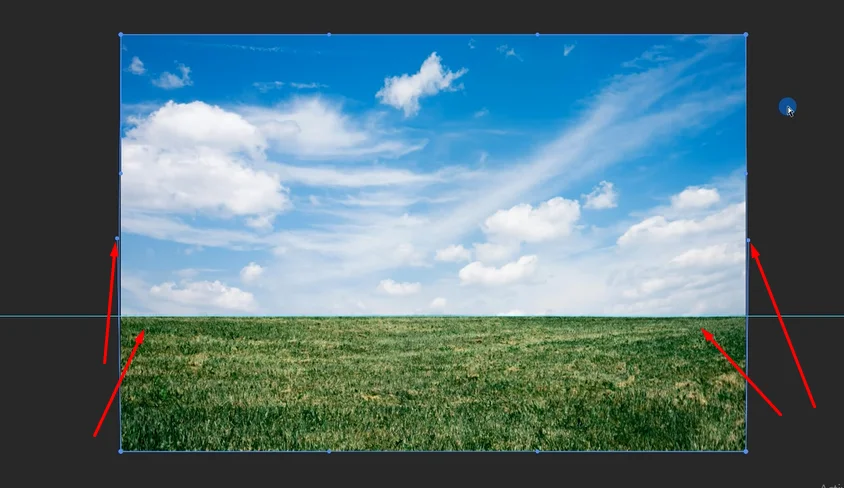
Step 3: Push the landscape upward and see the selection box moving as well. Once the horizon is in a straight line— “Save” your edit.
Wondering how can you straighten buildings in Photoshop? Check the next section.
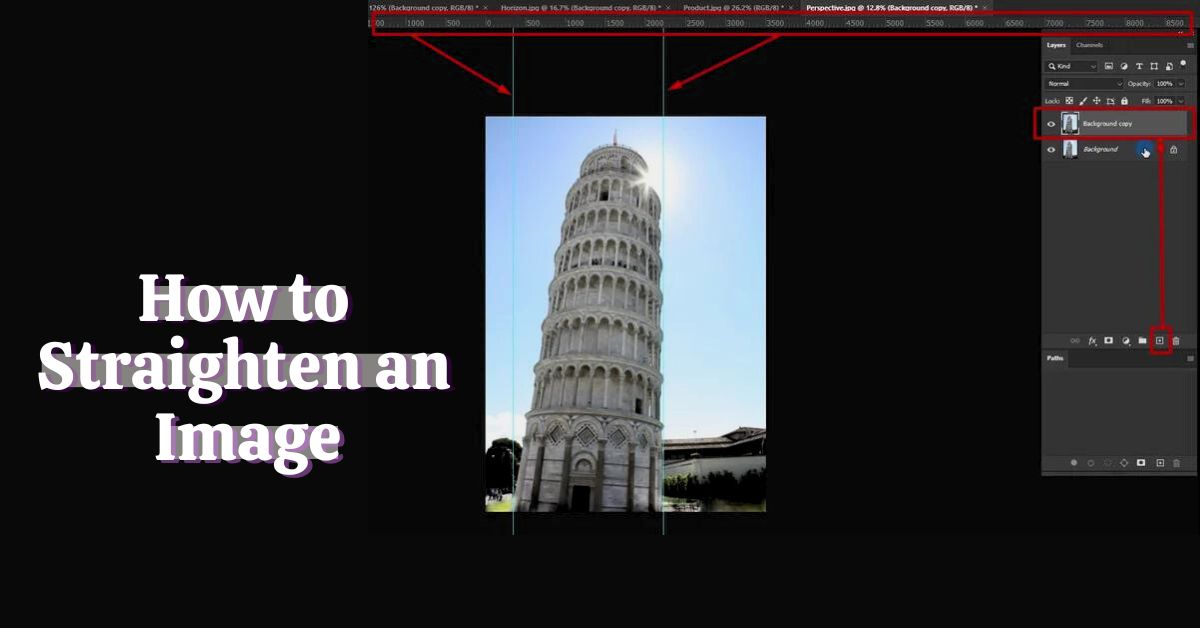
4. If You Want to Straighten Perspective in Photoshop—
Pictures containing titled buildings are also common. And, this error occurs for a variety of reasons, the most common one is the camera angle.
Nevertheless, let’s take this image as an example:
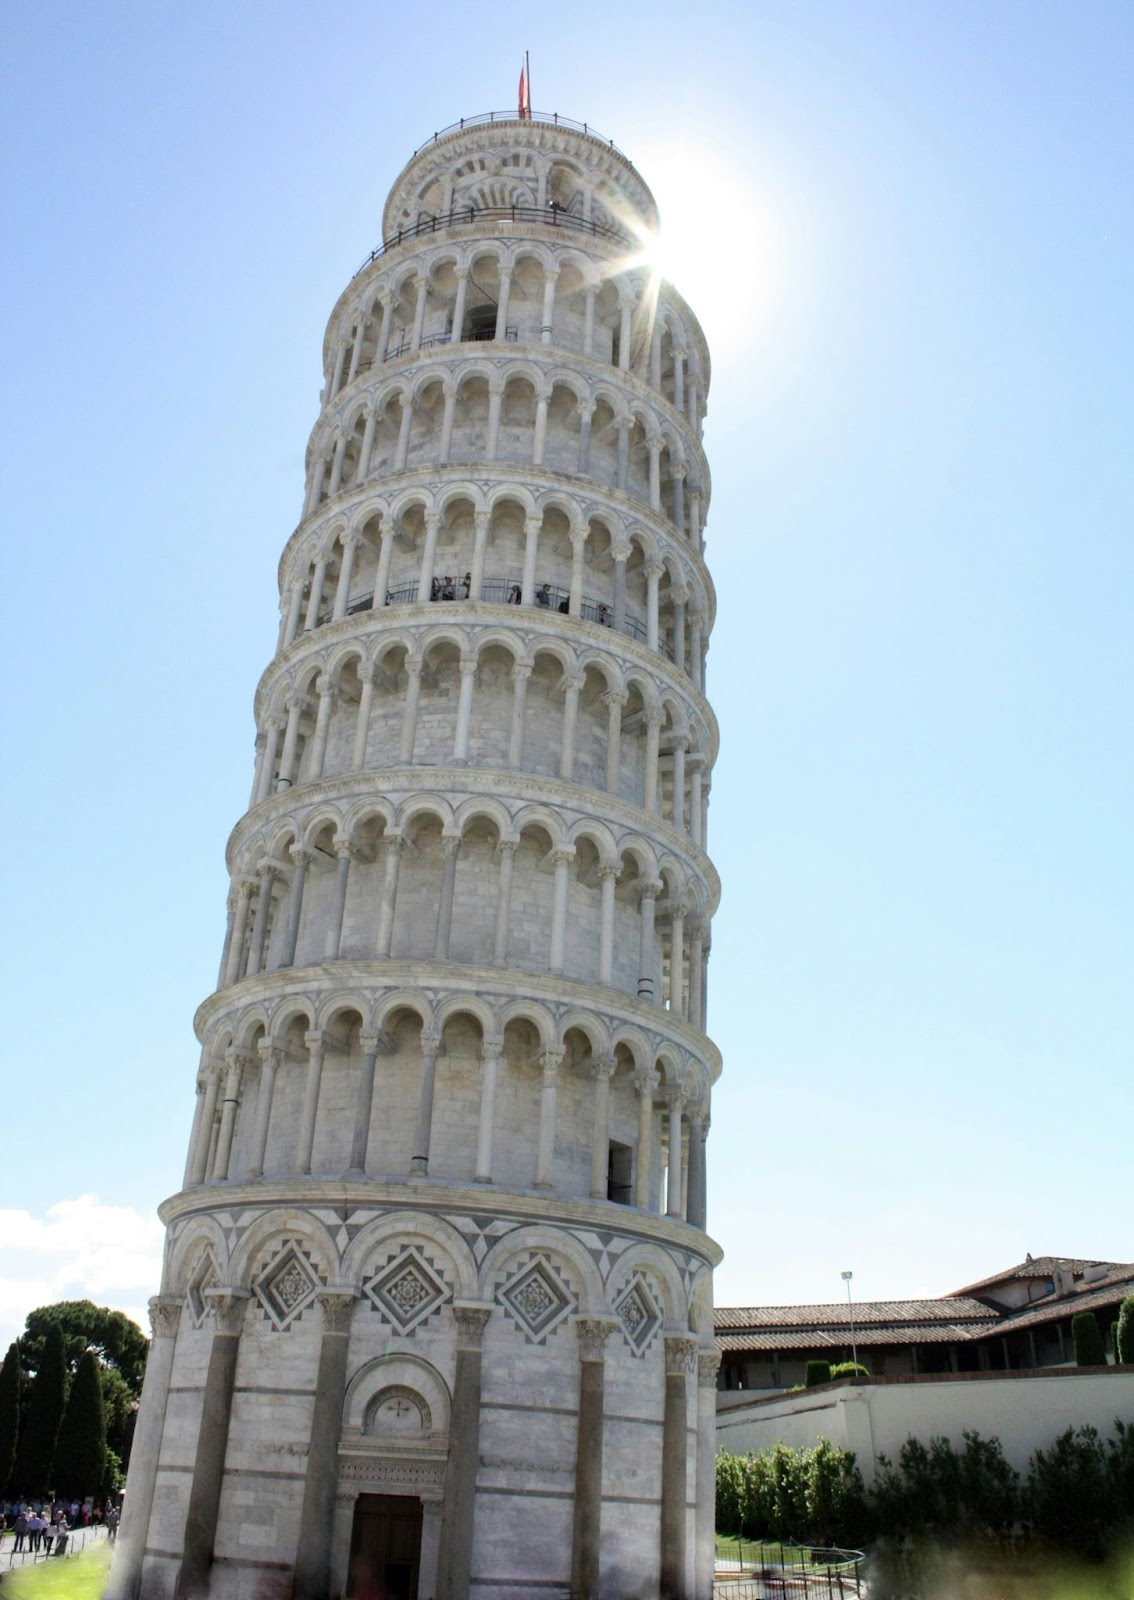
Not to mention, this building has been like this for ages. Yet, it can be a good example for correcting perspective.
Step 1: Make a “Background Copy” first. Then add two rulers vertically.
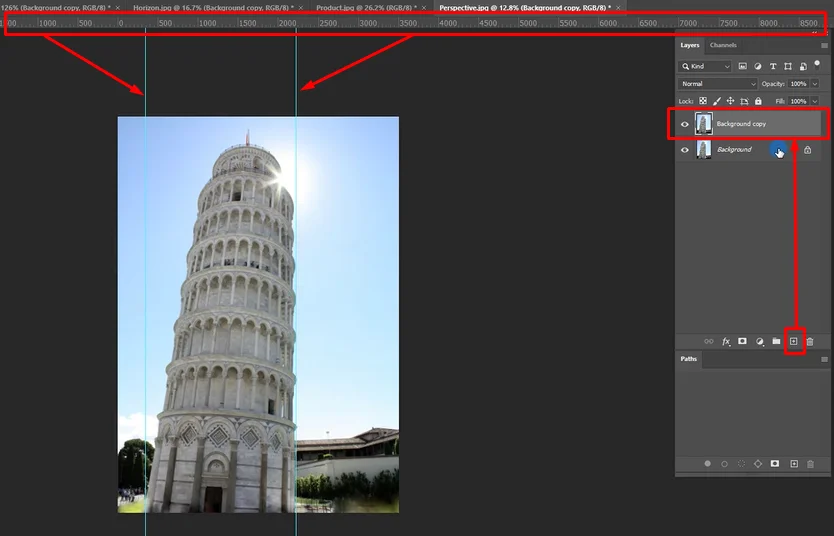
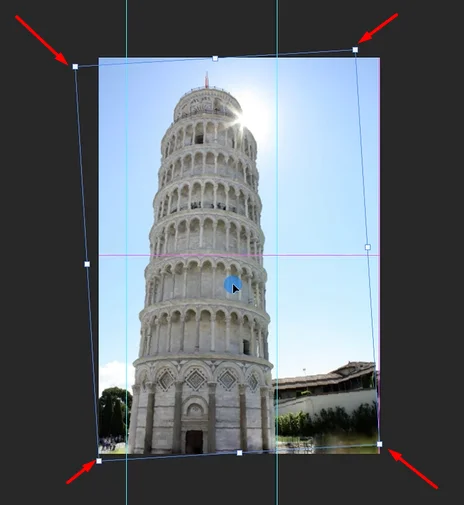
Step 2: Press “Control / Command + T” to select the layer. Next, move your cursor to set it in a straight line. Once you are done—you must hit “Enter”.
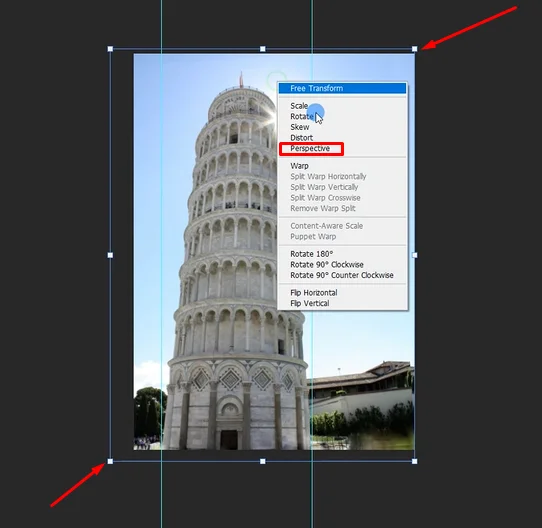
Step 3: Again, press “Control / Command + T” and the layer. Right-click on the image and select “Perspective”.
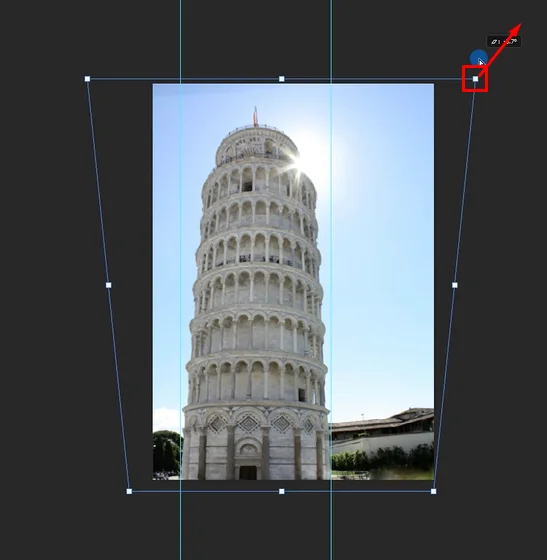
Step 4: Click on one of the corners of the layer and move your cursor to adjust the perspective.
5. See As Well—Straightening an Object in Photoshop
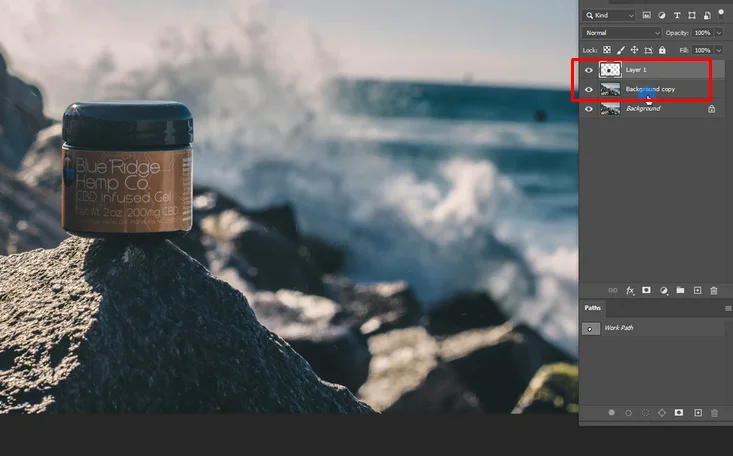
Products or objects sometimes might not be at a 90° angle, such as:
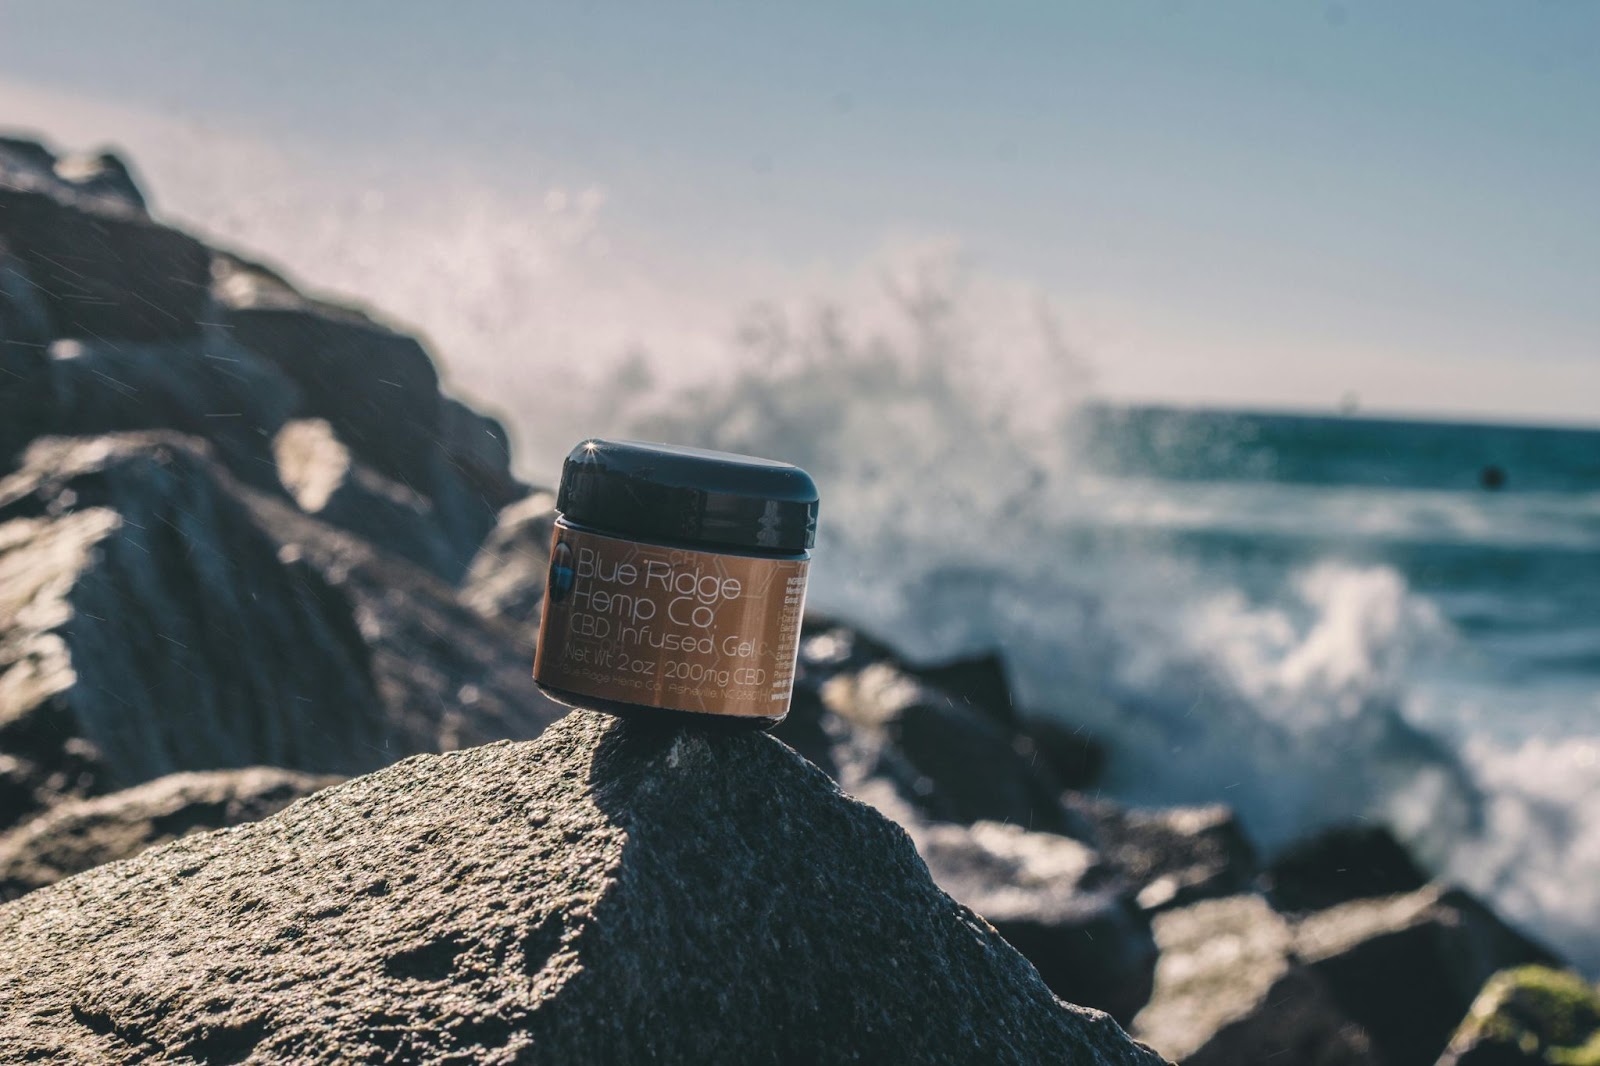
You can fix the angle easily with the help of these steps:
Step 1: First clip the product or object and make a “Work Path”. Next, make a “Background Copy”.
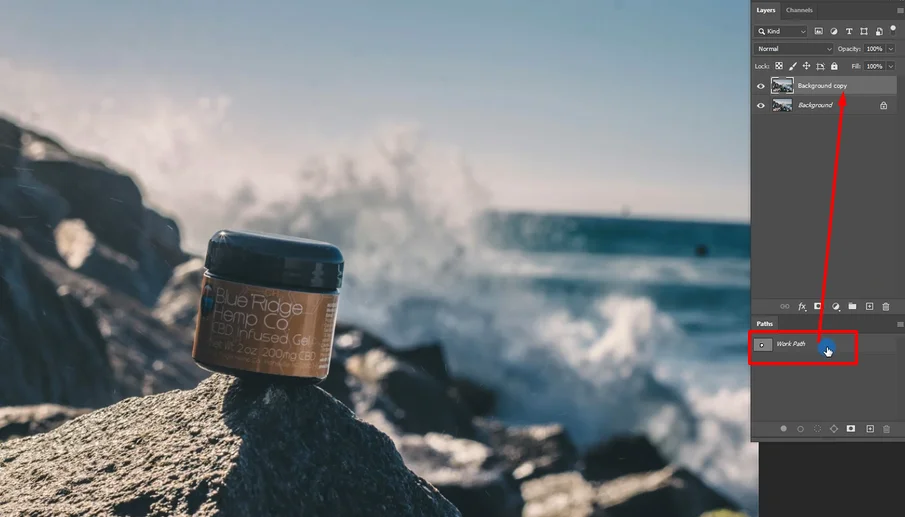
Step 2: Turn “Work Path” into “Layer 1”.
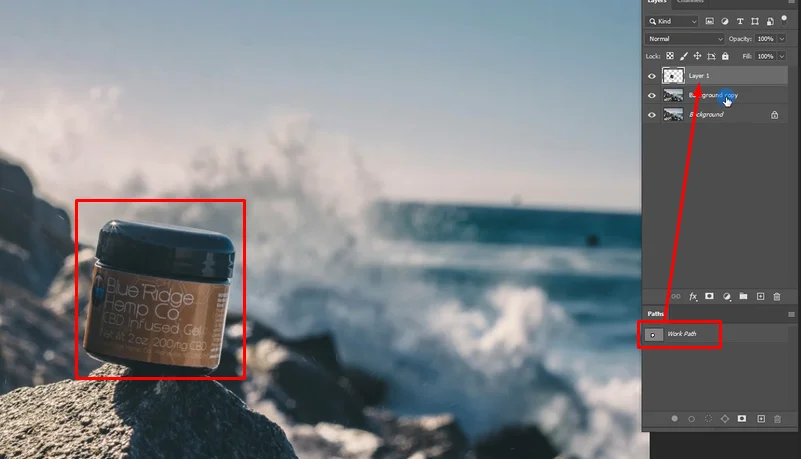
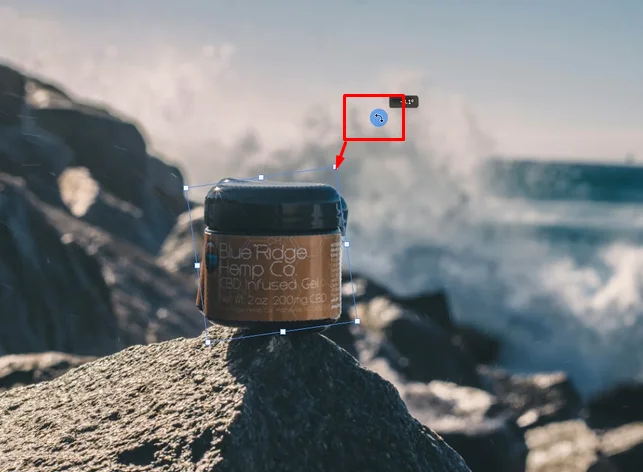
Step 3: Press “Control / Command + T” to select the object and use your cursor to place it straight.
Step 4: Select “Background Copy” and remove the edges of the product using the “Clone Stamp Tool”.
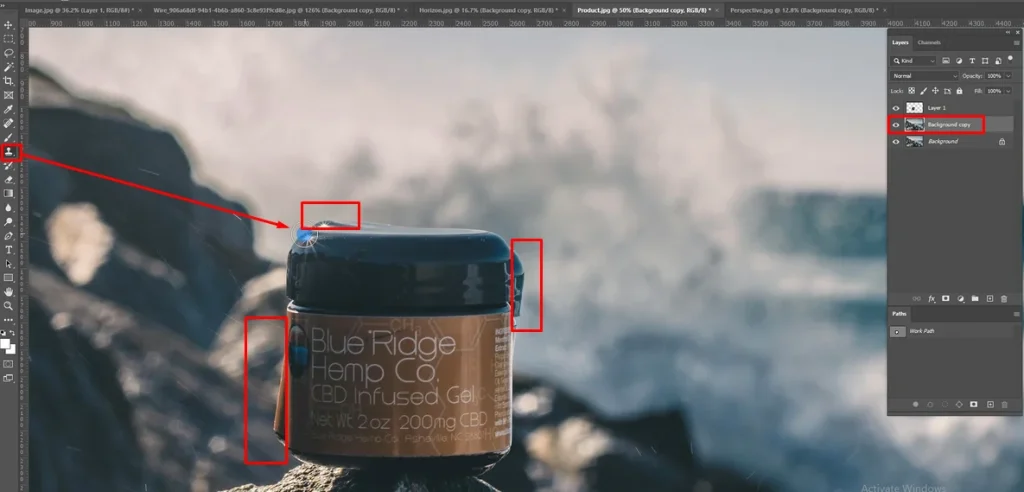
Step 5: Finally, make “Layer 1” and “Background Copy” one.
Watch this video to learn how to straighten canvas in Photoshop along with many more editing techniques discussed above.
Final Notes
From fixing wonky photos to straightening lines, horizons, perspectives, and objects—we’ve covered quite a lot of photo straightening techniques. Hopefully, you’ve found these tutorials helpful and feel more confident in your Photoshop skills. Share your thoughts or questions in the comments below. Keep practicing and stay tuned for more Photoshop image editing methods.
