
To export slices in Photoshop, go to File > Export > Save for Web. In the dialog box, select the slices you want to export, then click ‘Save.
Exporting slices helps break images into smaller parts, useful for icons, buttons, or banners.
In this article, we’ll walk you through the simple steps to export slices efficiently and effectively. But that’s not all! By reading this article, you’ll also:
- Learn how to export multiple slices at once for quicker results.
- Export individual slices for precise customization.
- Explore saving slices in different file formats like JPG and PNG.
Ready to dive in and take your Photoshop game to the next level? Let’s get started!
Export Slices in Photoshop without Save for Web
Exporting is one way of saving image files from Photoshop. However, “Export” and “Save” serve different purposes. See these steps, to get a clearer idea:
Step 1:
Shortcut- Alter / Option + Shift + Control / Command + S
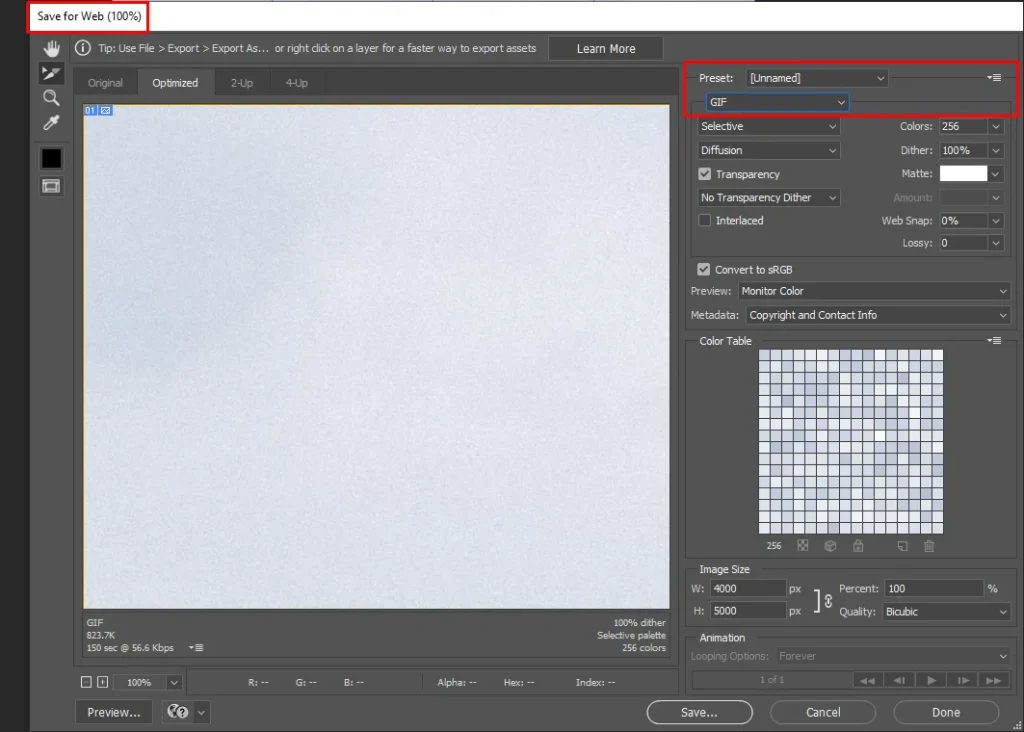
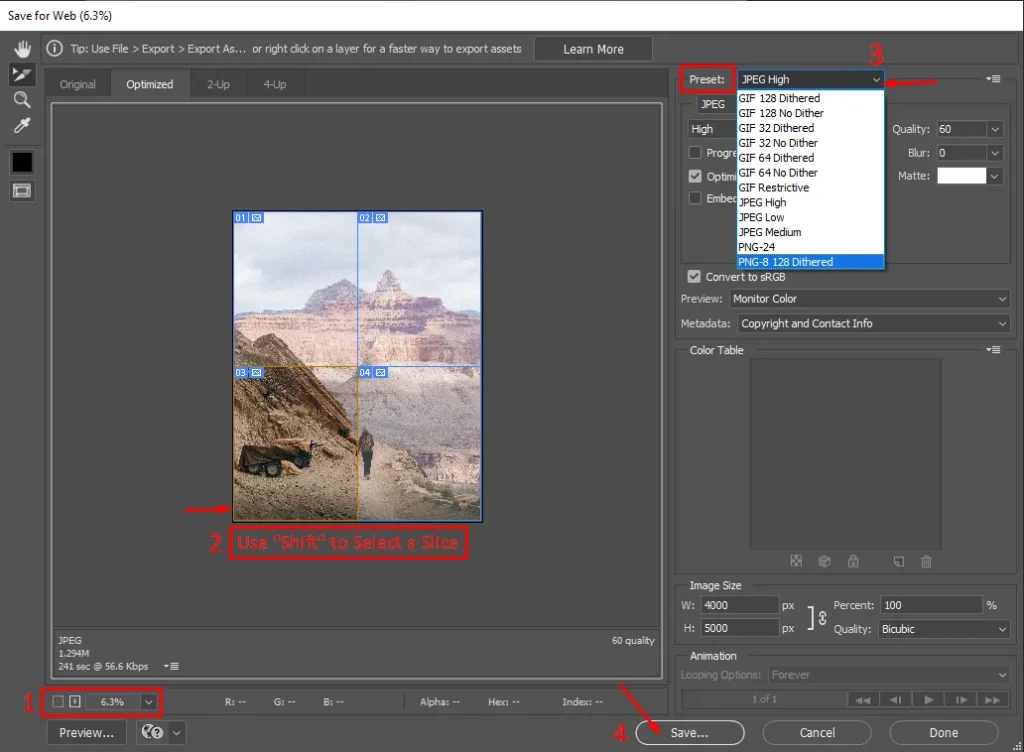
Press “Alter / Option + Shift + Control / Command + S” and there will be a window saying “Save for Web”. Also, notice the “Preset” on the right side for the upcoming steps.
Step 2:
Check the bottom-left side and decrease the “Zoom Level”. This will help you see all the slices. Also, this ensures easy selection of the slices.

Step 3:
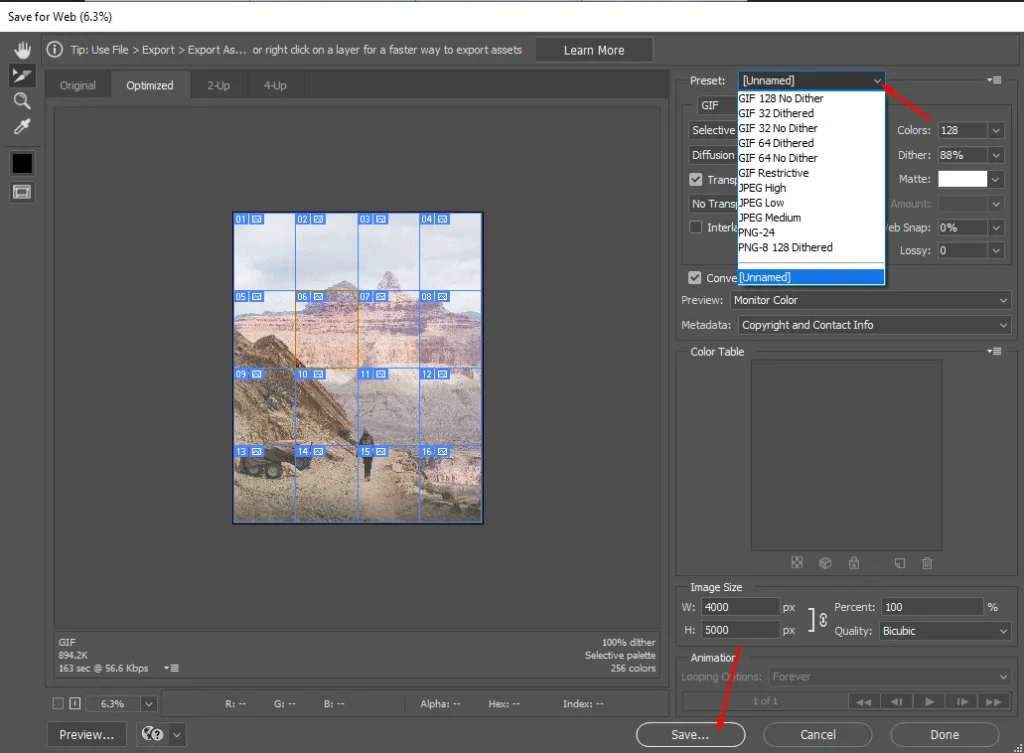
Click on the arrow of “Preset” and find the list of image formats optimized for the web. Once you pick the image format, click on “Save” below the window.
Step 4:
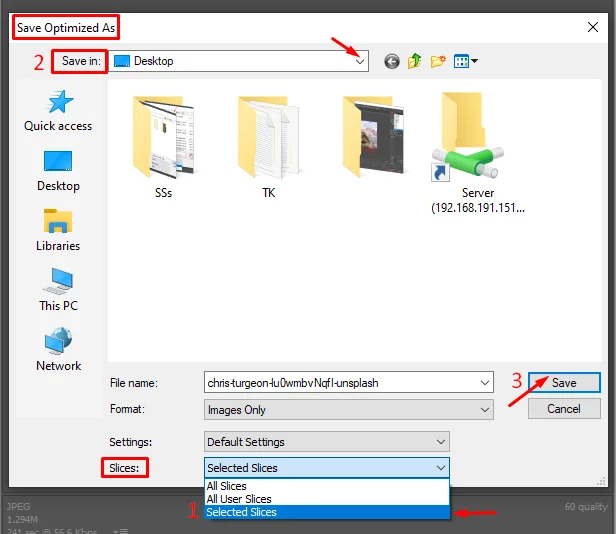
Next, you will see another window – “Save Optimised As”. Now, find the “Slices” option at the bottom of the window.

Step 5:
Then, in the “Slices” option—click on the arrow pointed in the image. Select “All Slices”. Select a folder from “Save in” and press the “Save” button.
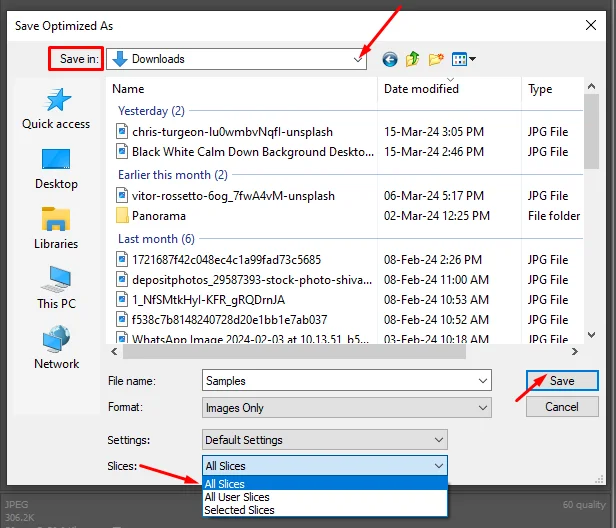
Finally, find the sliced images in the designated folder. You are likely to find them in a separate folder named “images”. In case you are thinking about how to export multiple slices in Photoshop—the steps are not different than the ones you just saw. Also, the instruction is the same for Photoshop save slices as separate files.
Do you need to download just one specific part of an image? The next section will help you.
How to Export Individual Slices in Photoshop
Sometimes you might need a portion of an image to use it for a certain reason. To export slices in Photoshop, go to File > Export > Save for Web. In the dialog box, select the slices you want to export, then click ‘Save.
Step 1:
- In the “Save for Web” zoom out first to make the selection.
- Then, holding “Shift” select as many slices as you need.
- Don’t forget to select the image format want in the “Preset”.
- Click on “Save”.
Step 2:
- “Save Optimised As” will appear.
- Pick “Selected Slices” and set the export location.
- At the end, click “Save” and find your specified slices in the target folder.
Still not sure how to export slices as JPG files? We have the following section for that.
Photoshop Export Slices as JPG/JPEG: Change “Preset”
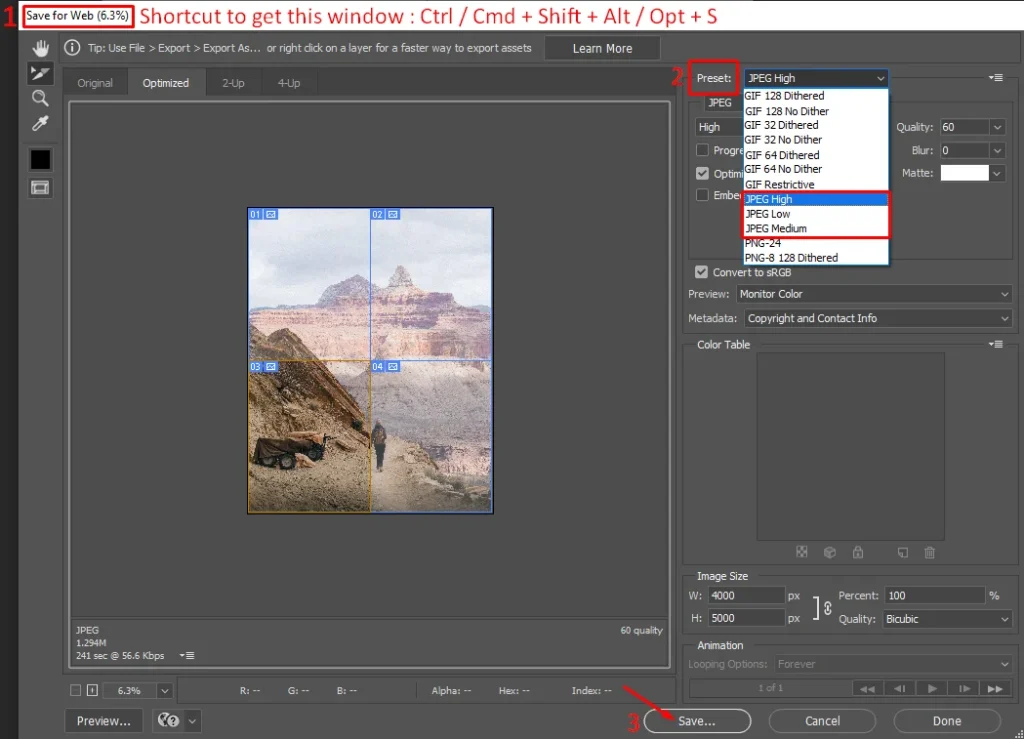
There isn’t any option for JPG there is JPEG.
- Access the “Save for Web” window with the shortcut: Alter / Option + Shift + Control / Command + S.
- Once you open the “Save for Web” change the image format to JPEG from the “Preset” list
- Click “Save”.
What about exporting in PNG format? The following section will help.
Photoshop Export Slices to PNG: Check the “Preset” List Again
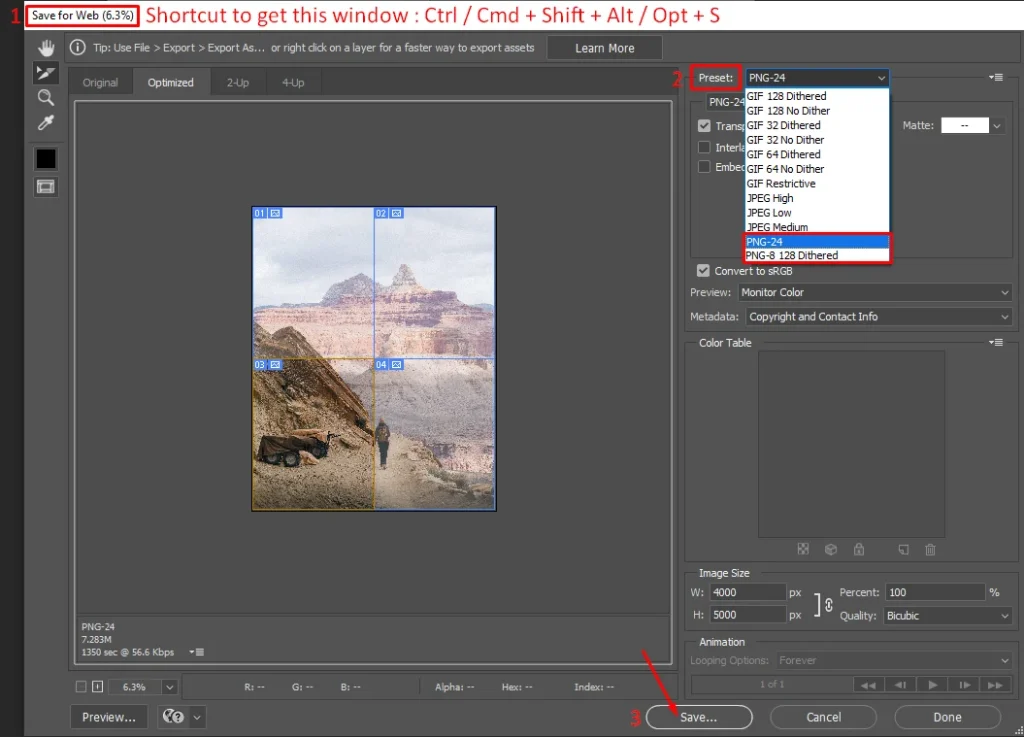
- In the “Save for Web” go to “Preset”.
- Change the image format to PNG from the list.
- Save in your desired folder.
How do I export a slice in Photoshop?
To export slices in Photoshop, go to File > Export > Save for Web. In the dialog box, select the slices you want to export, then click ‘Save.
Final Remarks on Saving Images Slices In Photoshop
We show you the whole process step by step, making it super simple. If needed, you can see the blog on—Creating, Deleting, and Printing Sliced Images in Photoshop.
But our journey doesn’t end here! Check out our other blogs and explore more tricks to make your Photoshop experience smooth sailing. Also, if the blog helps you, we’d love to hear about it!
Got questions or need more help? Comment below, and we’ll be more than happy to assist you.
