
What Is Making In Photoshop?
Many of the beginners want to know what is masking in photo editing? Here we go with a simple reply. Image masking is a graphics technology system like Photoshop to conceal parts of a picture or disclose parts. It allows you to modify and tweak subsequently if required, most of the moment. Very often, the picture manipulation facilities are effective and more innovative. Today, we are going to show you various essential points on image masking in Photoshop including the way to do it perfectly.
As the world is getting more digital, the way people communicate, the way they buy goods and their socialization has changed. In the last century, this digital revolution has also brought about huge improvements in graphic design. We could never see the composite digital parts of the difficulty that we can presently see before merging programs such as Adobe Photoshop, Quark Express, and Autodesk Maya.
Types of Image Masking In Photoshop
1. Layer Masking
The layer mask is the most common kind of masking in photoshop. We can conceal or disclose parts of the pictures or alter the opacity of the different parts of a picture by masking them. When the opacity of the entire picture changes from the opacity slider of the background panel. This changes the opacity of the entire picture.
The layer mask also enables us to alter the layer visibility. You may invisibly or partly visible any part. This part of the picture is entirely clear when we paint it with black on the mask. In other words, the layer below will be noticeable. For instance, if you paint a gray-sized color based on the percent black that we select for the pen, the picture is partly transparent. The conversion of the surface will be smoother if we pick a smooth brush.
2. Clipping Mask
Clipping masks make the use one layer to discover another layer’s visibility. We want to add the transparency for the cutting mask to the underside of the layer. We can regulate the visibility of the above layer from this lower layer. The conduct of the clipping mask with the layer mask for beginners can appear a lot contradictory. It may appear that the clipping mask in Photoshop works in reverse compared with the layer mask.
In the case of layer masks, we paint the layer pixels in black color on the mask, but we do the opposite to the layer mask. If there are pixels in the lower layer, the top layer will be opaque. The pixels in the upper layer are transparent or invisible if the lower layer is without pixels.
3. Alpha Channel Masking
Each image has various characteristics for the removal of background activities. Therefore, it is necessary to apply distinct techniques. Various pictures involve various methods. Alpha channel masking is a little complex way of doing masking. The two masking kinds above are quite straightforward. However, it is very hard and time consuming to pick regions with brush strokes when we have to mask the hair and furry regions. The use of alpha canal masking techniques will be simpler when the item and environment have enough contrast.
In brief, we use the palate to see which channel offers the most contrast in order to function with this masking technique. If it is the black channel, we create and add value to it to adequately boost the difference. If necessary, we can make it utterly black over the inside of the new blue canal. Then we turn the white to black and the black to white to turn it around. Then we duplicate and paste the stream to the layer register to build a fresh layer.
You can use the instruments to dodge and brute edges (blacken the edge/hair). The top parts may be more colorful. Sometimes with this choice, you can get beautiful outcomes. It is possible to create a duplicate of the region before using the color decontamination process. It’s a devastating method because. This is a short description to offer you a little thought about Alpha Channel masking. Now let’s see why this masking is necessary.
Why Do We Need Image Masking?
Photoshop provides a range of masking methods and options, but the cutting mask is one of the simplest. Clip models can be used to determine a mask with a layer form in one or more parts. Creating cutting masks for shaping a picture into text or for masking variously shaped parts.
Masking is a method that’s not destructive.
We can modify our masks subsequently or when we need them without damaging the original image. However, if we remove the unwanted regions, it is hard to bring them in if the image editing method requires those regions subsequently. The same goes for cutting an item or part of the route on the picture. More adjacent areas cannot be readily included. It can only be feasible with the masking method if we want to conceal a certain region that we have taken out.
1.The simplest use of masking is to hide and show portions of pictures. If we use a very smooth brush or gradient for masking we can have a transition impact. We can sometimes manage the transparencies of a picture’s areas, like a bright sky. Only by touching the region with a dark color can we create a very light sky region dimmer. There are of course other choices to do that, but this is an easier technique that gets you the job done faster.
2. Alterations of an area of an image are quite common. for instance, you want to modify the color of a model’s upper garment. By visibly noticeable, you can create a mask. Any changes you like, such as color adjustment and correction, brightness/comparison adjustment, image correction, etc. can then be applied.
3. The masking technique can also be used to remove the background of translucent objects, such as glass. This can be applied to the background of a tissue sort of muslin or mesh with transparency as well. In addition, a clipping mask can even fine-tune what is visible after masking. At other times, layer masking is just sufficient.
4. Furthermore, we can use the masking technique to create fascinating collage pictures. Collage pictures have infinite options. With multiple pictures and masking, we can produce impressive effects. The transitions are made fluid by using soft pads and gradients of gray.
5. Any method from Photoshop can show your imagination almost endlessly. Sometimes with various Photoshop processes/techniques, you can get the same outcome. What technique is more common or less time consuming, but generates the anticipated yield, depends on you. The choice is up to you. But the masking of images is certainly a helpful and innovative way.
6. Image masking has recently become very famous with filmmakers, developers and e-shoppers ‘ owners due to its effectiveness. We can not only erase the spots, but we can also create pictures natural, fair, honest and lovely. In the sector of image retouching, we have over 50 expert designers and other stuff as well. It has a wide understanding of photo editing since it has been operating for eight years under Clip and Touch.
Easy Way To Do Image Masking In Photoshop (Step By Step Guide)
Maybe you are wanting to know how to mask photos! Now, it’s time to show you the easiest way to learn image masking online. You will get the step by step guideline (with image and video) to learn the photoshop masking techniques. So, let’s jump to the central point below.
1. Open Photoshop to start masking.
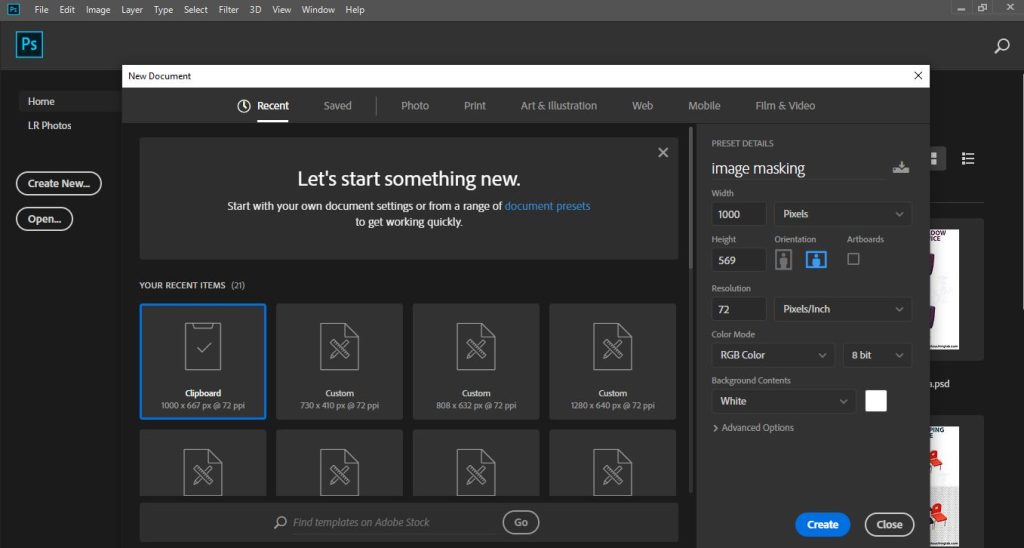
2. Select image from your drive that you want to work with.
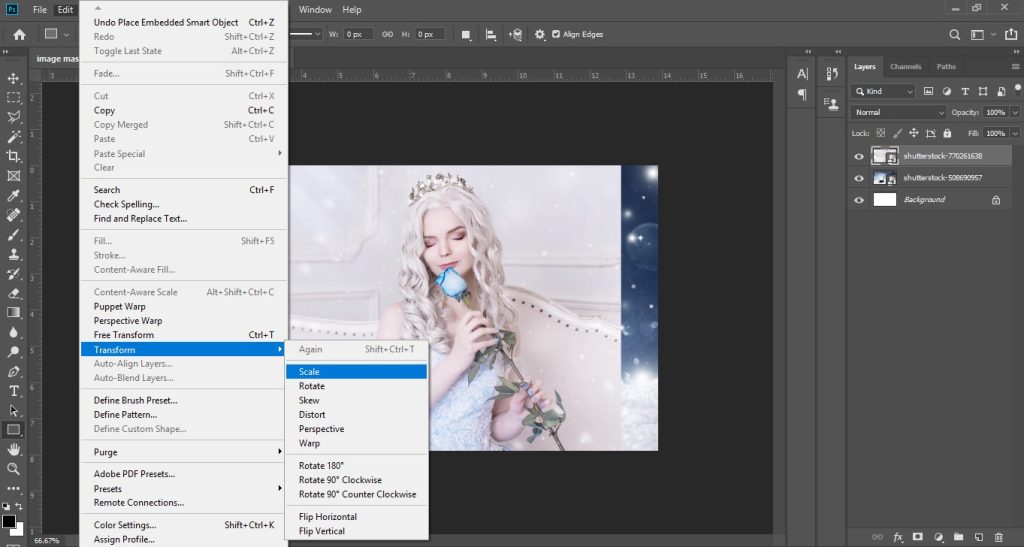
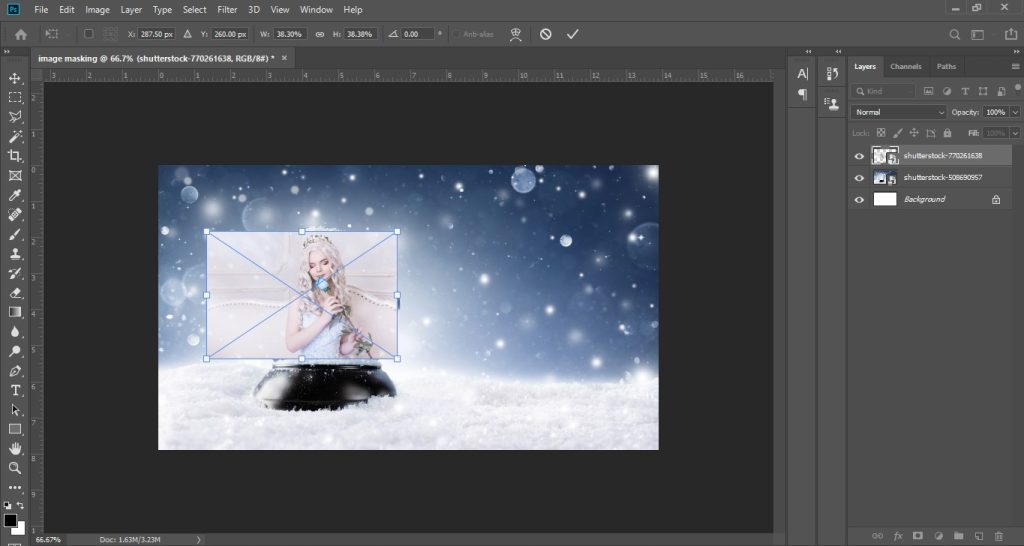
3. Go to edit section.
Then select ‘scale’ option from ‘transform’. With this, you can increase or decrease the size of the image as per your need.
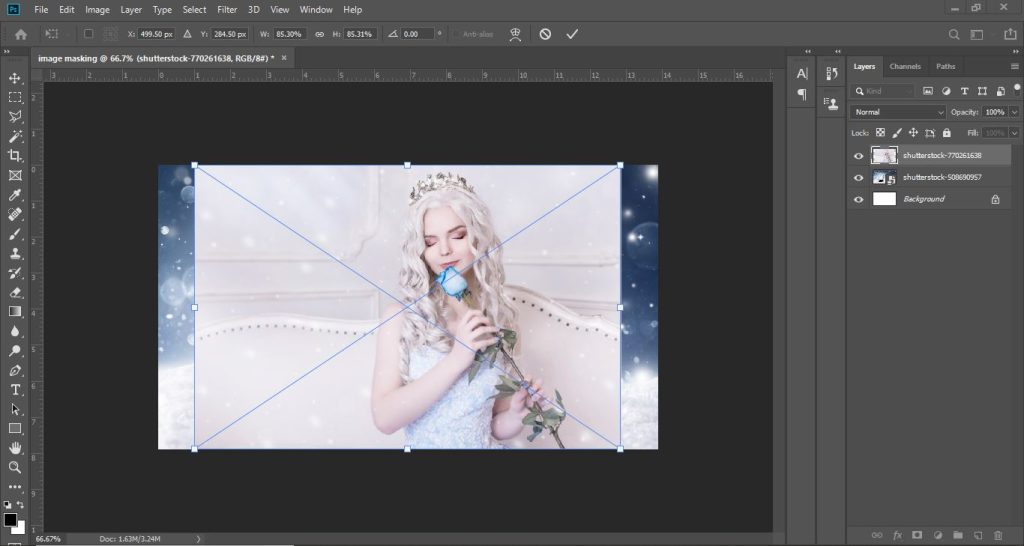
4. Then, place your image to the fixed region.
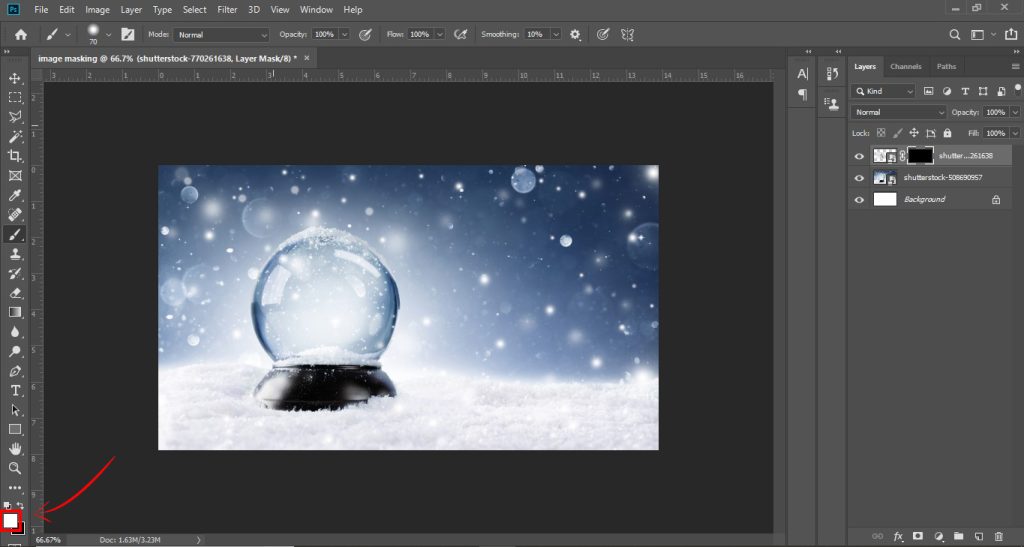
5. As you see in the image, click the Alt+add layer mask(red box below).
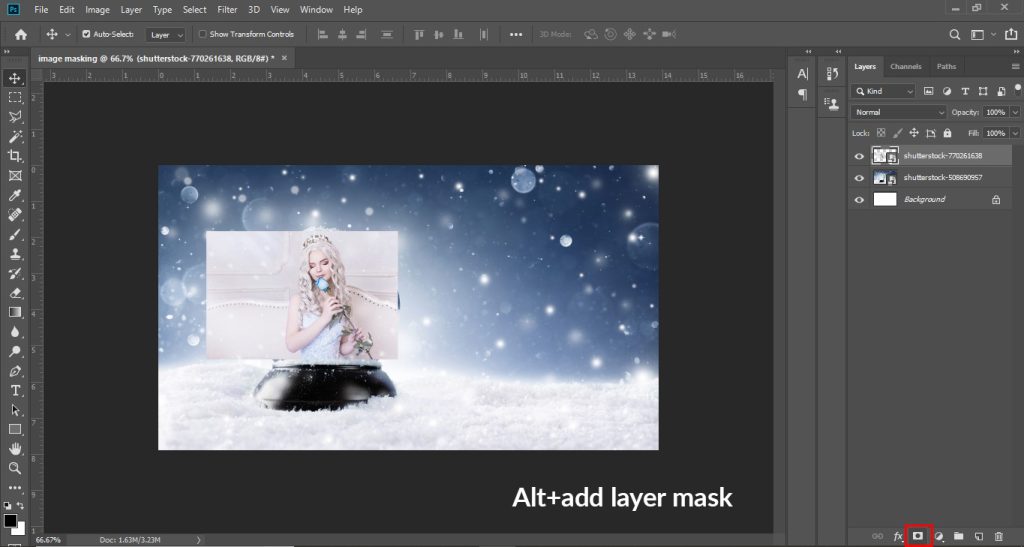
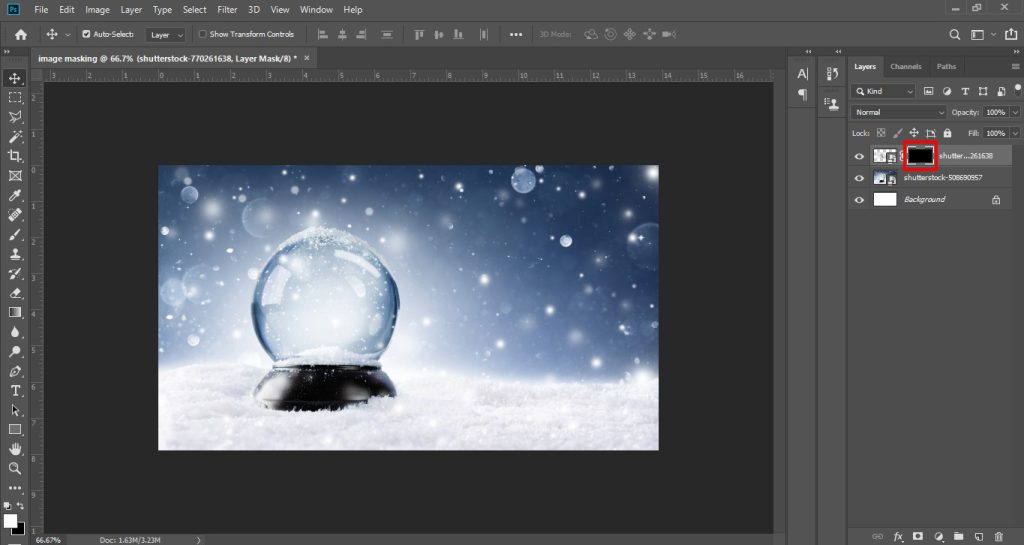
6. Now, create a layer mask to the image.
7. Select the brush tool to start your main task.
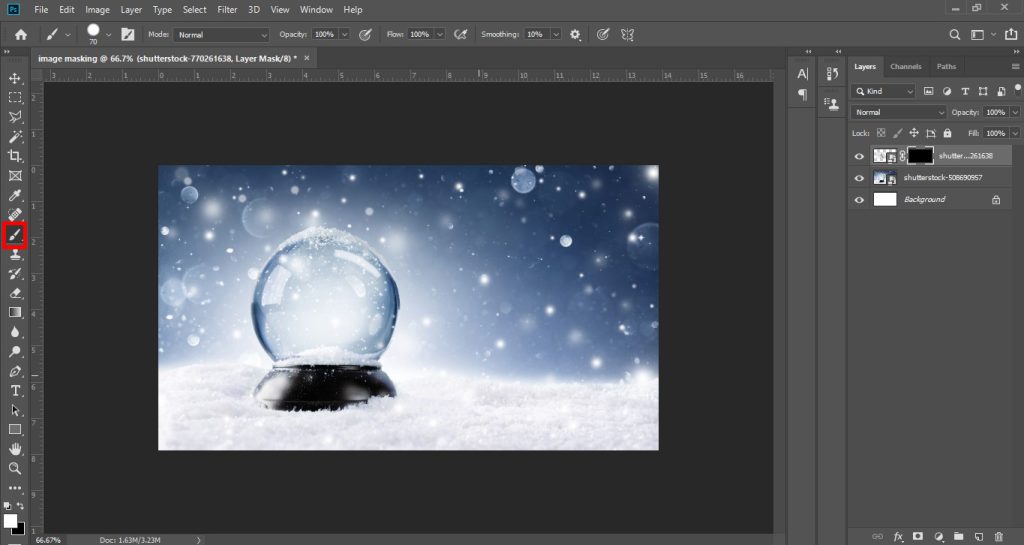
8. Make the hardness 30%.

9. Now, make sure the foreground color palette is white.
10. Click on image randomly.
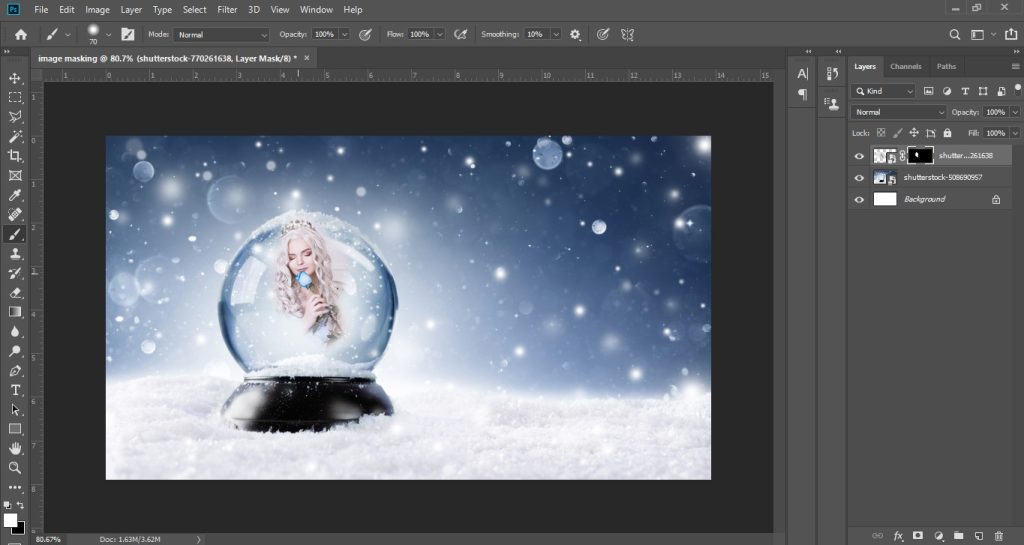
11. Make sure you have selected the masking layer.

12. Now, select the foreground color black.

13. After selecting the brush tool, turn the hardness level to 13%.

14. Select the image layer and masking layer (see the red box).

15. From the option, select ‘merge layers’.

16. Put all the layers in one layer.

Save it after finishing the masking.

Finishing Thought
In this competitive world, if you are to promote your products or be successful at advertising, it is highly likely that you are going to flourish if your image quality is poor. To produce images of high quality and resolution, there is no alternative other than using high technology and image masking is certainly one of the fastest ways to achieve that. Hopefully, the tutorial of our image masking in photoshop will help you to learn the techniques easily.
