
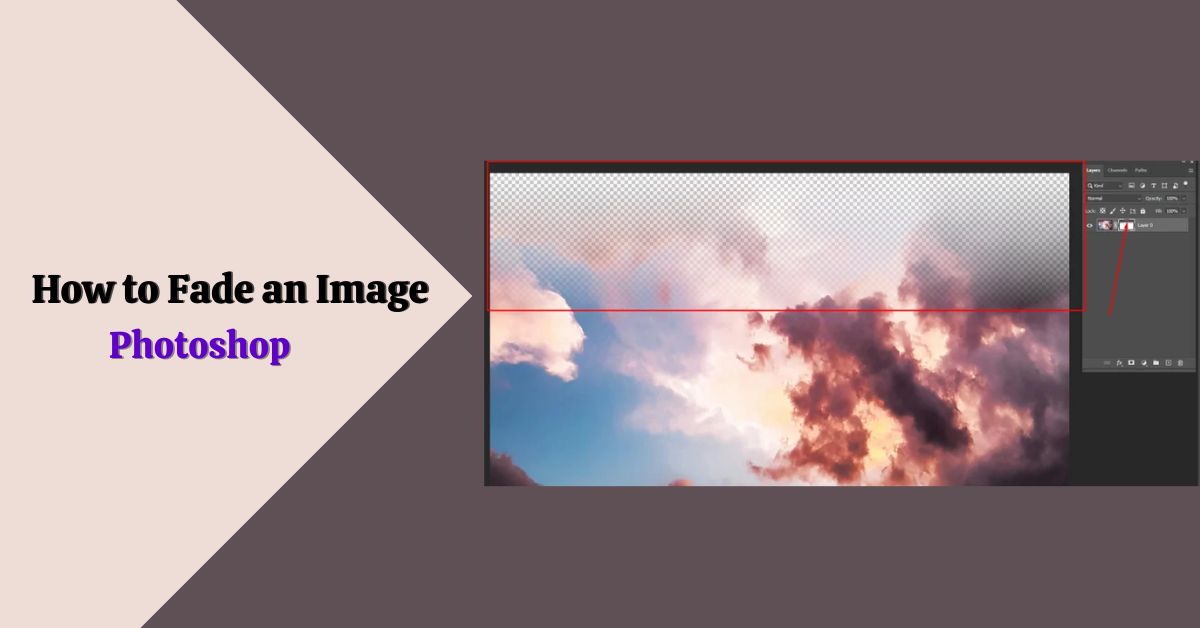
Using the Gradient Editor you can fade an image this way:
- Layer From background
- Add layer mask
- Gradient tool
- Click to edit the gradient
- Basics > Black, White > Ok
- Draw a gradient line from a direction
Learn how to fade an image in Photoshop in detail from all the concise instructions provided below.
If You Want to Fade the Top of an Image in Photoshop
Now, you will see how the steps listed at the beginning work. Specially, you will see how to make the top side of your image fade.
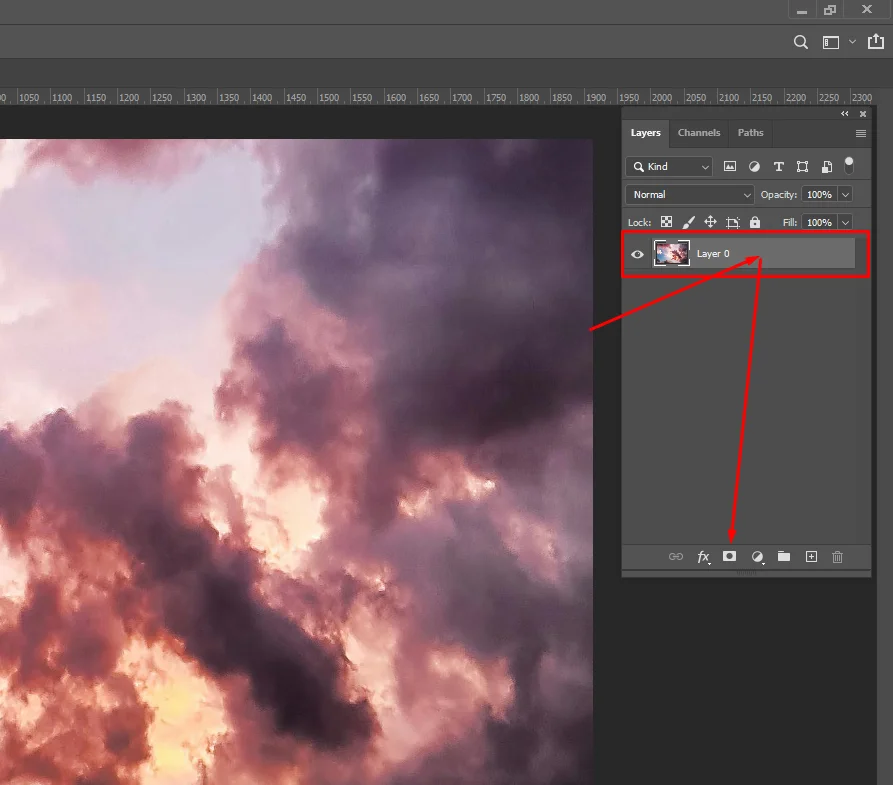
Step 1:
First, make sure your image is in the LAYER not in the background. Next, ADD LAYER MASK to the current layer.
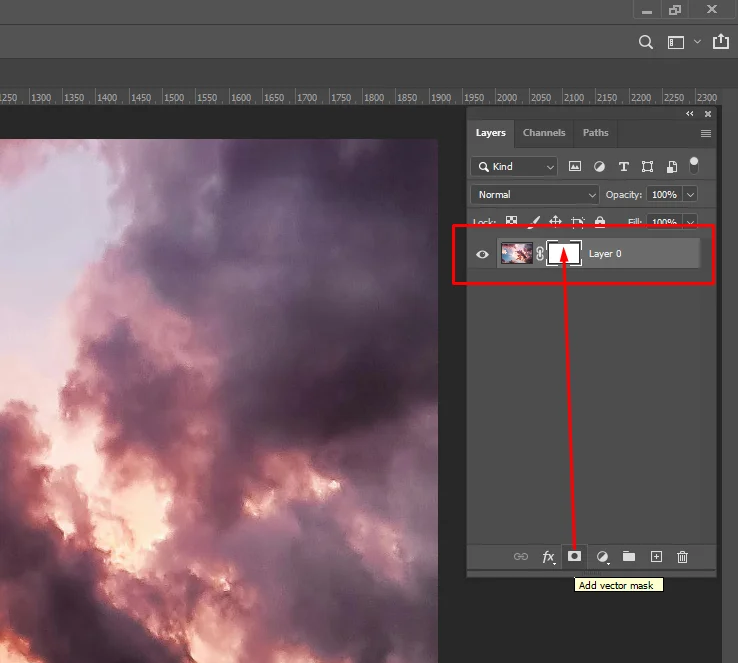
Once you add a layer mask you should see this:
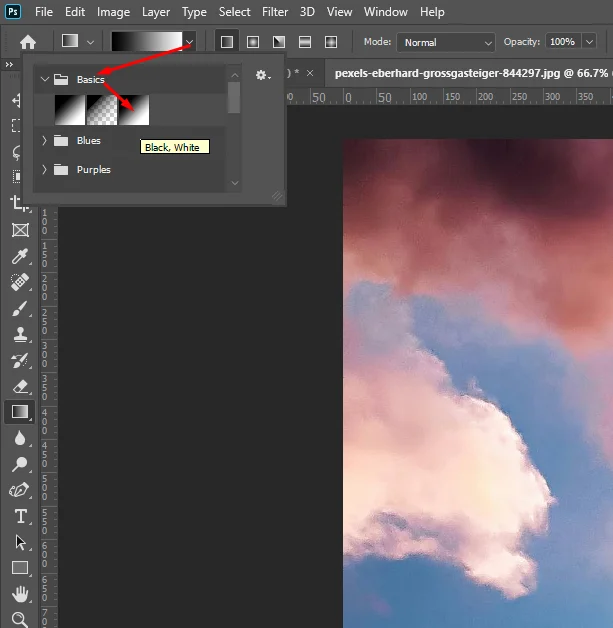
Step 2:
Keep the LAYER MASK selected only, then select GRADIENT TOOL from the left-hand side. Next, click on the gradient editor indicated at the top bar.
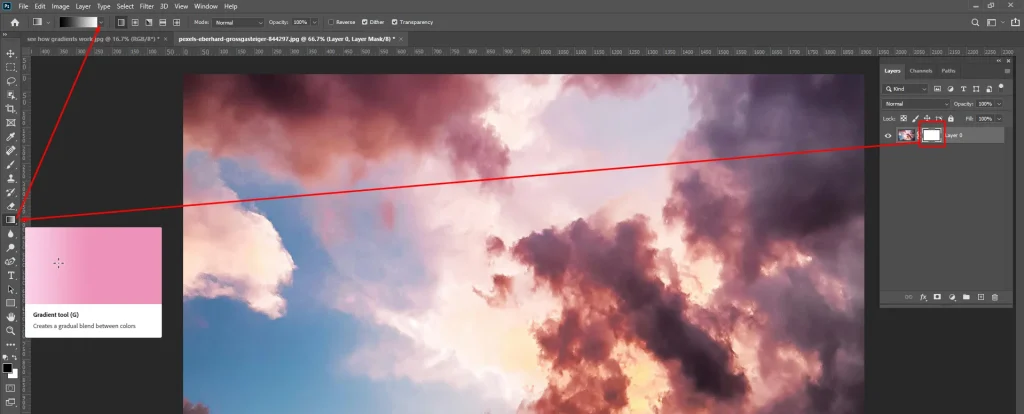
Now, select the type of gradient you need. So, we need here- Black, White. Select that box and double-click or hit ENTER.
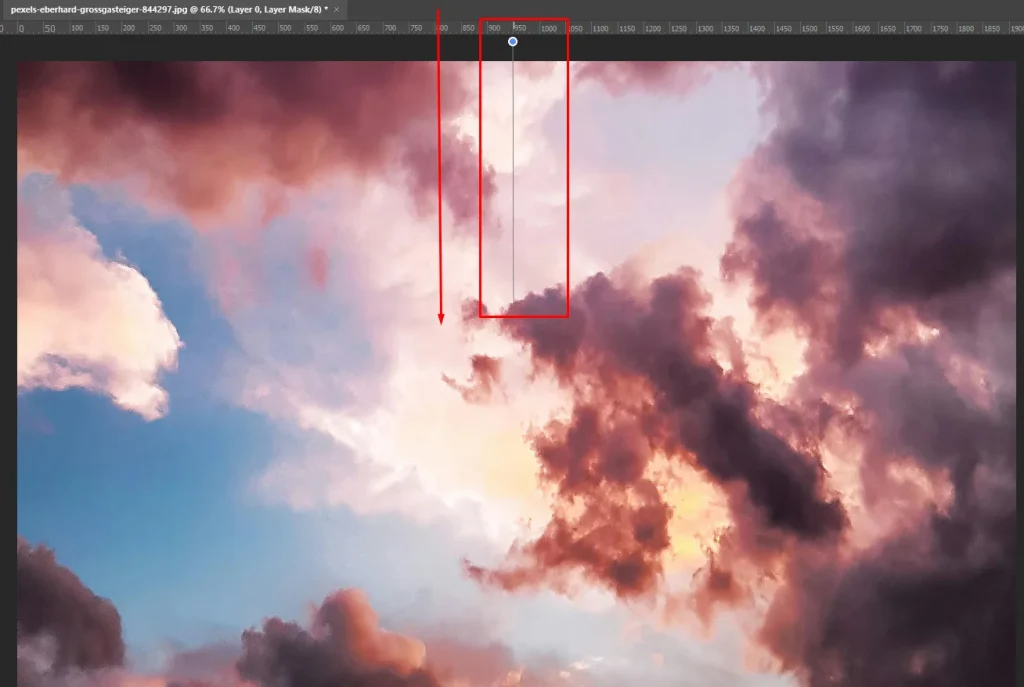
Step 3:
Now, draw a gradient line from the top as the arrow directs you in this image:
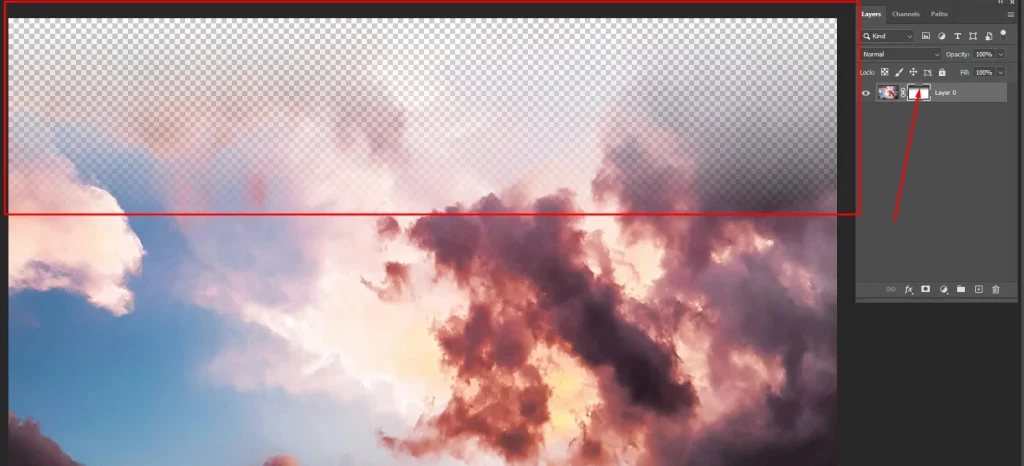
Finally, you will see something like this:
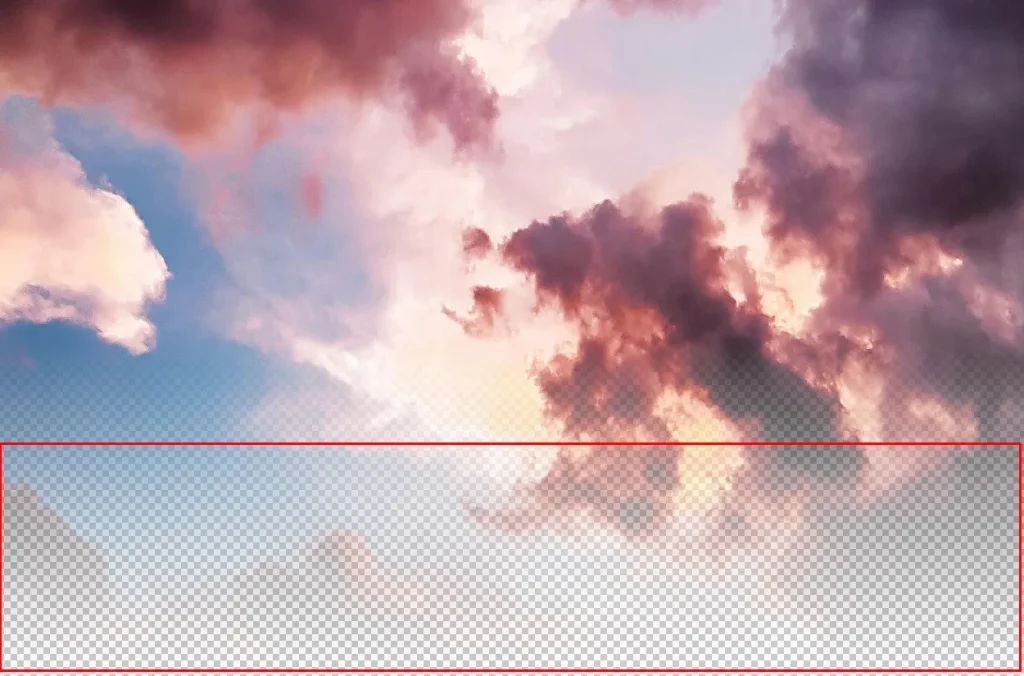
After that, SAVE your file as a JPEG or JPG file. You will see the photo like this:

Do You Need to Fade the Bottom of an Image in Photoshop?
The process is the same, as fading the top of an image. So, your steps will be:
- Layer From background
- Add layer mask
- Gradient tool
- Click to edit the gradient
- Basics > Black, White > Ok
- Draw a gradient line from bottom to top.
Final result:

You might need to learn to fade the outside of an image in Photoshop. Sometimes people look for methods to fade the corners of an image in Photoshop. Outside, Corners, or Edges– you fade it the same way. Find the technique below.
Learn Fading the EDGES of an Image in Photoshop—
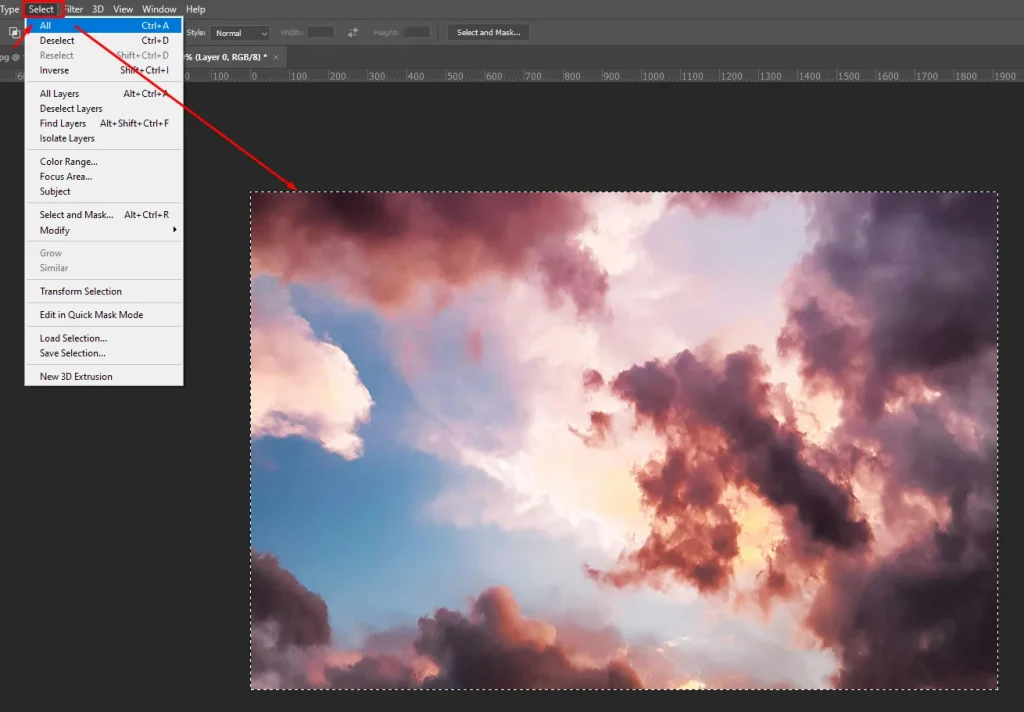
Open an image and SELECT all of it.
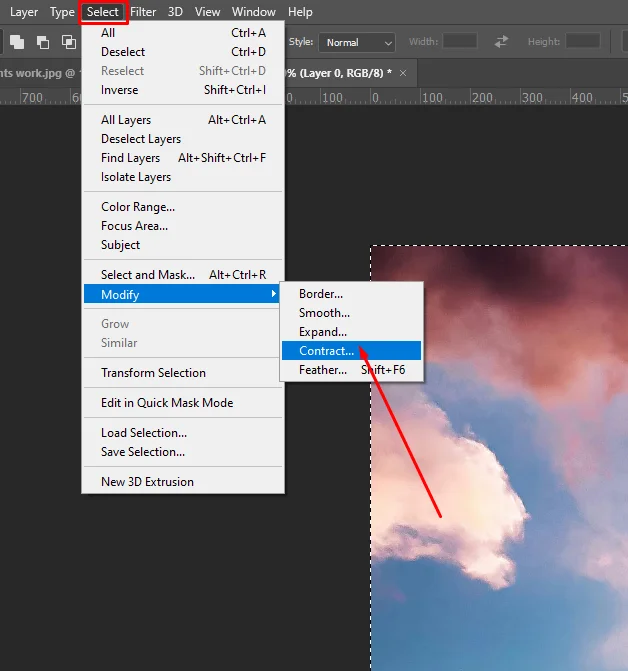
Next, find CONTRACT: Select > Modify > Contact. Click on it and you will get a small CONTRACT SELECTION box.
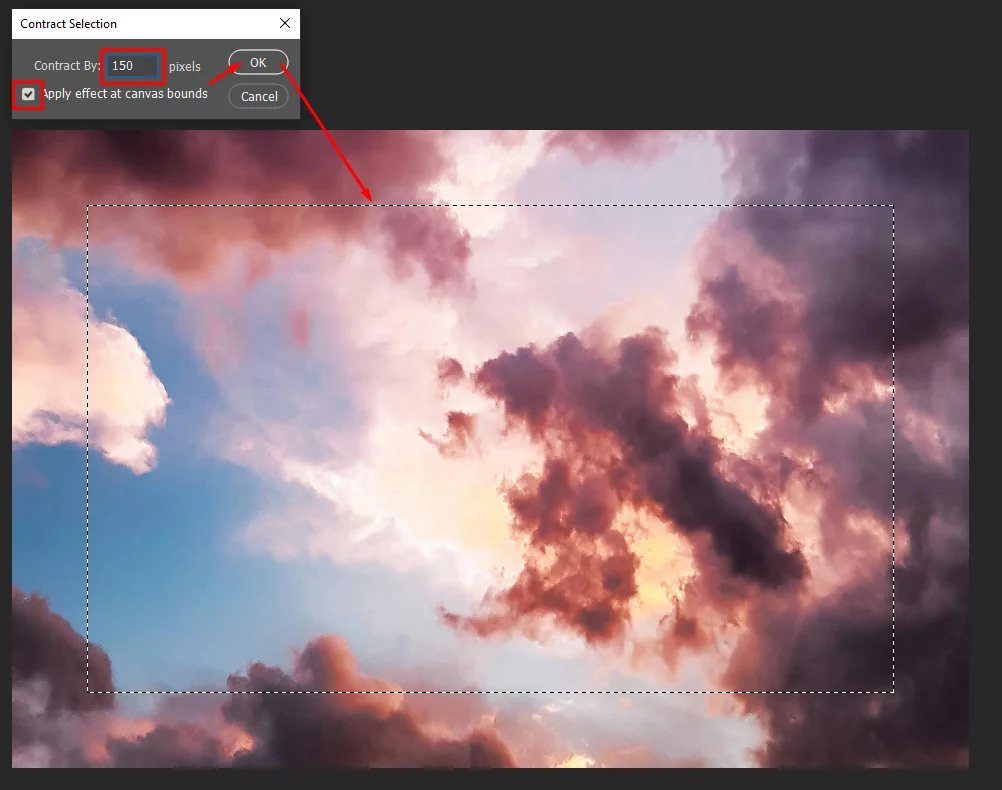
Set the contract accordingly. Here, for example– it’s 150 but it could be higher or lower for your image. So, you must decide that based on the final result you are aiming for.
Once you set it you will notice a box created on your picture.
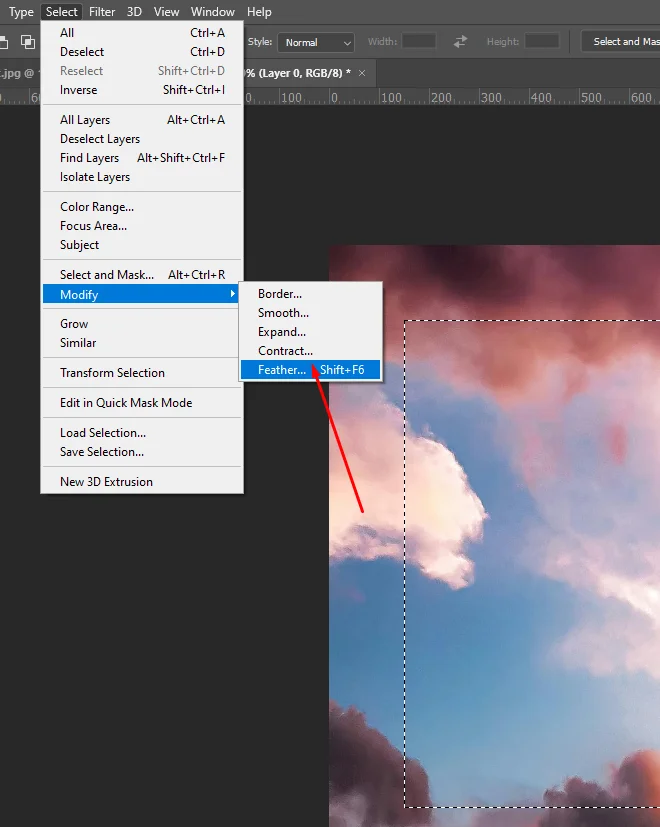
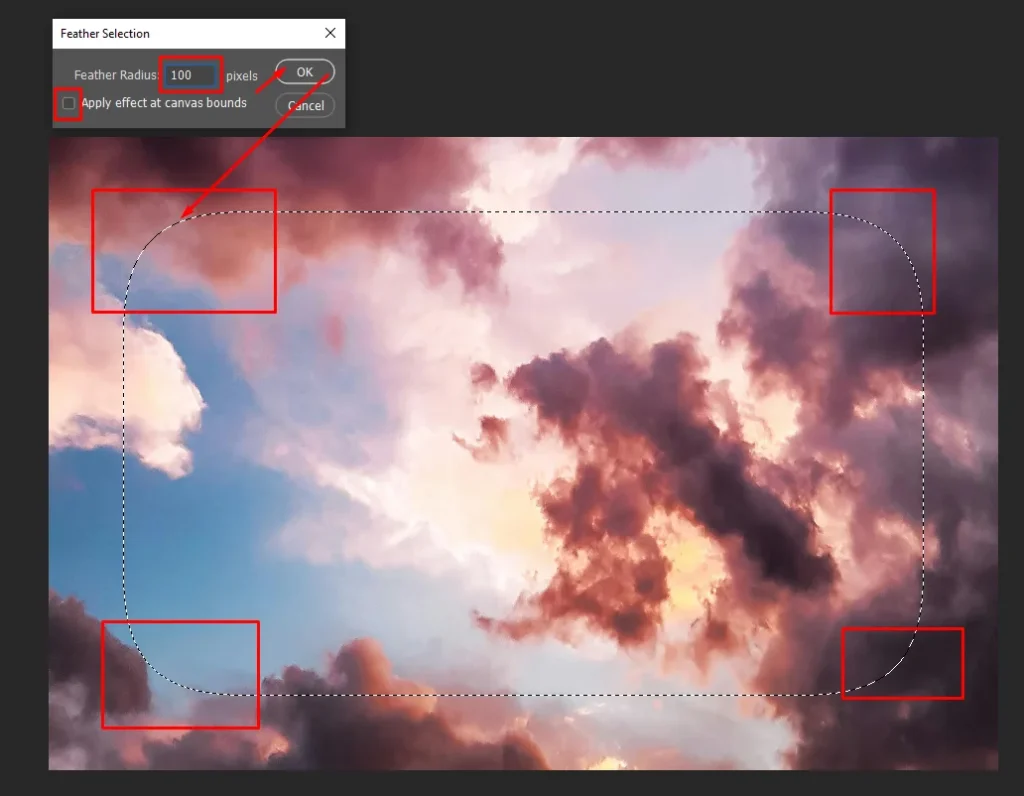
Next, you have to set FEATHER. Find it this way: Select > Modify > Feather. Then, click on it and a FEATHER SELECTION box will come up.
Just like setting CONTRACT, you need to set feathers accordingly. Once you hit OK, you will see the corner of the box bending.
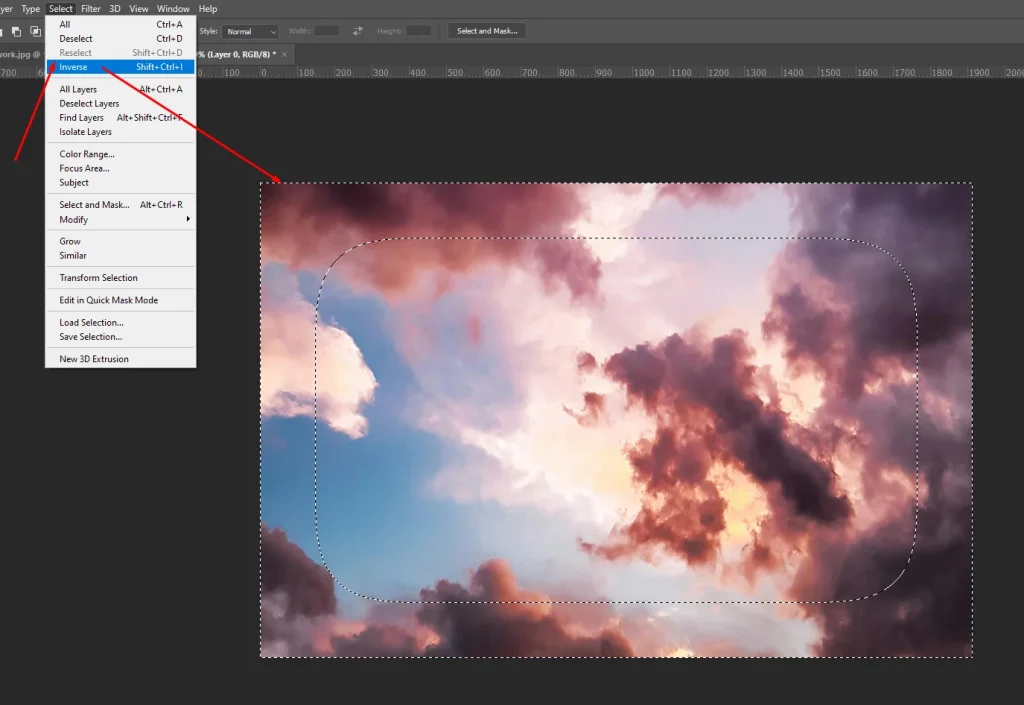
Now, you INVERSE the selections: Select > Inverse. Once you click on the inverse there’ll be a new selection box at the edges like this:
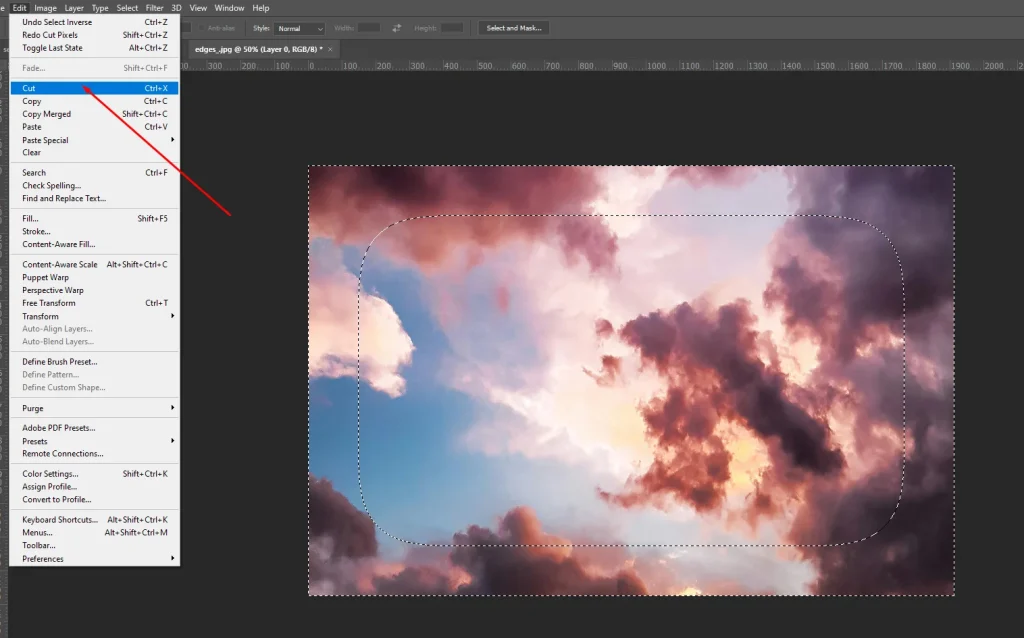
Now, you need to CUT the selection: Edit > Cut. Or you can just press DELETE on your keyboard.
After cutting you will see this:
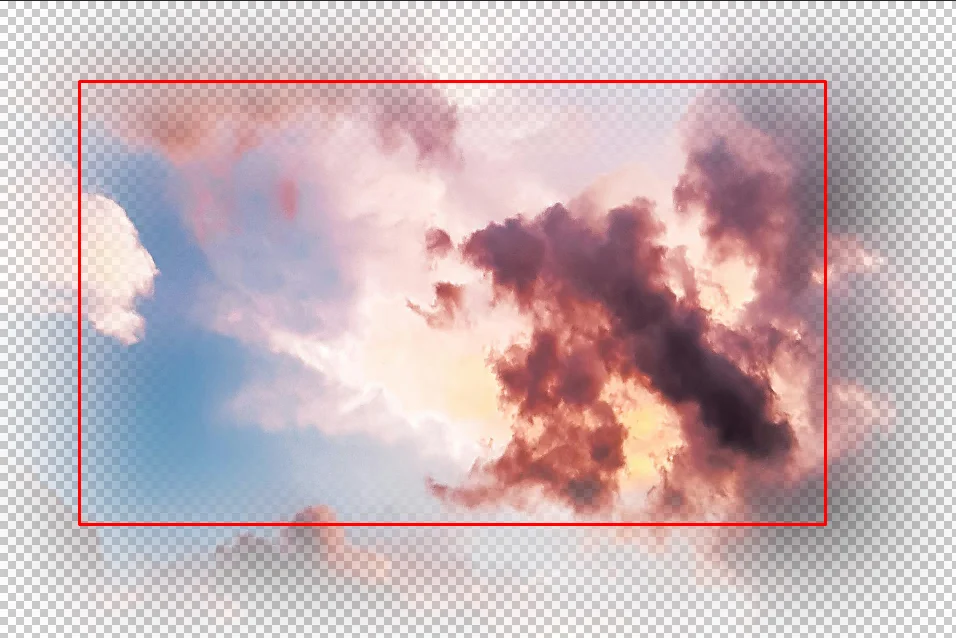
SAVE your file, JPG or PNG. You will see the edges faded:

Final Remarks on Fading Part of an Image in Photoshop
Learning how to fade parts of an image in Photoshop can truly level up your editing game. Whether you want to fade the top, bottom, or edges of a picture, the steps outlined here give you a solid foundation to achieve that smoothly.
By following these instructions, you can blend different parts of your images seamlessly, creating mindblowing effects. And if you prefer learning visually, there’s a video tutorial included to help you out even more.
Just like with anything, practice is key. Feel free to play around with different settings and techniques to see what works best for you. And if you found this guide useful, we’ve got plenty more editing tips on our blog for you to check out.
Don’t forget to drop a comment below to let us know how it went, and keep honing your skills by practicing regularly.
