
To change clothes in Photoshop, follow these steps:
- 1. Duplicate the background layer.
- 2. Use the Lasso Tool to select the new clothing design.
- Make “Layer 1” for the new design/part
- Initially, adjust the design
- Set a “Feather Radius” in “Background Copy” and “Path 2”
- Create “Layer 2” & place new design on “Path 2”
- Send the “Layer 1” backward
- Again, bring the “Layer 1” forward
- “Create a Clipping Mask” for “Layer 1”
- Resize “Layer 1”
- Mark unwanted parts of previous clothing with “Pen Tool”
- Erase parts with the “Clone Stamp Tool”
By following these steps, you can seamlessly change clothes in Photoshop.
Put your newfound skills to the test with our hands-on tutorial. Follow along and practice changing clothes in Photoshop to refine your techniques and unleash your creativity.
Simplest Method to Change Clothes in Photoshop
Explore the simplest technique for changing clothes in Photoshop, suitable for various garment editing needs.
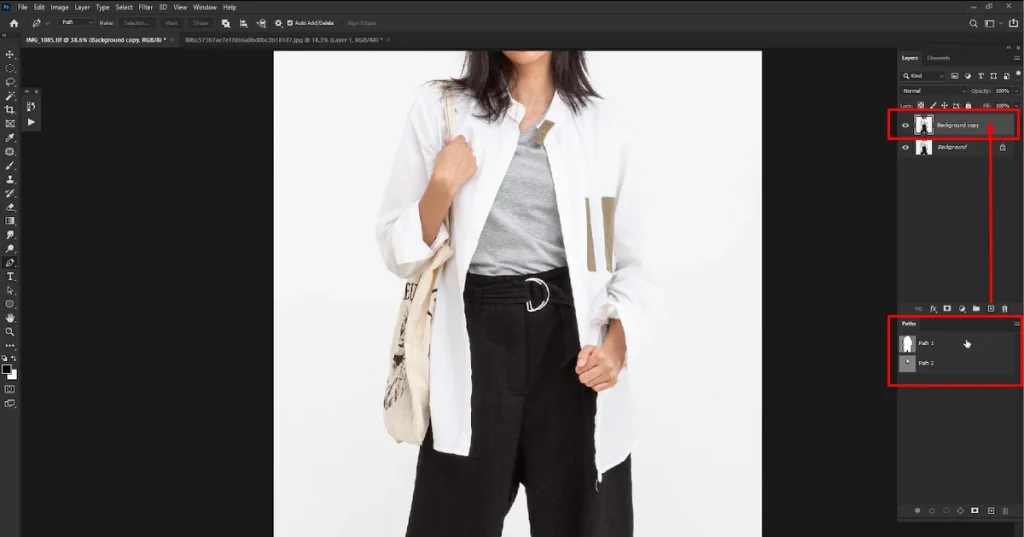
Step 1: Create a Background Copy
Preserve the integrity of your original image by creating a duplicate “Background Copy” layer before making any edits. This ensures that you can always revert to the original if needed.
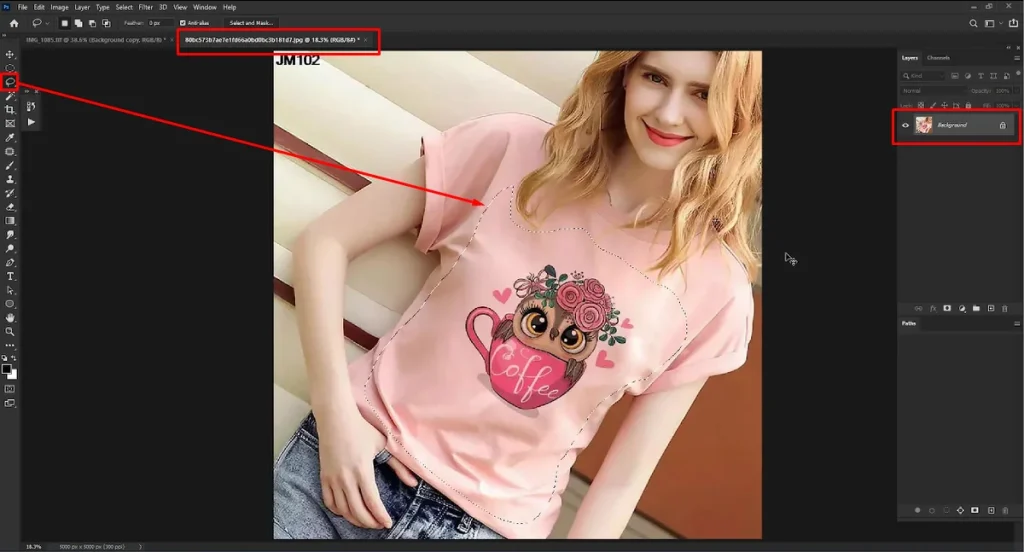
Step 2: Utilize the Lasso Tool
Open the image you want to replace in another tab.
Select the “Lasso Tool” to precisely outline and cut out the new garment design from its background. Take your time to ensure an accurate selection for seamless integration into the main image.
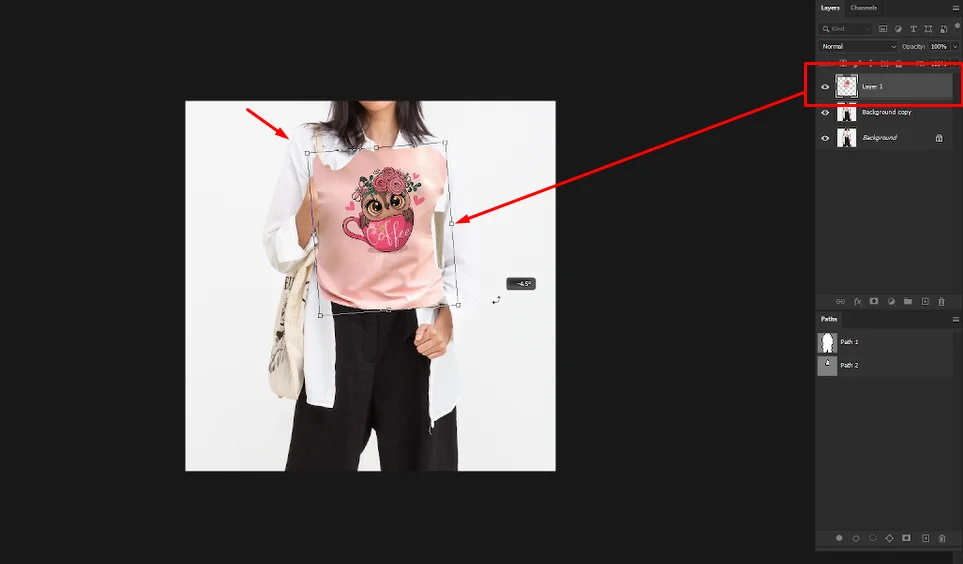
Step 3: Create Layer 1
After cutting make “Layer 1” for the new part only.
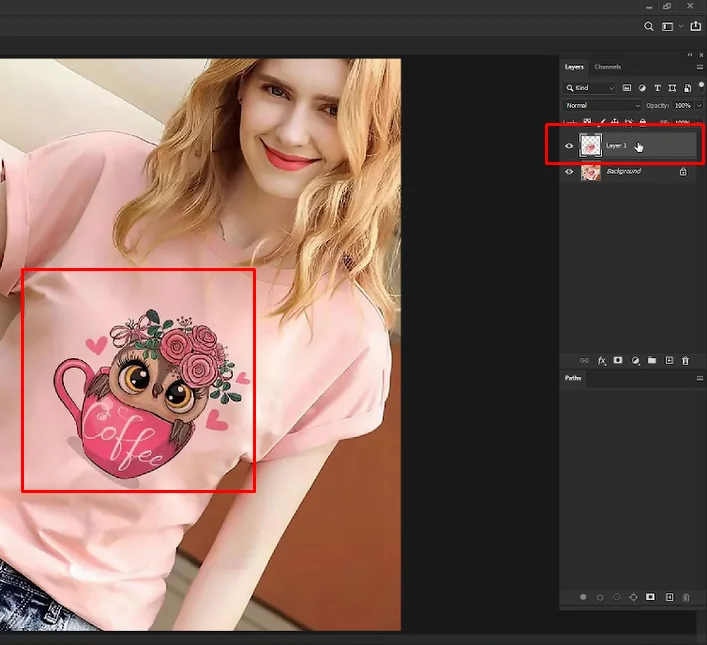
Step 4: Bring that Layer 1
Bring that “Layer 1” on the main image and adjust the size to combine properly.
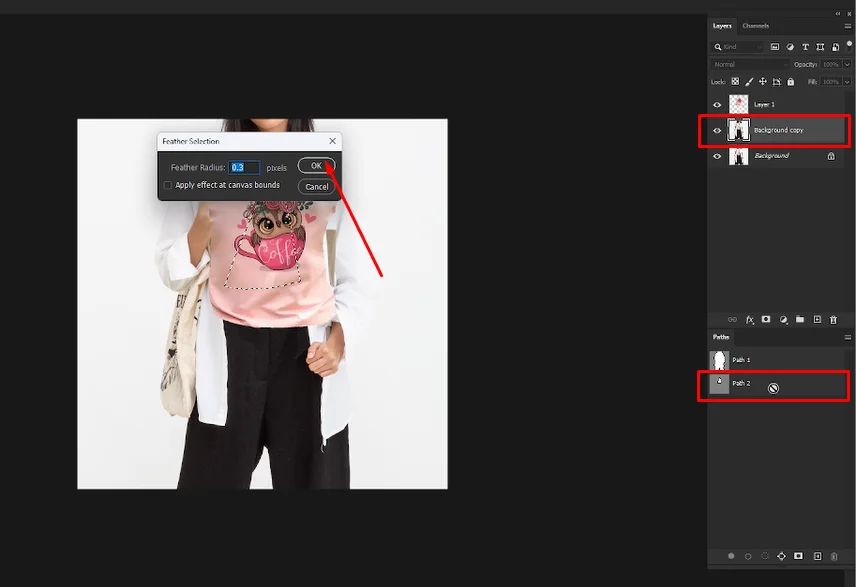
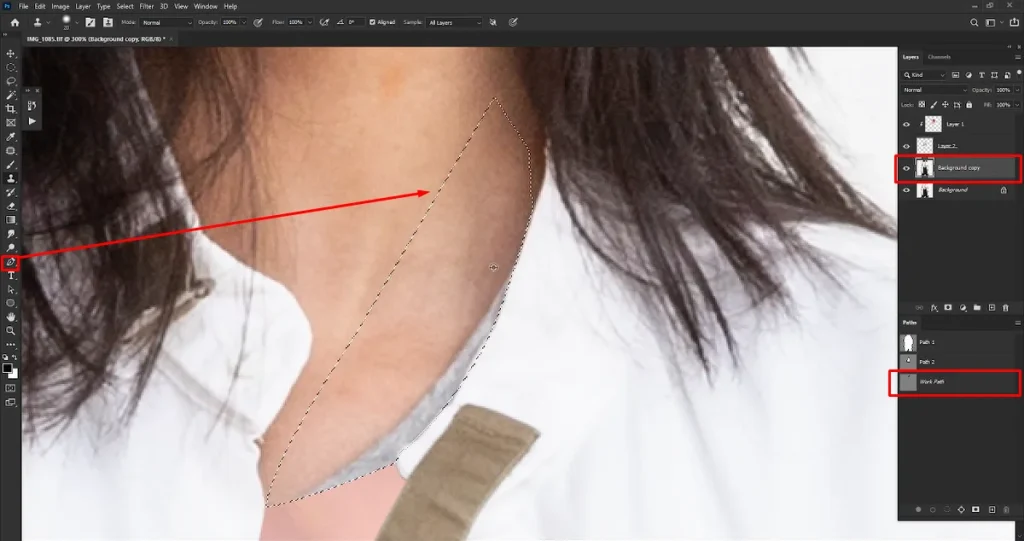
Step 5: Select Background Copy
Select “Background Copy” and put the necessary “Feather Radius” for “Path 2”
Step 6: Create Layer 2
Create “Layer 2” and place that new part above “Path 2”.

Step 7: Next, send the Layer 1 backward.
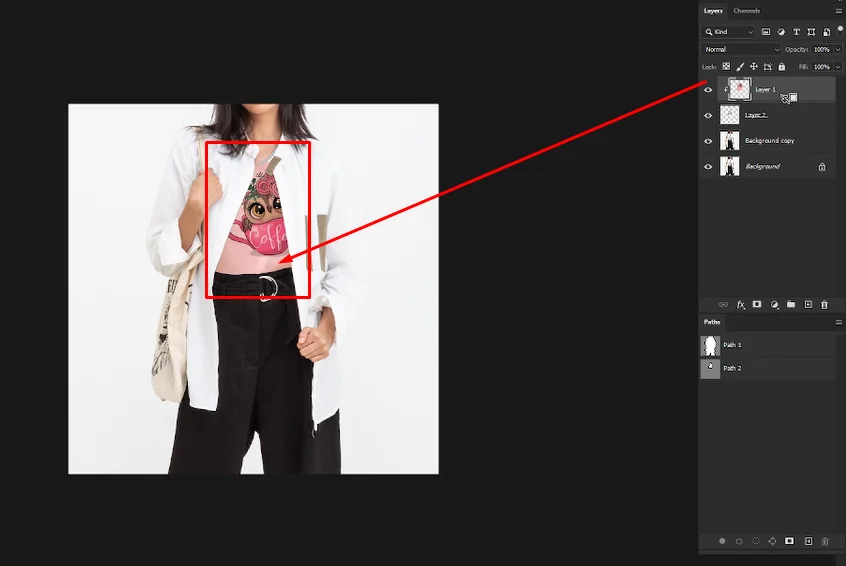
Step 8: Select Layer 1 again and bring it forward.

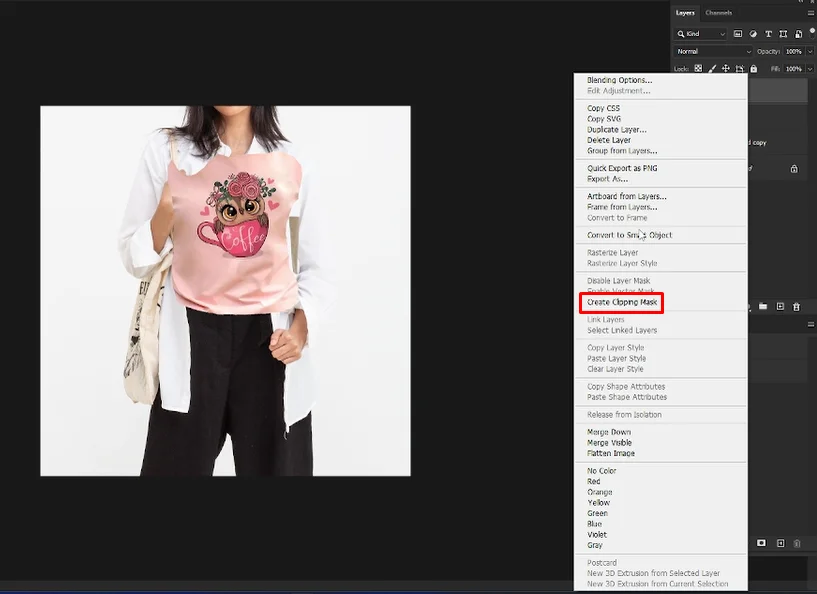
Step 9: Create a Clipping Mask for Layer 1.
Create a “Clipping Mask” to confine the new garment design within the boundaries of the underlying image. This ensures that the garment conforms to the contours and perspective of the original image for a realistic appearance.
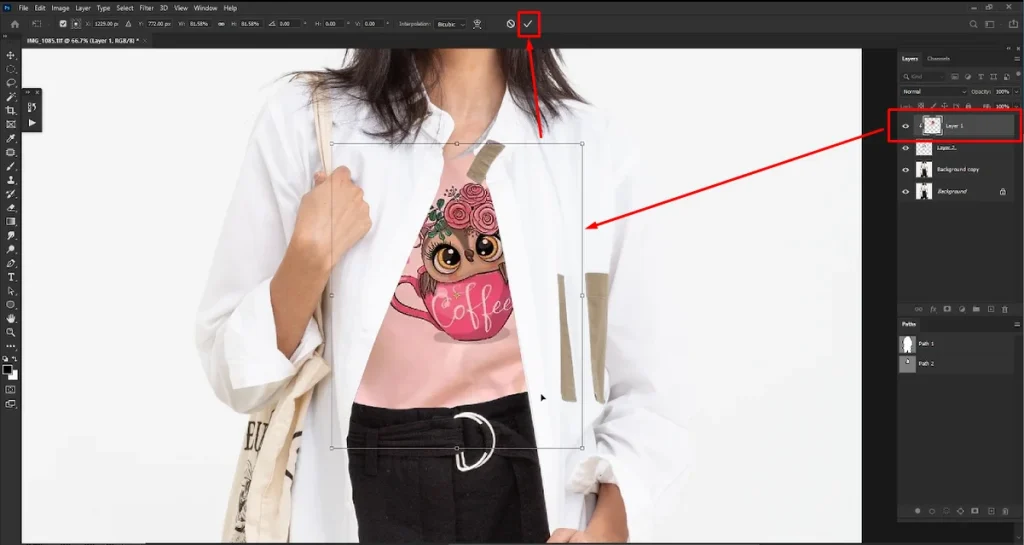
Step 10: Resize Layer 1
Resize “Layer 1” and click on the tick mark to set it on the main image.
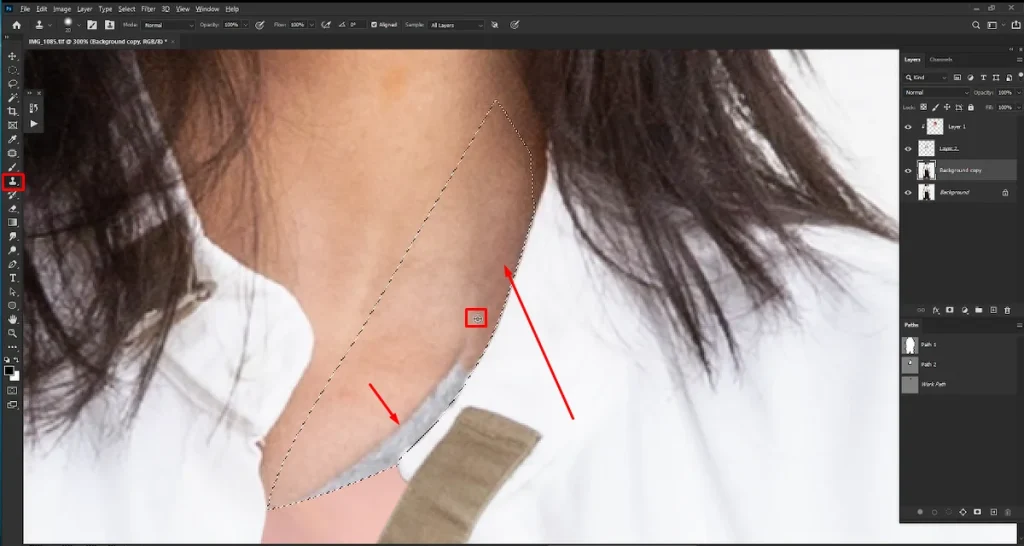
Step 11: Do basic essential touch-ups
Essential touch-ups like erasing any visible part of the previous design or garment part.
Select “Pen Tool” and mark the unwanted areas.
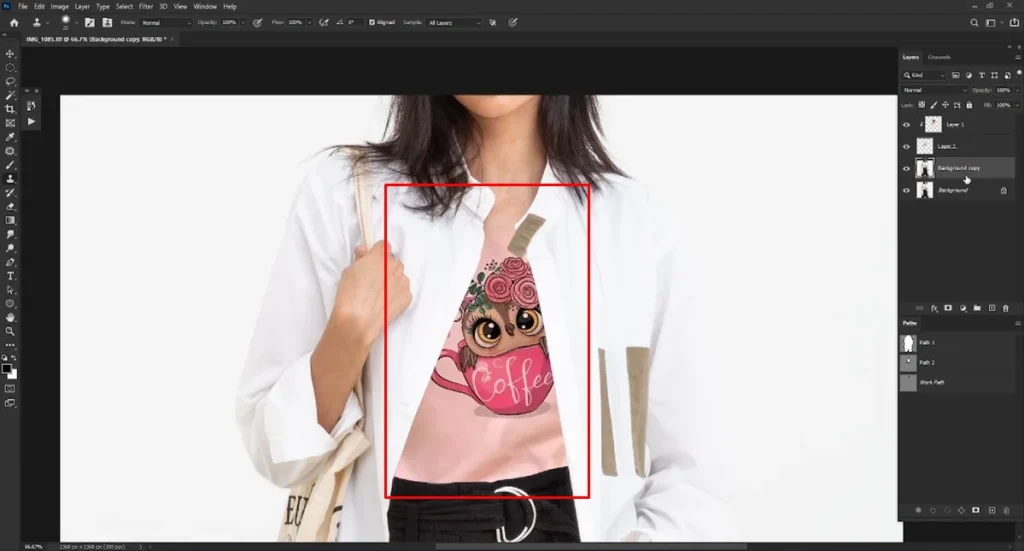
Step 12: Select Clone Stamp Tool
Select “Clone Stamp Tool” and erase the visible lower layer.
The final image:
Get suggestions on editing the cloth nicely in the next section and do it like an expert.
Make it Look Professional: Expert Tips to Change Clothing in Photoshop
The steps you have seen so far mainly focus on replacing the new garment. But you must refine the image for a nice look.
Check out these tips:
Modify Colors with Vibrance
Use the Vibrance tool in Photoshop to make them pop without oversaturating the rest. It’s like giving your garment a color boost while keeping things natural.
Fix Colors with Levels
Sometimes, your garment’s colors might not look quite right. That’s where Levels comes in handy. It helps you tweak brightness, contrast, and colors precisely to make your garment look beautiful.
Keep Edits Neat with Clipping Masks
Don’t want your color adjustments to mess up the whole picture? Use a Clipping Mask. It’s like putting a neat frame around your garment edits, making sure they stay within bounds.
Add Realistic Shadows
To make your garment look like it’s really there, try adding shadows. Just paint them on a separate layer beneath or around your garment. It’s a simple trick that adds depth and realism to your edits.
Conclusion:
With our comprehensive guide and expert tips, you’re well-equipped to master the art of changing clothes in Photoshop like a pro. Whether you’re editing for personal projects or professional clients, these techniques will help you achieve flawless garment edits every time.
