

Post-processing is an important part of photography. It’s where you improve details, adjust the composition, and make your photos more eye-catchy. But, it’s easy to make mistakes that can spoil even great pictures.
As a professional retoucher at Image Retouching Lab, I’ve worked on thousands of photos and seen almost every mistake. The good news is that these mistakes can be avoided with the right knowledge and skills. In this post, I’ll share 17 common mistakes in post-processing and show you how to avoid them.

Mistake 1: Over-Saturation

It’s easy to get carried away with boosting colors, but over-saturating your images can leave you with unnatural hues.
While vibrant colors can make a photo pop, too much can have the opposite effect – creating a jarring, unrealistic feel.
How to Fix It:
The key is balance. Just like seasoning a dish, too much saturation can spoil the flavor.
Adjust the saturation and vibrance carefully, paying special attention to delicate areas like skin tones.
Fine-tune with selective adjustment tools in Adobe Lightroom or Photoshop for precise control.
Many of our clients send us photos to avoid this kind mistake. Besides, projects demanding high-volume or complex edits require precision, expertise, and significant time investment. Consider outsourcing professional editing services from Image Retouching Lab.
Mistake 2: Over-Sharpening

Sharpening is crucial for bringing out the finer details, but too much of it can create unsightly halos around edges, giving your photo a digital “plastic” look.
Over-sharpening can also introduce unwanted noise, making your image appear gritty rather than crisp.
How to Fix It:
Sharpen selectively, focusing on areas that matter most, like eyes or textures.
Ever tried the High Pass filter in Photoshop?
It gives you the control to sharpen without losing the essence of the image, ensuring a natural yet detailed result.
Mistake 3: Noise Reduction

Noise reduction can smooth out grainy areas, but overuse can leave you with a flat, lifeless image.
It’s the classic case of “less is more.” In low light, this pitfall is all too common.
How to Fix It:
Apply noise reduction like a sculptor chiseling a statue – carefully and selectively.
Use Lightroom’s Luminance slider or Photoshop’s Reduce Noise filter to smooth out the background, while keeping your subject sharp and detailed.
Mistake 4: Ignoring the Histogram

Ignoring the histogram is like driving without a rearview mirror – you’re bound to miss important details.
If you don’t monitor your exposure, you could end up with overexposed highlights or underexposed shadows, leaving your photo in the dark.
How to Fix It:
Check the histogram regularly throughout your editing process.
Strive for balance, making sure you avoid clipping in the highlights or shadows.
Your goal should always be a harmonious tonal distribution.
Mistake 5: Using Presets Without Customization

Presets are convenient but rarely satisfying in the long run.
They can be a great starting point, but relying too heavily on them leads to one-size-fits-all edits that don’t take your photo’s unique character into account.
How to Fix It:
Instead of relying on presets as a shortcut, use them as a springboard.
Adjust exposure, contrast, and white balance after applying the preset to ensure the result matches your photo’s unique vibe.
Mistake 6: Over-Retouched Skin or Portraits

The temptation to smooth skin to perfection is strong, but too much retouching can make portraits look, well, fake.
It’s like trying to fit a square peg in a round hole – it just doesn’t look natural.
How to Fix It:
Think of retouching as a delicate touch rather than a heavy hand.
Techniques like frequency separation allow you to smooth skin while preserving its texture.
Embrace natural features, as over-smoothing will often rob a photo of its authenticity.
This is true not only for portraits but also for product shots.
Mistake 7: Underexposing or Overexposing

Exposure adjustments are vital, but when taken too far, they can tip the scale – either losing detail in shadows with underexposure or washing out highlights with overexposure.
How to Fix It:
Like balancing a tightrope, adjust exposure with a steady hand.
Use Lightroom’s graduated filter or Photoshop’s curves for subtle, gradual changes. Subtlety is key to maintaining a balanced tonal range.
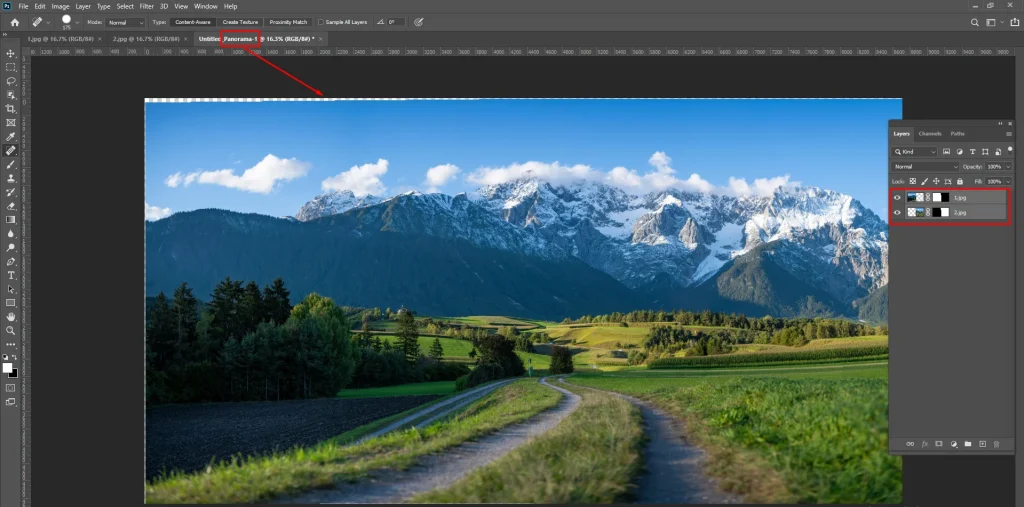
Mistake 8: Forgetting to Use Layers

Working directly on the image is like carving into stone – you risk losing everything if you make a mistake.
Non-destructive editing is where flexibility meets precision.
How to Fix It:
Embrace layers and masks in Photoshop or use Lightroom’s adjustment layers.
This method keeps your options open, allowing you to make changes and refine your edits later, without worrying about ruining the original image.
Mistake 9: Using Too Much Contrast

While contrast can make a photo stand out, going overboard can create harsh edges and tonal extremes, making your image look more like a harsh painting than a photograph.
How to Fix It:
Contrast, like salt, should be used sparingly.
Apply contrast adjustments with care, using Photoshop or Lightroom Tone Curve for more control.
A gradual, less aggressive approach avoids the “blow-your-eyes-out” effect.
Mistake 10: Clipping Highlights and Shadows

Clipping results in areas with no detail – pure white or pure black. These clipped areas leave your photo lacking texture and depth.
How to Fix It:
Pay close attention to the highlights and shadows sliders.
Make slight adjustments to exposure or contrast to keep details in check.
Always aim for a balanced tonal range to avoid those unforgiving white and black spots.
Mistake 11. Not Using Masking Properly

Masking is your secret weapon for targeted edits. You don’t want to use it? You might end up changing the whole image when only certain areas need tweaking.
How to Fix It:
Master masking – it’s not just for pros.
By applying adjustments only where needed, you maintain control and precision in your edits.
It’s like putting on makeup – focus on the spots that need it, not the whole face.
Mistake 12. Wrong White Balance

Incorrect white balance can turn your photo into a color nightmare, creating unnatural warm or cool casts that make your image look off-balance.
How to Fix It:
Adjust the white balance to match the lighting conditions of your shoot.
Use the eyedropper tool to click on neutral areas for more accurate results.
Mistake 13: Not Cropping Your Image Correctly
Cropping is essential for removing distractions, improving composition, and directing focus.
Failing to crop properly can leave unwanted elements or poor framing that diminishes the impact of your image.
How to Fix It:
Approach cropping with intention — imagine your frame as a canvas, and cut out only what distracts from the main subject.
In Photoshop, use the Crop Tool with a specific aspect ratio or rule of thirds overlay to enhance composition.
In Lightroom, the Crop Overlay also provides guides for balanced framing.
Always aim for a purposeful crop that enhances storytelling and visual appeal without sacrificing essential elements.
Mistake 14: Incorrect Resizing
Resizing images after cropping without considering the final use can lead to pixelation, distortion, or incorrect aspect ratios, reducing the quality of your photo.
How to Fix It:
Resize thoughtfully, keeping the final output in mind.
Use the Image Size dialog in Photoshop to resize without distortion, ensuring “Resample” is checked for upscaling or downscaling.
Maintain sharpness by applying a slight “Unsharp Mask” filter if resizing affects clarity.
For web usage, choose resolutions that balance file size and quality, such as 72 DPI, while for print, stick to at least 300 DPI to preserve detail.
Mistake 15. Failing to Backup Your Work
Imagine spending hours editing only to lose everything with one wrong click. It’s a nightmare every photographer dreads.
How to Fix It:
Save your work in multiple versions as you go. It’s better to be safe than sorry.
Having backups means you can always return to a previous version if you need to, giving you peace of mind.
Mistake 16. Neglecting Final Review
From my experiences, without the final check there will be small errors that may go unnoticed before you publish a photo or send the edited photo to your client.
How to Fix It:
Take a step back.
Review your work with fresh eyes and zoom in to inspect the finer details.
Just like proofreading a paper, this last step ensures everything is perfect before you call it quits.
Mistake 17: Inconsistency Issue
Imagine a product catalog where each item has different tones, lighting, and levels of contrast – it confuses viewers, disrupts visual harmony, and lowers the overall professionalism of your work. Consistency is crucial in building a brand’s image, ensuring your photography delivers a cohesive and polished look.
How to Fix It:
Establish a consistent approach to color grading, contrast, and other adjustments that reflect your brand or personal aesthetic.
Create custom Lightroom or Photoshop presets to apply the same adjustments across batches of images, speeding up the workflow.
Keep past edits as reference points when working on new images in a series, ensuring consistent tones, brightness, and overall appearance.
Final Notes
Avoiding these common mistakes will help you create polished, professional images. Editing is an art, but with the right techniques and attention to detail.
If you find these steps challenging or time-consuming, consider professional retouching services from Image Retouching Lab.
