
Photoshop presets serve as powerful tools for both amateur and professional photographers. Follow these simple steps to install presets in Photoshop:
- Search for a website or any platform offering Photoshop presets.
- Download the presets, typically provided in a zip file format.
- Extract the contents of the zip file.
- Launch Adobe Photoshop on your computer.
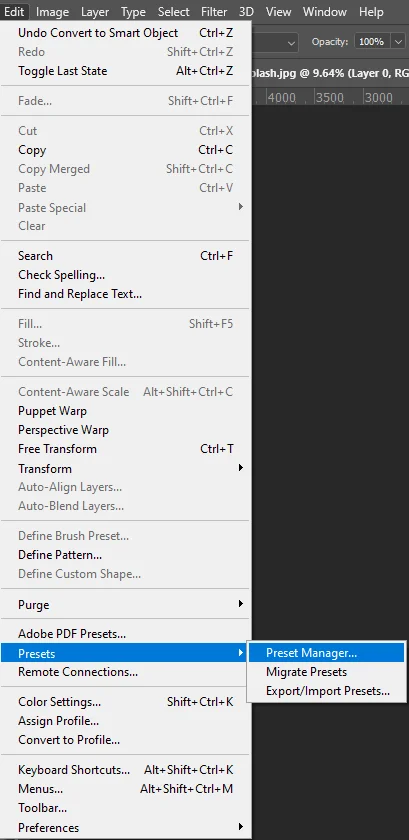
- Access the “Edit” menu from the toolbar.
- Choose “Presets” from the dropdown menu.
- Select “Preset Manager” to open the presets management window. Within the Preset Manager window, specify the preset type you wish to add (e.g., Brushes, Gradients, Patterns, Styles).
- Click the “Load” button in the Preset Manager window.
- Navigate to the directory where you extracted the preset files.
- Choose the desired presets for import and click “Load”.
- Close and reopen Photoshop to ensure the imported presets are properly loaded.
- Access the “Presets” panel within Photoshop to utilize the newly installed presets.
Here’s something interesting:
Presets are batch editing bliss for graphic editing services. With presets, it’s easy to finish batch editing time efficiently—applying consistent adjustments and effects to multiple images in seconds!
If you’re still unsure about how to make the most of presets, let’s explore the process of installing presets in more detail in the video below.
Tutorial: Load Presets in Photoshop
There are specialized presets, that you must learn about to enhance your skill.
List of the six presets available in photoshop
When you’re working in Photoshop, having quick access to a range of pre-made settings known as presets can really speed up your workflow. Here’s a look at six preset types that many users find indispensable:
- Brushes
Think of brushes as your digital paintbrushes. They come preloaded with various shapes, sizes, and textures that help you create everything from subtle shading to dramatic strokes. Whether you’re retouching photos or creating digital art, these presets are a staple in your toolkit. - Gradients
Gradients offer smooth transitions between colors, making them perfect for adding depth and dimension to your designs. Use them for backgrounds, overlays, or to enhance lighting effects the possibilities are endless. - Patterns
Patterns are all about repetition. They allow you to apply a consistent, repeating design element to your work. This can be especially useful when you need to fill a large area with texture or create a visually engaging background. - Styles
Layer styles combine several effects like shadows, glows, and bevels into a single, reusable setting. With styles, you can quickly transform the look of a layer, saving you time and ensuring a consistent appearance throughout your project. - Swatches
Swatches are your go-to for color management. They’re essentially collections of colors that you can save and reuse across projects. This is particularly handy when you’re working on a brand’s color scheme or just want to keep your design palette consistent. - Actions
Actions are sequences of commands that you can record and then apply with a single click. They’re a huge time-saver when you need to perform repetitive tasks, like batch editing a set of photos, by automating your workflow.
To access these presets, simply head over to the Preset Manager in Photoshop by navigating to Edit > Presets > Preset Manager. Here, you can load, save, and organize your presets, tailoring them to your specific needs.
By integrating these presets into your routine, you’ll find that your projects not only become more efficient but also maintain a higher level of consistency.
Diverse Preset Installation in Photoshop: Simplified Steps
In the next section, you’ll learn how to boost your Photoshop workflow by installing various presets, allowing you to quickly apply styles, effects, and adjustments to your images.
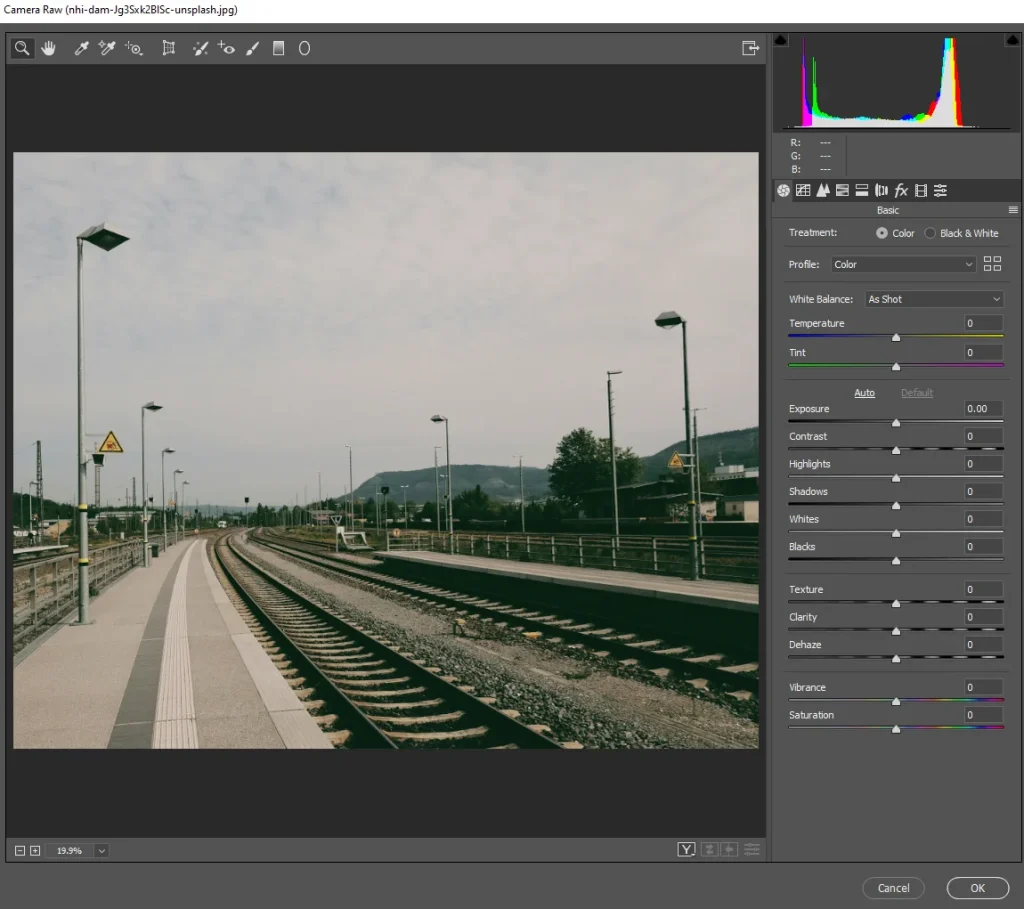
Install Camera Raw Presets in Photoshop
Camera Raw presets offer a quick and efficient way to enhance your raw images directly within Photoshop. By following these steps, you’ll be able to seamlessly integrate Camera Raw presets into your editing arsenal, allowing for consistent and impactful adjustments across your photographs.
- Go to the “Edit” menu and select “Preferences” > “Presets.”
- Choose “Show All Other Presets”.
- A folder will open. Look for the “Camera Raw” folder.
- Copy your Camera Raw presets (usually in .xmp format) into this folder.
- Restart Photoshop to apply the presets.
Install Xmp Presets in Photoshop
XMP presets provide a versatile solution for applying effects and adjustments to your images. By understanding how to install these presets in Photoshop, you’ll unlock a wealth of creative possibilities and streamline your editing workflow, making it easier than ever to achieve your desired aesthetic.
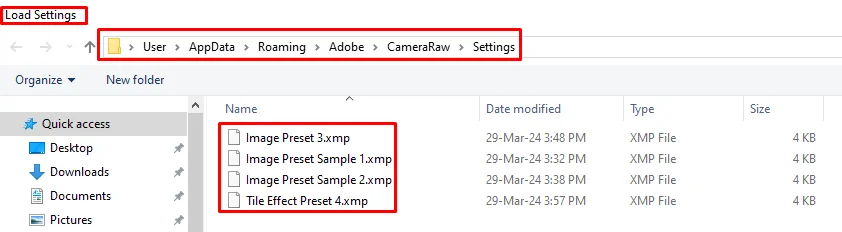
- Navigate to “Edit” > “Preferences” > “Presets.”
- Select “Show All Other Presets”.
- Inside, find the “Settings” folder.
- Paste your XMP presets into this folder.
- Restart Photoshop to see the new presets.
Install VSCO Presets in Photoshop
VSCO presets are renowned for their distinct and artistic looks, favored by photographers and creators worldwide. By mastering the installation process outlined here, you’ll gain access to VSCO’s signature styles directly within Photoshop, allowing you to effortlessly infuse your images with unique visual flair.
- Download the VSCO presets you want to use.
- Open Photoshop.
- Go to “Edit” > “Preferences” > “Presets”.
- Click on “Show All Other Presets”.
- Inside, locate the “Settings” folder.
- Paste your downloaded VSCO presets (usually in .xmp format) into this folder.
- Restart Photoshop to apply the presets.
Install Brush Presets in Photoshop
Brush presets are essential for digital artists and photographers alike, offering a wide range of customizable brushes for various creative endeavors. By learning how to install brush presets in Photoshop, you’ll enrich your editing capabilities.
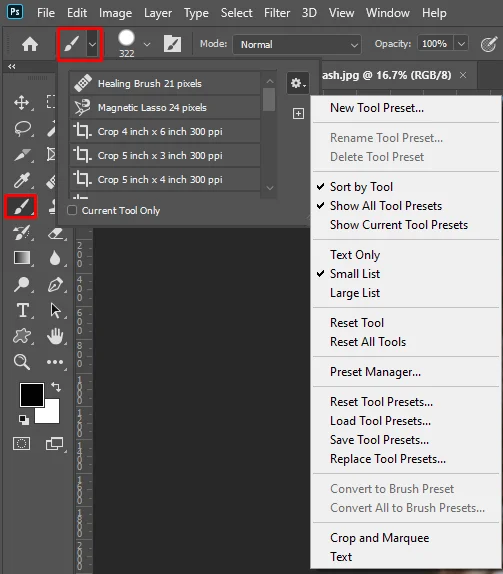
- Select the Brush Tool from the toolbar.
- Access the brush preset picker (located in the top toolbar).
- Click the gear icon and choose “Load Brushes”.
- Find your brush presets (usually in .abr format) and select them.
- Your new brushes will now be available in the brush preset picker.
While Photoshop and Lightroom offer distinct editing environments, you can bridge the gap by converting and importing Lightroom presets into Photoshop.
Install Lightroom Presets in Photoshop
To install Lightroom presets in Photoshop, you’ll need to convert them into a format that Photoshop can recognize. Here’s a step-by-step guide on how to do it:
Step 1: Find the folder where your Lightroom presets are saved on your computer.
Step 2: Photoshop doesn’t natively support Lightroom presets, so you’ll need to convert them to Adobe Camera Raw (ACR) presets, which Photoshop can use.
Step 3: Launch Adobe Photoshop on your computer.
Step 4: Go to “Filter” in the menu bar, then choose “Camera Raw Filter”. Alternatively, you can open a RAW image directly in Photoshop, and Camera Raw will automatically launch.
Step 5: In the Camera Raw interface, click on the “Presets” tab.
Step 6: At the bottom of the Presets panel, click on the three dots (…) and choose “Import Profiles & Presets”.
Step 7: Locate the folder where your converted ACR presets are saved.
Step 8: Select the presets you want to import into Photoshop and click on “Import”.
Step 9: Once imported, you can apply the presets to your images in Photoshop using the Camera Raw filter. Simply select the preset from the Presets panel in Camera Raw.
Step 10: After applying the preset, you can further adjust the settings in Camera Raw to fine-tune the effect to your liking.
Step 11: Once you’re satisfied with the adjustments, click “OK” to apply the changes and exit Camera Raw. You can then save your image as usual.
Learn Further: Create & Save Your Own Presets
Creating and saving presets in Photoshop is a handy skill that can save you a lot of time and effort in your editing process. Whether you’re a beginner or an experienced user, mastering this feature can make your workflow smoother and ensure consistency in your work.
Create Presets in Photoshop
Let’s learn how to make things easier in Photoshop by creating presets. Presets are like shortcuts that remember all the changes you make to your pictures. This helps you do things faster and keep your pictures looking consistent.
Customize Your Settings
Start by adjusting the various tools and settings in Photoshop to get the desired look for your image. This could involve tweaking things like color balance, exposure, filters, or any other adjustments you regularly use.
Find the Preset Option
Once you’re happy with your edits, look for the option to save your settings as a preset. You’ll usually find this in the menu of the tool you’re using. For example, if you’ve adjusted the color balance, it would be in the “Color Balance” menu.
Save Your Preset
Click on the option to save your settings as a preset. You’ll be prompted to give your preset a name and choose where to save it. Make sure to give it a descriptive name so you can easily recognize it later.
Organize Your Presets
You can also organize your presets into folders to keep things tidy and easy to find. This step isn’t necessary, but it can be helpful if you have a lot of presets.
Finalize & Save
Once you’ve named your preset and chosen a location, hit the “Save” button. Your preset is now saved and ready to use whenever you need it.
Any Further Confusion about Loading Presets in Photoshop?
Finding and using presets in Photoshop can be tricky, especially when you’re trying to add them to your workspace. If you’re feeling unsure, I’ll help clear up any confusion you might have.
Can You Use Lightroom Presets in Photoshop?
Yes, you can use Lightroom presets in Photoshop, but there’s a slight process involved due to the difference in how Lightroom and Photoshop handle presets. Lightroom presets need to be converted into a format that Photoshop can recognize, specifically Adobe Camera Raw (ACR) presets
How to Delete a Custom Preset in Photoshop?
To delete a custom preset in Photoshop, follow these steps:
- Open the Preset Manager by choosing Edit > Presets > Preset Manager.
- Select the preset you want to delete..
- Click Delete to remove the preset from your list
What Are the Six Presets Available in Photoshop?
In Adobe Photoshop, there are several preset types you can utilize to enhance your workflow and editing process. The six main preset types available are:
Brushes: These presets contain predefined brush settings, including brush tip shape, size, hardness, and opacity.
Gradients: Gradients presets offer predefined gradient combinations that you can apply to your images or design elements.
Patterns: Pattern presets consist of pre-designed patterns that can be applied to fill areas or create textures in your projects.
Styles: Styles presets include predefined layer styles such as drop shadows, bevels, embossing, and more, which can be applied to layers for various effects.
Camera Raw: Camera Raw presets contain settings for processing raw image files, offering adjustments for exposure, contrast, color balance, and more.
Custom Presets: Additionally, you can create and save your own custom presets in Photoshop, which can include a combination of various adjustments and settings tailored to your specific editing needs.
Where Can I Find Presets for Photoshop?
Presets for Photoshop can be found on various websites, (for example, Envato) photography forums, and online marketplaces specializing in photography resources. Additionally, many professional photographers and graphic designers offer their own presets for download on their websites or platforms like Etsy or Creative Market.
How to Backup Custom Presets In Photoshop
To backup custom presets in Photoshop, you can follow these steps:
- Open Photoshop and go to Edit > Presets > Export/Import Presets.
- Choose Export Presets and select the desired presets you want to back up.
- Select a folder to export your presets to, which can be a USB drive, network location, or online sharing service.
- To import these backed-up presets on another computer or to restore them later, choose Edit > Presets > Export/Import Presets.
- Select Import Presets, choose the presets you want to import, and click Import Presets.
- If you saved your presets to a non-default folder, select the Import Folder and choose the appropriate location.
By exporting your custom presets you create a backup that can be easily imported back into Photoshop when needed, ensuring you don’t lose your customized settings and configurations.
Can I Customize Presets after Loading Them in Photoshop?
Yes, you can customize presets after loading them in Photoshop. Once applied, presets serve as a starting point for your edits, but you can further adjust the settings and fine-tune the effects according to your preferences. This flexibility allows for creative experimentation and personalized editing.
Final Remarks on Installing Presets in Photoshop
In wrapping up, learning proper to install presets in Photoshop opens up a world of possibilities for your editing, whether you’re a beginner or a seasoned pro. Throughout this guide, we’ve simplified the process, making it accessible for everyone to elevate their images effortlessly. But don’t stop here! Explore our other blog posts to uncover more Photoshop insights and techniques. There’s plenty more to discover. We’re eager to hear about your experiences with this guide. Share your successes and don’t hesitate to reach out if you have any questions.
