
Fill a shape with text in Photoshop via these steps using “Shape Panel” and “Text Tool”:
- Create a new document using the shortcut: Ctrl / Cmd + N
- Pick, drag, drop, and fix a shape from the “Shapes” panel: Windows > Shapes
- Put your text in the shape using the “Text Tool”
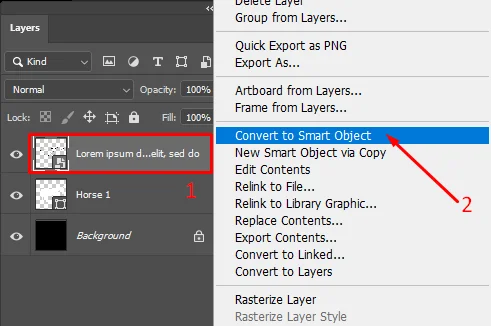
- Select the “Text Layer” and right-click to “Covert to Smart Object”
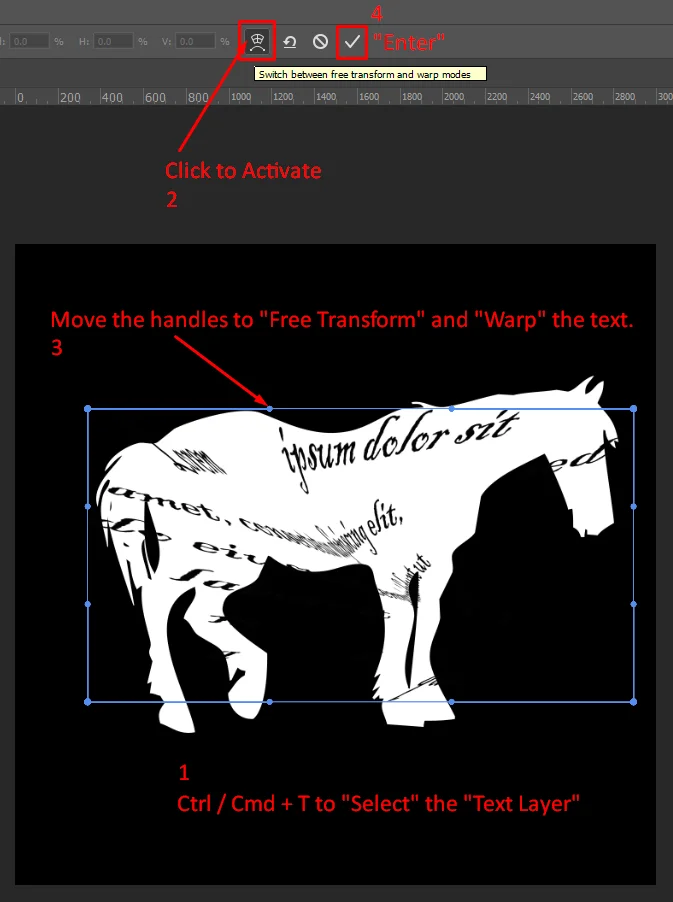
- Select the “Text Layer” with “Ctrl / Cmd + T” and activate “ Switch Between Free Transform and Warp”
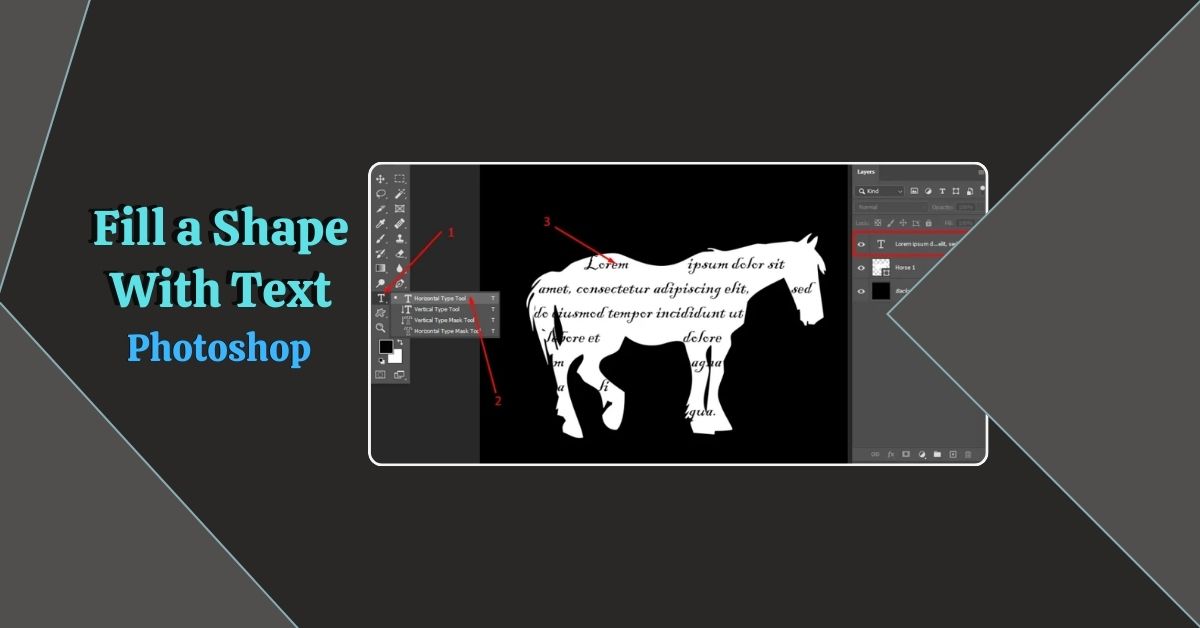
3 Simple Steps to Fill a Shape with Text in Photoshop
This particular process is following expert editors and an image retouching company as well. So, one of the ways you can fill a shape is.
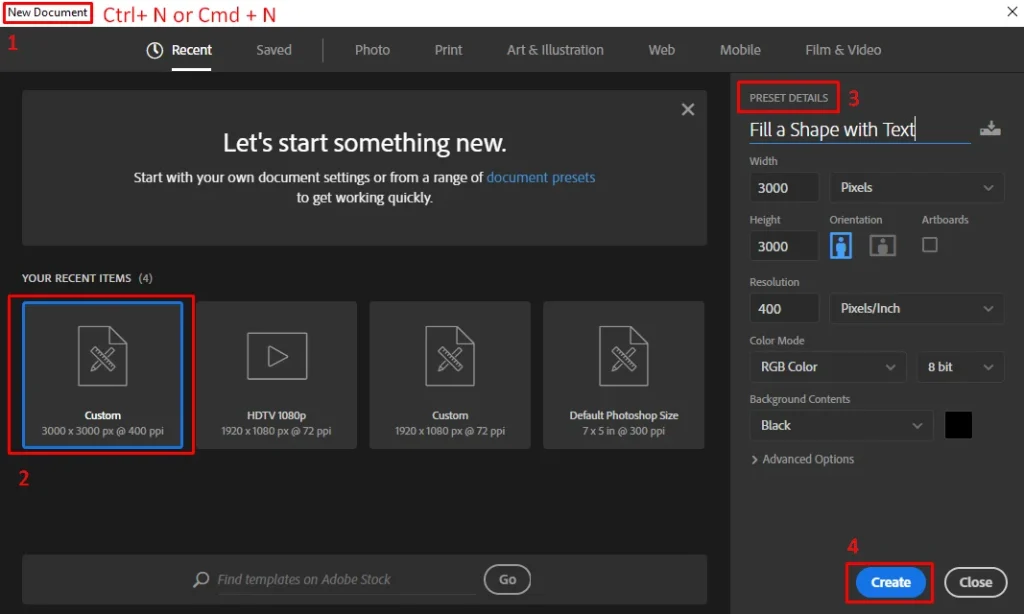
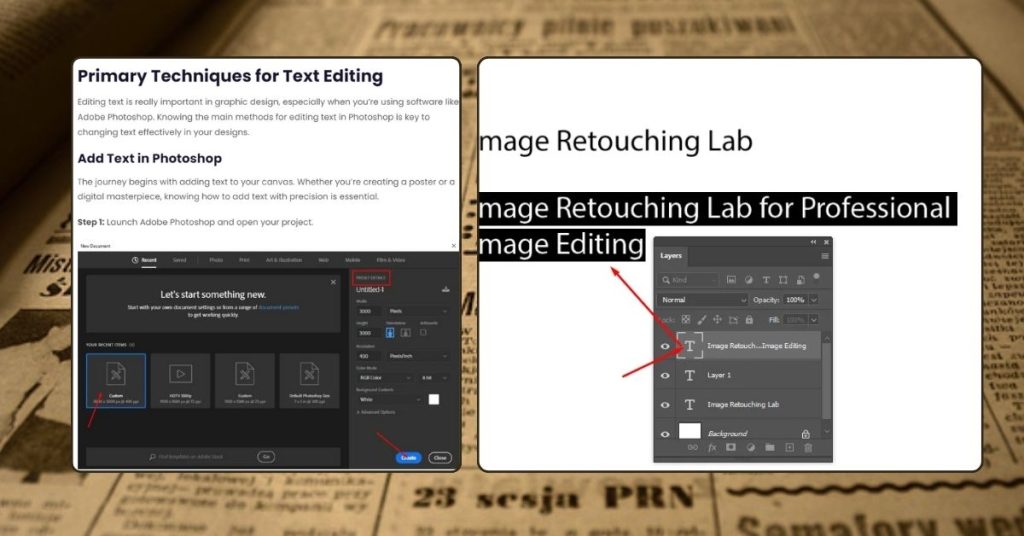
Step 1: Open a “New Document”
Click “Ctrl / Cmd + N” to open a “New Document”. You must set “Preset Details” and then press “Create”.
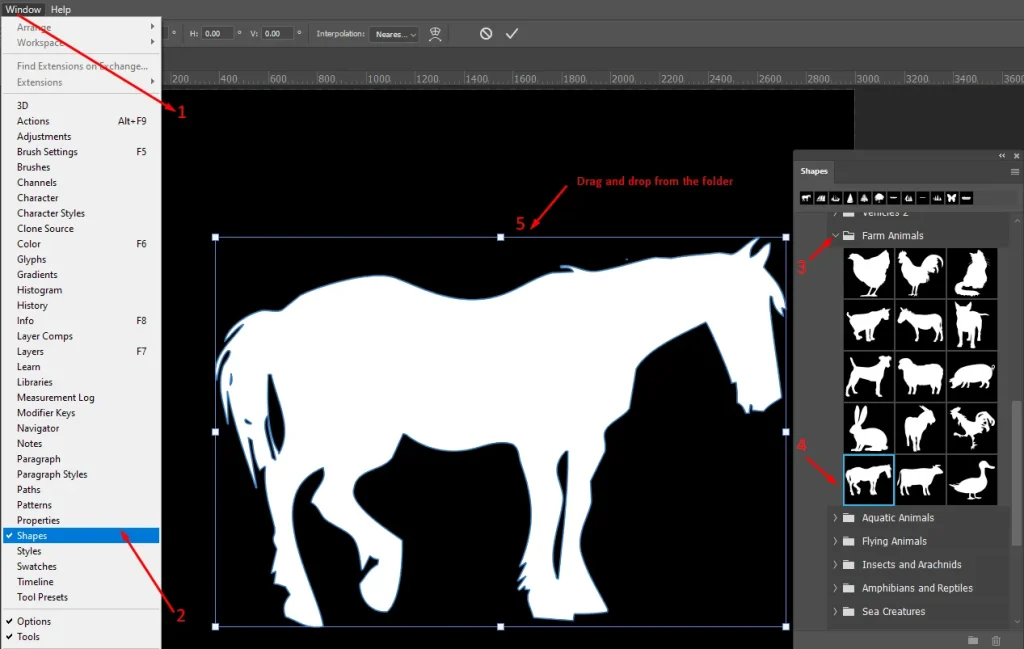
Step 2: Pick and Fix a “Shape”
Go to “Window” and click on “Shape”. Explore the folders and pick your desired “Shape”. Darg and drop the “Shape” on the “Blank Document”. Hold “Alt / Opt” to resize. Reposition holding left-click and press “Enter” to commit transform.
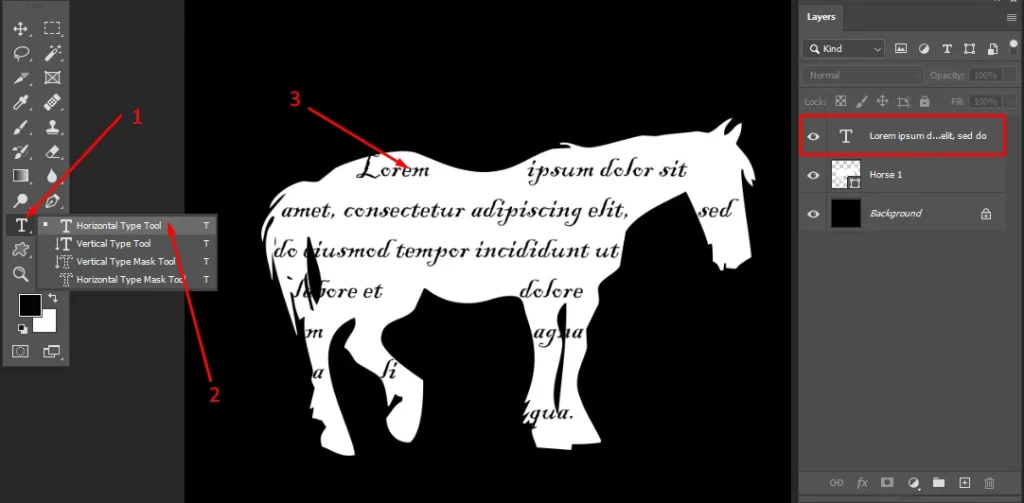
Step 3: Put the Text
Select “Horizontal Type Tool”. Take the cursor on the shape and left-click to get a “Text Box or Text Layer”. Put your text there. Hit “Enter” to confirm the transformation.
To enhance your Photoshop skills further, I highly recommend you check out my informative article on How to Edit Text in Photoshop. It offers valuable insights and techniques that can greatly improve your text editing proficiency.
Step 4: Convert to Smart Object
Select the “Text Layer”. “Right Click” on the layer and click on “Convert to Smart Object”.
Step 5: Style the text
Press “Ctrl / Cmd+ T” to “Select” the “Text Layer”. Then, activate the “Switch Between Free Transform and Warp Modes” option. Use the handles or the dots to curve your text and “Enter” to set the edit.
In my previous blog post, I showed How to Fill a Shape with an Image in Photoshop where I simply explained the process so I recommend you to read that article as well to become an expert at designing and editing a shape in Photoshop.

Final Remarks
We’ve provided clear, step-by-step instructions to help you achieve this effect easily.
Don’t forget to check out our other articles to learn more about Photoshop. Whether you want to explore adding images to shapes, mastering advanced techniques, or staying updated on the latest features, there’s plenty more to discover.
We’d love to hear from you! If this blog has been helpful or if you have any questions about Photoshop or design, please share your thoughts with us. Your feedback helps us improve our content and cater to your needs.
Keep creating, keep learning, and keep exploring all that Photoshop has to offer!
