
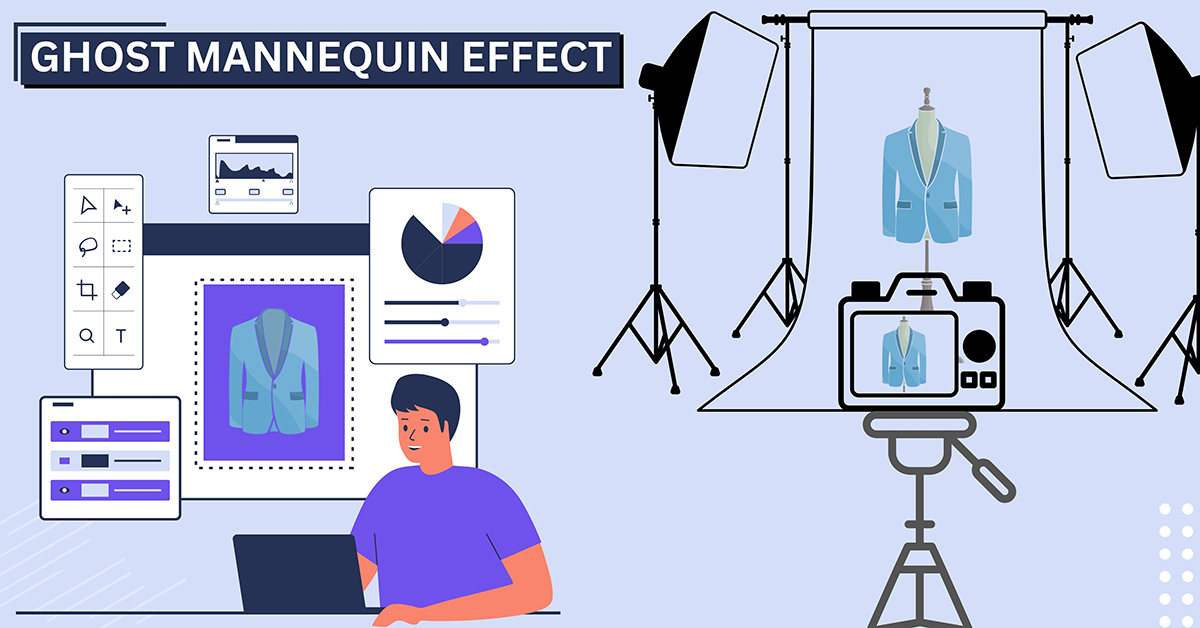
There are 2 widely used methods you can employ to create a ghost mannequin effect in Photoshop: Quick Selection, and Pen Tool methods. If you have a simple garment like a T-shirt, tank top, or leggings and a solid color background that contrasts with the garment use the Quick Selection method:
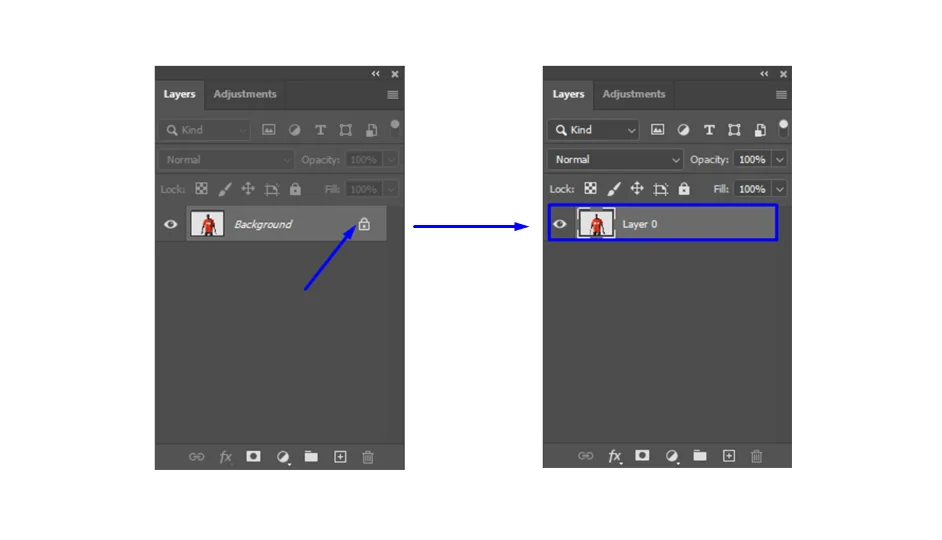
- Open your front-facing image and unlock its layer.
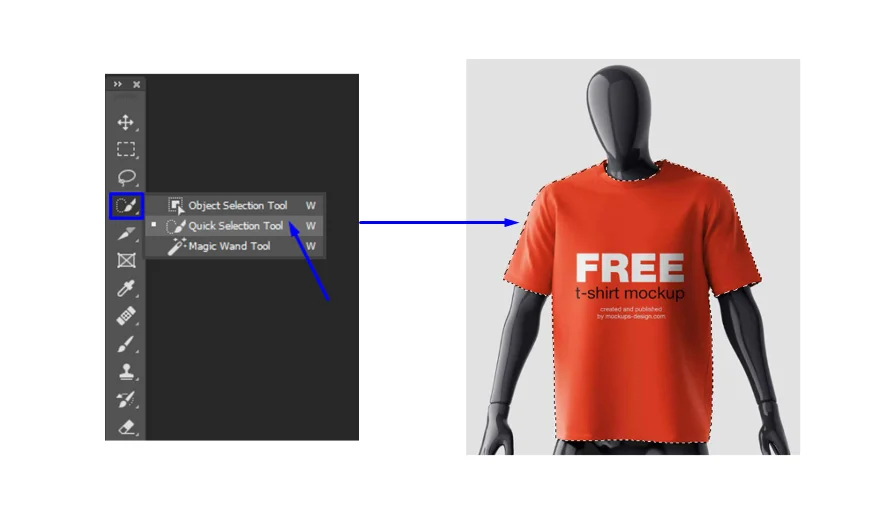
- Use the quick selection tool to select your desired area. Hold the alt/option to adjust the selection.
- In the select menu, choose “inverse” and hit delete.
- “Deselect” by going to the select menu or pressing ctrl/command + D.
- Go to the file menu and select “place embedded” to add your back picture. Scale as needed.
- Move the layer using the selection tool to the bottom of the stacking order. Adjust the size again, if necessary.
- Erase unwanted areas with the eraser tool, adjusting brush size and ensuring you’re on the background layer.
- Merge both layers.
- Use the clone stamp tool to adjust opacity and brush hardness, sampling nearby areas.
- Lower the opacity and hardness of the brush, then use the eraser to refine the edges.
- Crop the image and save it as a PNG file.
You can do it using the following tool as well. In another blog, we have shown ghost mannequin creation using Pen Tool in Photoshop.
Another Method: Using Pen Tool for Ghost Mannequin Editing
Watch the video below to see how the Quick Selection method works. Many people these days utilize clipping path service. However, Keep scrolling to get the elaborated steps. Also, get tips on ghost mannequin photography at the end.
Ghost Mannequin Effect with Quick Selection: Easy Tutorial
Although in this video the t-shirt is on a man, the process is the same. Just imagine that you have a mannequin in the photoshop instead of a model.
Create a Ghost Mannequin Effect in Photoshop with Quick Selection: Step-by-Step
Image Sample Source: unblast.com
The Quick Selection Tool is great for beginners because it’s fast and straightforward.
| However, it’s not flawless—it might overlook small details, requiring extra effort to clean up rough edges. When it comes to garments and their backgrounds, this tool may not be as precise as some others, especially for complex images. |
So, if your picture has a simple background and your clothing isn’t too detailed or intricate, you can follow these steps:
Open Image, Unlock Layer
Start by opening the image of the garment you want to edit. Make sure to unlock the layer so you can make edits.
Use the Quick Selection Tool, Adjust
Use the quick selection tool to outline the garment. Hold down the alt/option key to refine the selection if needed.
Invert Selection, Delete
After selecting the garment, go to the select menu and choose “inverse” (ctrl/command + Shift + I). Then, hit Backspace/Delete to remove the mannequin and background.
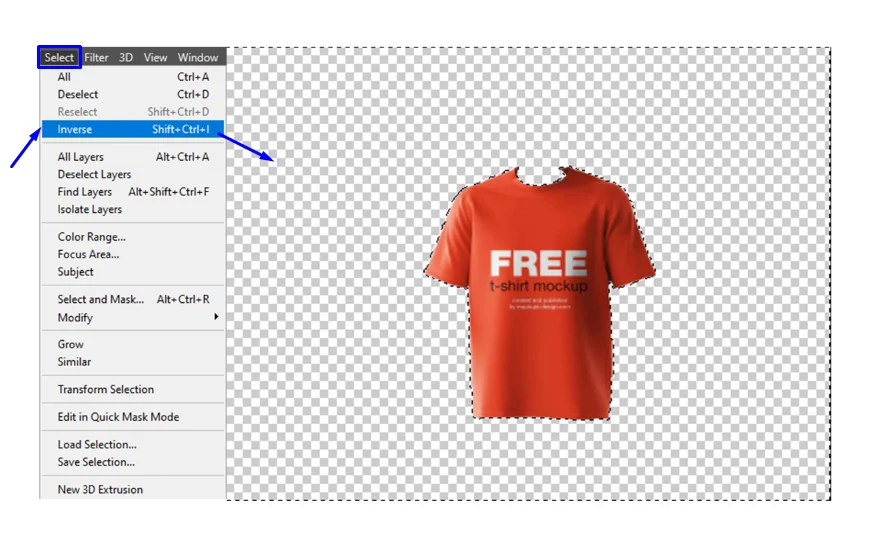
Deselect (ctrl/command + D)
To deselect the areas, go to the select menu or press ctrl/command + D.

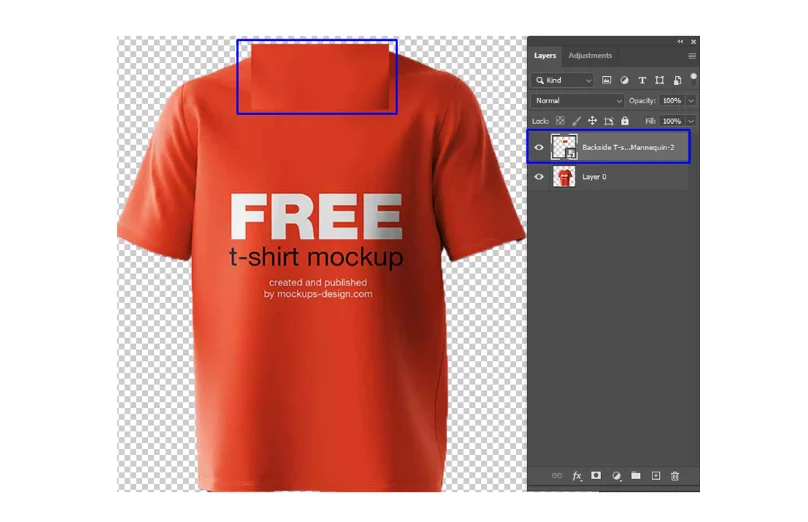
Place Back-Picture, Scale
Go to the file menu and select “place embedded” (ctrl/command + Shift + P) to add the back-picture of the garment. Adjust the size as necessary.
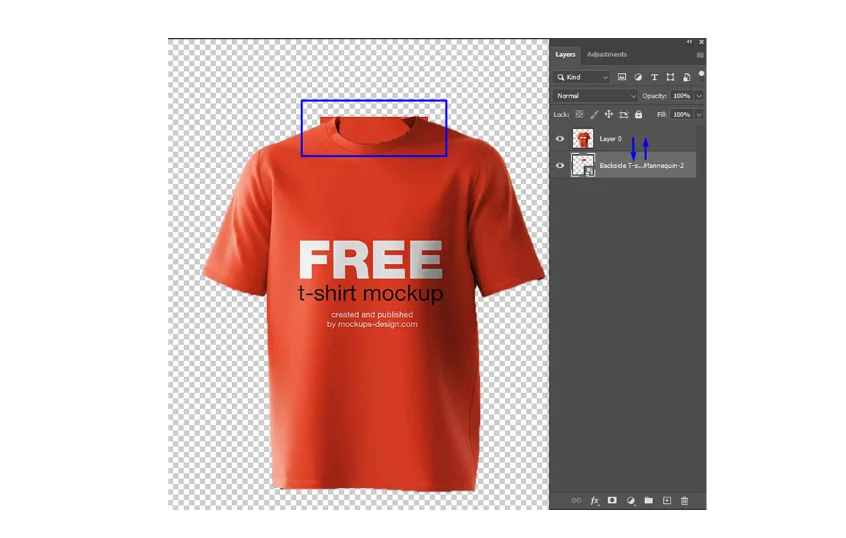
Move Down & Adjust
Next, you need to move the layer down. If scaling or adjusting is necessary, do that too for a better result.
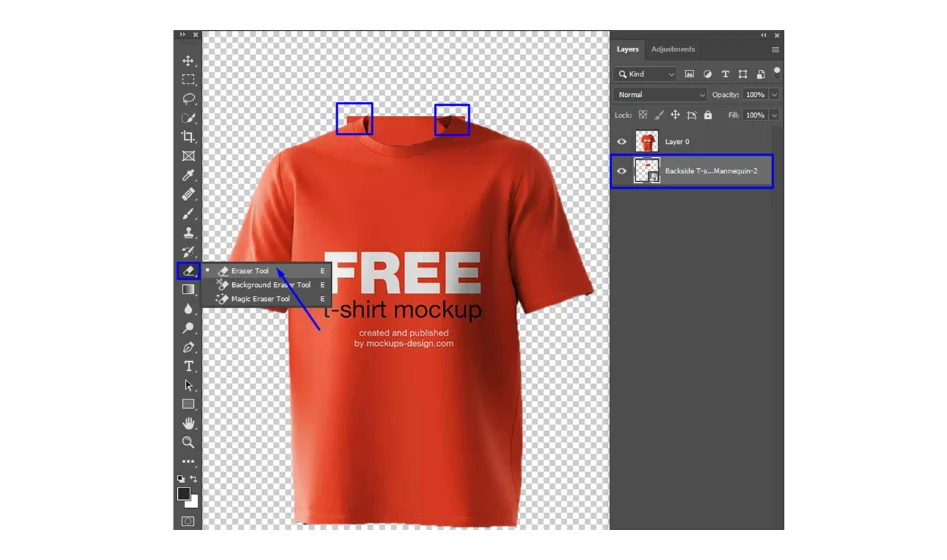
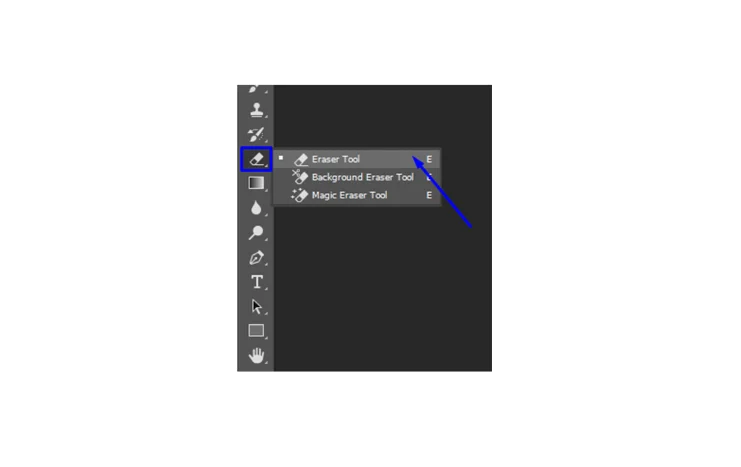
Erase Unwanted Areas
Use the eraser tool (E) to remove any unwanted areas, adjusting the brush size as needed. Make sure you’re working on the background layer.
Merge Layers
Merge the front-facing and back-facing layers together (ctrl/command + E).

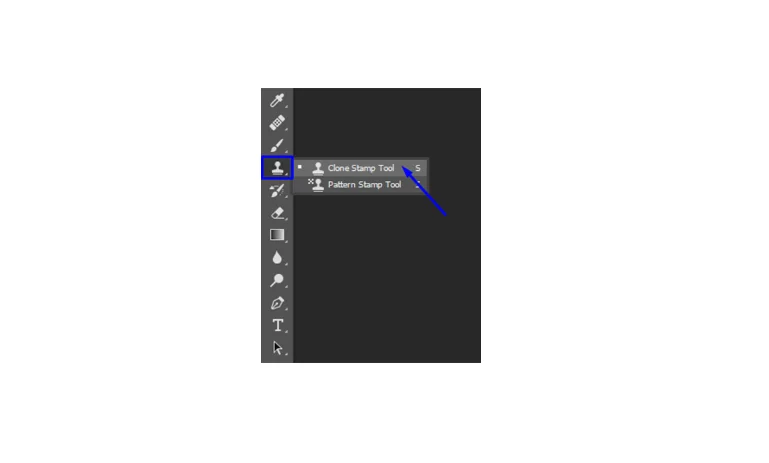
Use Clone Stamp Tool
Adjust the opacity and brush hardness of the clone stamp tool (S). Sample nearby areas and clone as necessary to refine the image.
Refine Edges with Eraser
Lower the opacity and hardness of the brush, then use the eraser tool to refine the edges further.
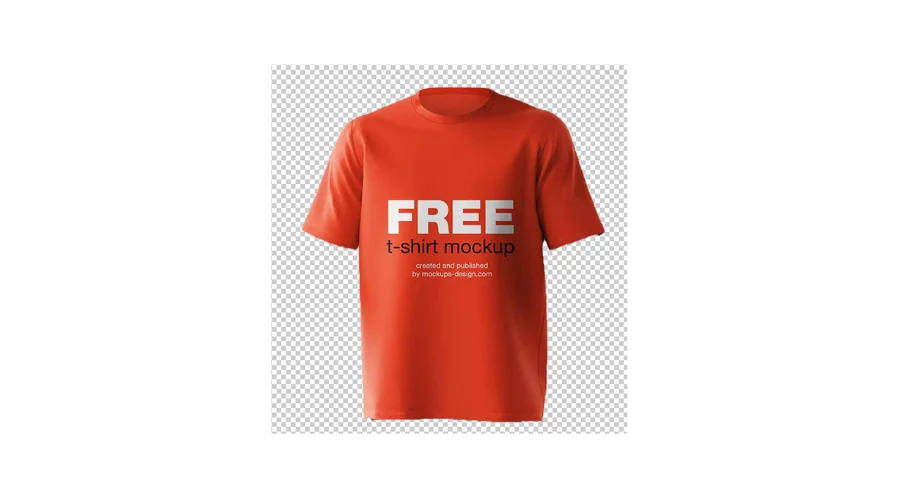
You final image should be something like this:
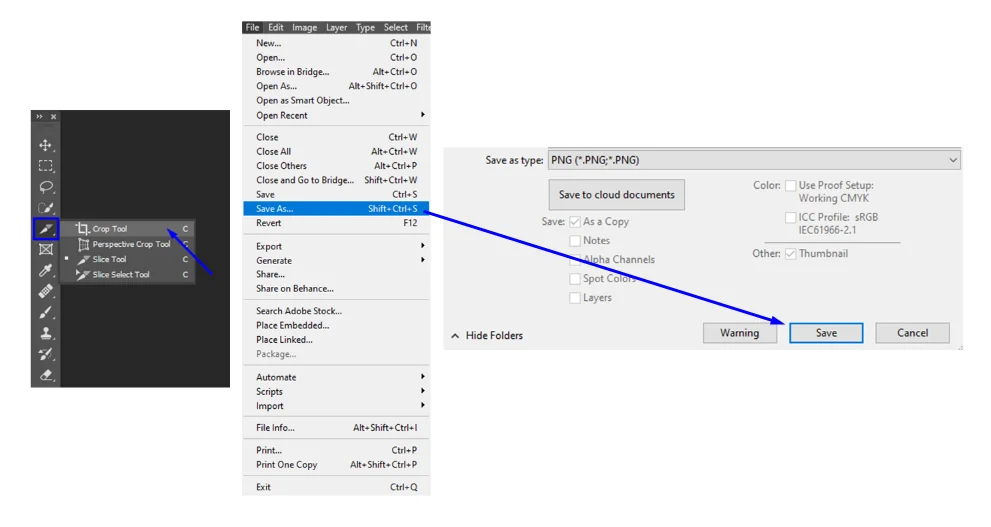
Crop and Save as PNG
Finally, crop the image to remove any excess areas and save the edited image as a PNG file (ctrl/command + S).
Before going to the expert tips I wanna tell you something if you are a businessman, and don’t want to take this editing hassle you can take our ghost mannequin service.
Let’s explore some expert tips to make your ghost mannequin even better. These photography tips will help you improve your images and save time, making them more attractive to potential customers.
For precise isolation, consider our deep etching service.
Ghost Mannequin Photography: Expert Tips
Ghost mannequin photography, also called invisible mannequin photography, is a widely used method in online shopping and product photos. It’s aimed at showcasing clothing in a realistic and wrinkle-free manner by removing the mannequin from the final image.
To help you achieve professional-quality results with your ghost mannequin photos, here are some tips:
Before You Start Taking Pictures
Choose the Right Mannequin: Look for a mannequin that matches the size and shape of the people who might buy your clothes. It’s like finding a model that fits your target customers.
If you can, pick a mannequin that you can adjust to different sizes. This way, you can use it for various types of clothing.
Prepare Your Clothes: Before you take any pictures, make sure your clothes look their best.
Check for any wrinkles and iron them out. If you don’t have an iron, a steamer can also do the job.
It’s essential to start with clean clothes to ensure they look fresh in the photos.
Setting Up Your Photo Shoot
Use Soft Light: Lighting plays a big role in how your photos turn out. Soft light is gentle and helps avoid harsh shadows, making your clothes look better.
You can achieve soft light using specific studio lights or even by taking pictures in a well-lit room with curtains to soften the sunlight.
Pick a Simple Background: The background of your photo should be clean and simple so that the focus stays on the clothes.
A plain white or light gray background works well. It’s like having a blank canvas where your clothes can stand out.
Adjust Your Camera Settings: To get the best photos, you’ll need to adjust your camera settings.
Use a tripod to keep your camera steady and prevent blurry images.
Switch your camera to manual mode so you can control settings like aperture, shutter speed, and ISO. This way, you have more control over how the final image looks.
Taking the Pictures
Capture Different Angles: It’s essential to show off your clothes from various angles so that customers can see every detail.
Take pictures from the front, back, and sides to give a complete view of the garment.
Support the Clothes: To ensure your clothes maintain their shape during the shoot, stuff certain parts with paper or tissue.
For example, you can stuff sleeves or collars to keep them looking neat and defined in the photos.
Extra Tips for Better Results
Experiment with Techniques: Don’t be afraid to try different methods as you get more comfortable with ghost mannequin photography.
Check Your Screen: Make sure your computer screen is calibrated correctly so that the colors in your photos look accurate.
Invest in Quality Equipment: Consider upgrading your camera, lighting setup, and background as you progress to improve the quality of your photos.
Wrapping Up
Mastering the ghost mannequin helps make a clothing line look more professional. Whether you prefer the Quick Selection or Pen Tool method, paying attention to details is key to creating a ghost mannequin effect in Photoshop.To improve your skills, check out other Photoshop blogs for more tips and tricks. There are plenty of techniques out there waiting to be explored. And feel free to ask questions or share your thoughts.
