
In this era of technology, video games are dominating the world of young generation. Millions of young people play video games on their smartphones, tablets, and computers every day. Some people play these games for passing their lazy time, while some others play for entertainment. The good news for those people is that they can now earn some extra money by playing games. For this purpose, they need to create accounts on Twitch TV and publish live streaming of their favorite games.
However, if you are one of those people, you might be interested to stream your videos on Twitch TV. In this case, you need a twitch overlay for streaming your videos on the website. But you might not know how to make a twitch overlay on your own. To help you out in your journey of Twitch streaming, we have come up with this article to let you learn how to make a twitch overlay template.
What is twitch?
The question may arise while you get to know about how to make a twitch. This comes up in conversation that what is twitch basically. We are going to explain briefly about twitch before you get to know about how to make a twitch overlay in Photoshop. When someone is watching anyone else playing games for hours, it must be in their mind that what is a twitch.
If you are a novice or a streamer, you may desire to know more. We want you to cover several specific things about twitch. The live streaming website is known as twitch. This has created a platform for the streamers to share the live session of games. Have you seen the news crews to upload live news on TV? Besides, many upload their live painting or eating videos on their channels.
The popularity of twitch is gradually increasing. Twitch has included several creative categories. Now people can come up to show their designs, arts, music, and many other things through twitch. This allows them to build a connection with their audiences. The viewers can subscribe to the streamer’s channels to watch more videos. But it has fees for subscription and advertising.
Let’s Proceed On To Learn How To Make A Twitch Overlay
We are going to explain everything in detail that how you can create twitch overlay and how you can make it a unique one. Some professional looking twitch streams stand out from others. It is easy to add an overlay to your stream. Before you start making your twitch overlay, you must know what kind of image and which image you are going to add to your stream. There is no restriction for you to add pictures whatever the game you are going to play. A perfect twitch can be used to see your favorite players.
Create the Canvas
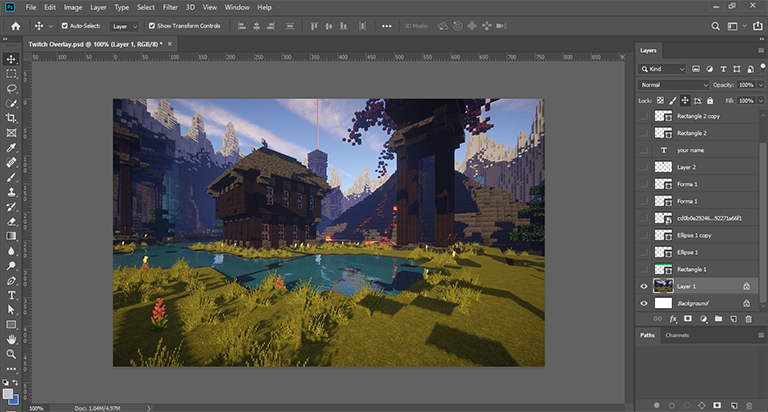
Open up Photoshop in your computer to make a twitch overlay using the software. After opening your Photoshop, get ready to select the “File” menu to create a new image. And keep in mind that the size of your new image should be as large as the screen resolution of your computer.
Well, you have a blank Photoshop document now. Before advancing further, open up your desired game and take a screenshot. Insert the screenshot into Photoshop when you are ready with it. To insert it into Photoshop, you need to click on “File & Place”. After clicking on the menu, select the desired file to proceed on. Afterward, stretch the new image until it gets to the full size of the canvas.
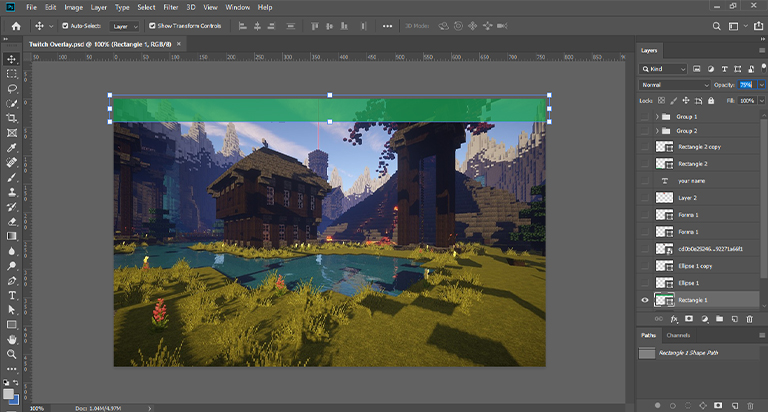
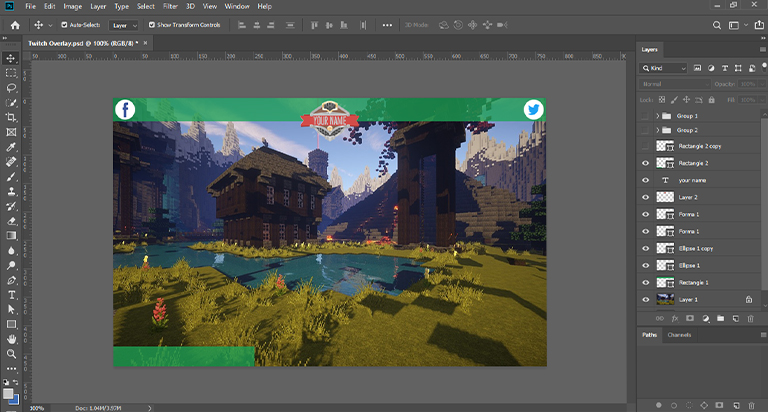
Add a Top Bar
It is time to create a new layer. After creating the new layer, name it as “Top Banner”. Then take your mouse pointer to the left menu of Photoshop to select the Rectangle Tool. And open the Color Selector from the same menu to choose the background color. Afterward, click on the top of the new layer and drag it to the right side.
Now, you have to give a border to the rectangle. For this purpose, put the mouse pointer on the layer. Then press the right button of the mouse. You will find a bunch of options there, and you have to choose the “Blending Options”. Whenever you select the Blending Option, a menu will appear in front of you. Select the “Stroke” option from that very menu. Then set the color and width of the stroke according to your needs. After setting the stroke color and width, click on “OK” and select the layer.
Add Social Media Logos
There are many ready-made social media icons on the internet, which are totally free to use commercially. For your kind information, you can browse iconfinder.com to get any kind of icons which are free for commercial use. Never try to use icons from a source which does not provide royalty free icons; otherwise, you will have to face legal troubles in the future.
However, take your mouse pointer to “File” from the menu and select “Place” to import your expected logo into Photoshop. Well, you have the logo in your Photoshop now. The logo may look a little bit bland. To make it stand out perfectly, you have to select “Blending Options” and “Stroke” respectively. Keep it in mind to give it an outer stroke with the color you used for “Top Banner”. And select the “Dropper” with a view to matching the color with the top banner.
Now, move the imported logo to the left side of the top of your screen. Use the “Control” key to place it perfectly into the desired corner.
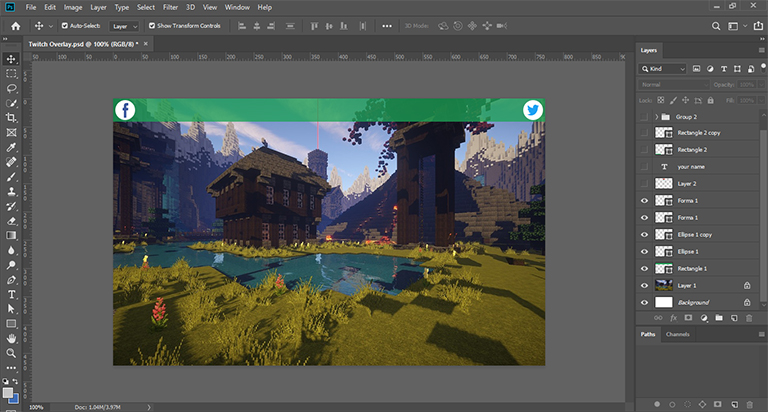
If you want to add another logo into the twitch overlay, you can add it to the top left corner of the screen. In this case, you have to follow the same way you followed for adding the first logo. To save your time, you can select the layer of the first logo.
Add Channel Logo
After adding two social media logos to the top corners, you can go for adding your channel logo to the twitch overlay. And it is a good idea to place your channel logo in the top center of your overlay.
What if you don’t have any logo for your channel? In this case, you can add some custom texts featuring either your channel name or website. This will help you spread the news of your channel in a very easy and effective way.
To start adding your channel logo, go to the left toolbar and drag a ruler. Make sure it has snapped to the center of your screen. Don’t worry if you cannot see the ruler on your Photoshop Layout. You can find it from the “View” menu of Photoshop.

Now, place your logo on the center of the ruler. After that, create a new layer. When you are done with creating the layer, drag it to the layer which is below the logo. Create a rectangle which is a little bit larger than your logo so that it gets a framed effect. Give the new square an Outer Stroke. And use the same color which was used for the rest of the borders.
Finally, take your mouse and press the right button of it to select “Convert to Smart Object” to convert both your logo and border on the same layer. Don’t worry about further editions of the layer. You will be able to edit it later if it is necessary. However, it is time to move your logo to place it to the top of the overlay. And resize it to fit after moving it to the top.
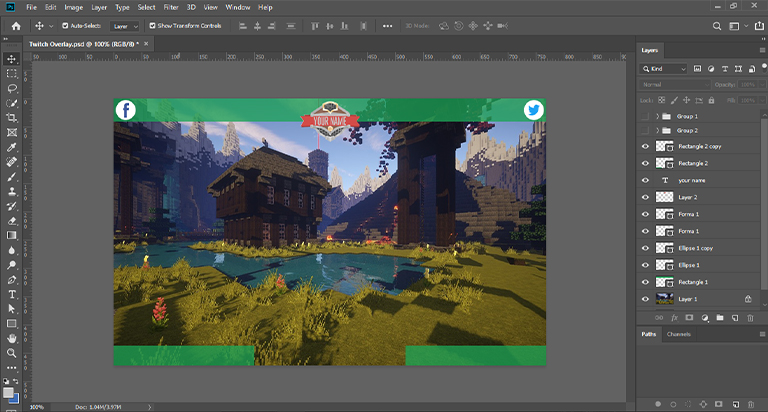
Add the Bottom Banners
You can create new bottom banners in the same way you followed to create the top banner. But it is not necessary to create new bottom banners. To escape from creating new bottom banners, right-click on the Top Banner and choose “Duplicate Layer”. Now, name this layer as “Bottom Left” and move it to the left side of the bottom of your computer screen.
Afterward, go for creating another bottom banner by following the way which you applied to create the Right Bottom banner, and name this banner as “Bottom Right”.
Congratulations! You have successfully created the basic overlay. It is time to add a frame for your camera.
Add Some Texts
Create a layer to add texts. Then select “Text Tool” from the menu to drag out the text box for use. You will find a drop-down menu on the right side of the screen. Select “Character” from that menu. If you don’t find the drop-down menu on the layout of your Photoshop, you have a chance to bring it on the screen in another way. For this purpose, select “Window” from the menu and choose “Character”. Now, add your text in accordance with your selected color and font. Once your writing is done, place the text on one of the bottom banners with the help of “Move Tool”.
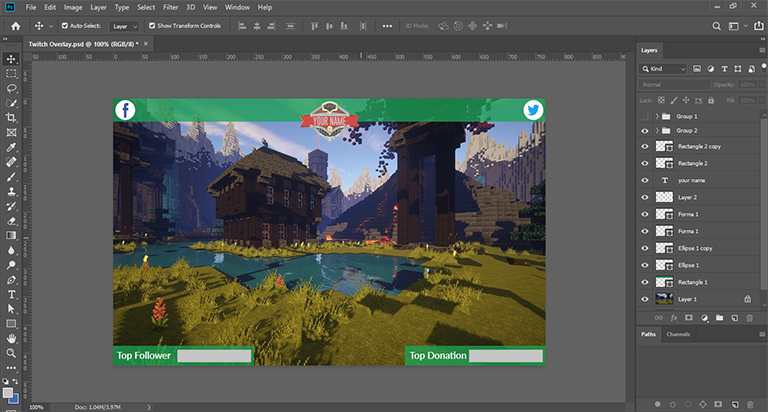
You have the necessary texts now, but the texts do not look professional. By the way, press the right button of your mouse on the Text Layer to make your texts stand out. Then choose “Blending Options” from the drop-down menu. After that choose the “Stroke” option followed by “Drop Shadow” option from the menu. These two options will give your texts a little glamour. Create a duplicate layer for the texts of the other corners. To do this, use the “Move Tool”.
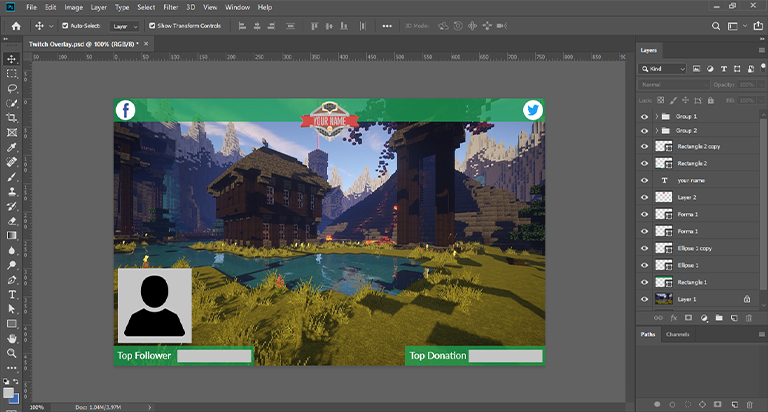
Add a Camera Frame
To add a camera frame, you have to create a layer first. Creating the new layer, name it as “Frame”. Now, pick the “Rectangle Tool” from the left side menu and create a proper square. There is nothing to worry about choosing a color for the square. You will be able to fix it later.
Now, take your mouse pointer on the layer and press the right button of your mouse to pick “Blending Options”. Then select “Stroke” and proceed on to choose “Position”. Three options will be found in this menu. The options are Outside, Inside, and Centre. Select “Inside” to put the frame into your square. Afterward, choose a color fitting your color scheme. Then pick the layer again to change its “Fill” to zero percent.
Save the Overlay
It is a matter of great joy that you have successfully made your long desired twitch overlay. Now, it’s time to save the overlay. But don’t be too hasty. Save the overlay as a PSD document before saving it as an image. You can use the document for different games in the future.
Keep it in your mind that you must make the background of your overlay transparent. And to do this, you have to select the “Eye” icon on the screen of your game and background layers so that only the overlay elements are left showing. In the end, save the file in PNG format to use it in your comfortable time.
Why is it fun to stream on twitch?
Twitch is the largest streaming platform where millions of viewers watch streaming. No wonder that twitch has become an outstanding platform to generate revenue for streamers. Twitch has made it possible for streamers to earn a huge sum of revenue with subscriptions. The top twitch streamers have a chance to turn their passion into their career. If you aim at growing your twitch channel, you have to stream to gain more viewers. You have to set the goal on the right track to achieve it successfully. If you are passionate about whatever you are doing, you have to keep patience and work with full dedication. You can start with a few followers. But do not lose hope to grow followers. Improve your twitch channel to make a standout.
Create a consistent schedule for streaming so that viewers come back to your channel. If you do not have a consistent time, they will move on to another channel. Create a unique reason to make them come back to your channel. Sometimes viewers come to a specific channel to improve their level of streaming. In this way, you can make them know about new strategies and tactics. Make them know how to go through the difficult ways. Make them know your gaming knowledge while you stream.
Your channel will grow if you can offer unique content. In several different way, you can highlight your channel and engage more viewers. Interact with audiences to get more views. If you are interacting with your audiences, you will pay more attention to your streaming.
Conclusion
An outstanding twitch overlay plays a significant role to make you famous in the twitch industry. Remember, if your overlay is not comfortable for your viewers, they may lose interest on your twitch channel. For this reason, you should try to make the best twitch overlay since you know how to make a twitch overlay. And if you think that you need professional help for your desired twitch overlay, you can get in touch with image retouching companies out there.
